What is Kimi Code Desktop?
Kimi Code Desktop is a desktop app for coding, and it's the official desktop version for Kimi Code. It brings Kimi Code’s AI coding capabilities to a desktop app. Through conversation, you can ask the Agent to read and write code, run commands, and automate tasks. A new visual interface also lets you manage all your projects in one place, adjust frequently used settings, and follow every step of the Agent’s work.
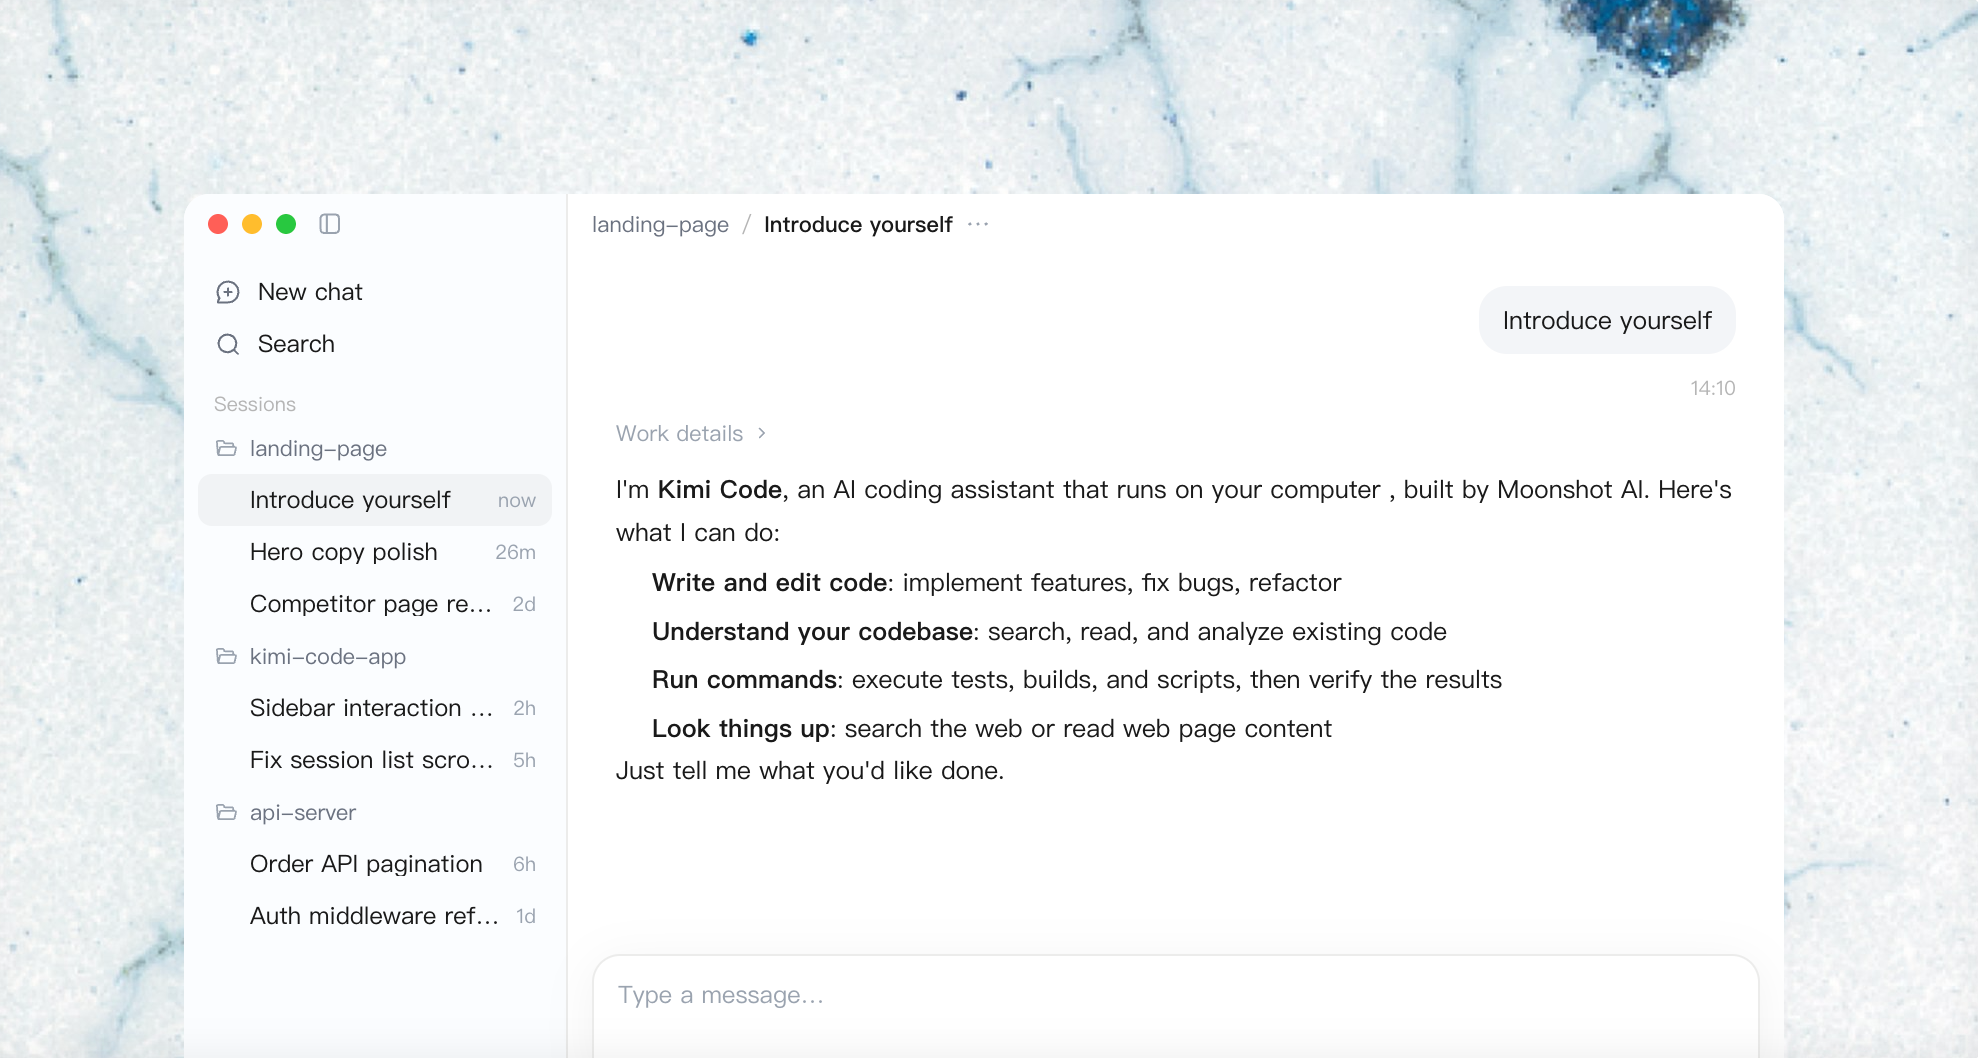
You can use Desktop to develop a prototype, build a personal application, or make changes in an existing codebase. Your project still uses its own dependencies, development tools, and test commands. Desktop gives you a place to delegate and inspect the work.
Why choose Kimi Code on desktop
Keep projects and conversations organized
A workspace is a local project folder, and Desktop groups conversations around those workspaces. You can return to a project, search earlier sessions, and archive finished work. This helps when a bug fix, a feature, and an exploratory question each need their own conversation.
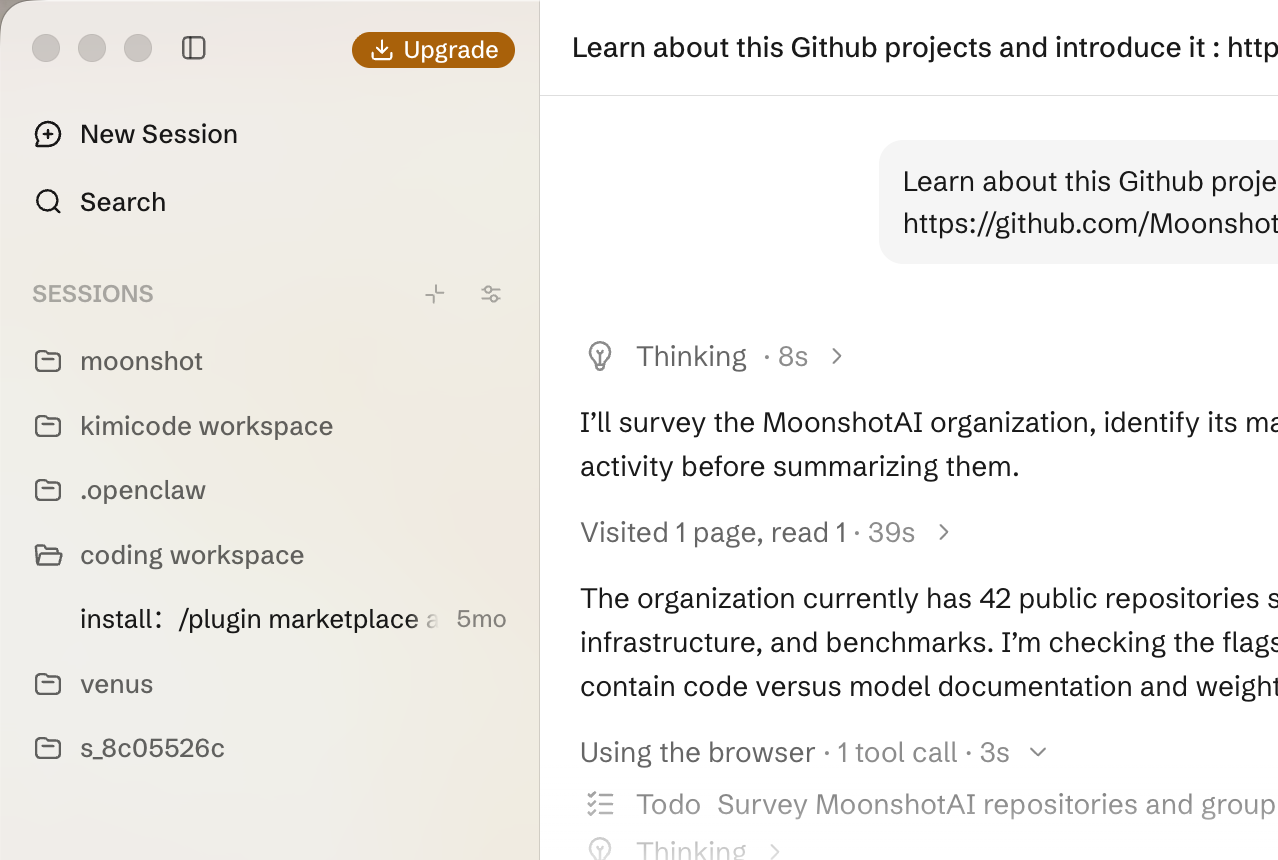
You can also fork a conversation to explore another approach. For a quick question alongside the main task, a side chat provides a temporary, read-only copy of its context. Desktop and CLI share local session data, so existing CLI work can continue in Desktop. If both interfaces are open, you may need to reload to see recent activity. See project and session management for the details.
See the work and inspect the result
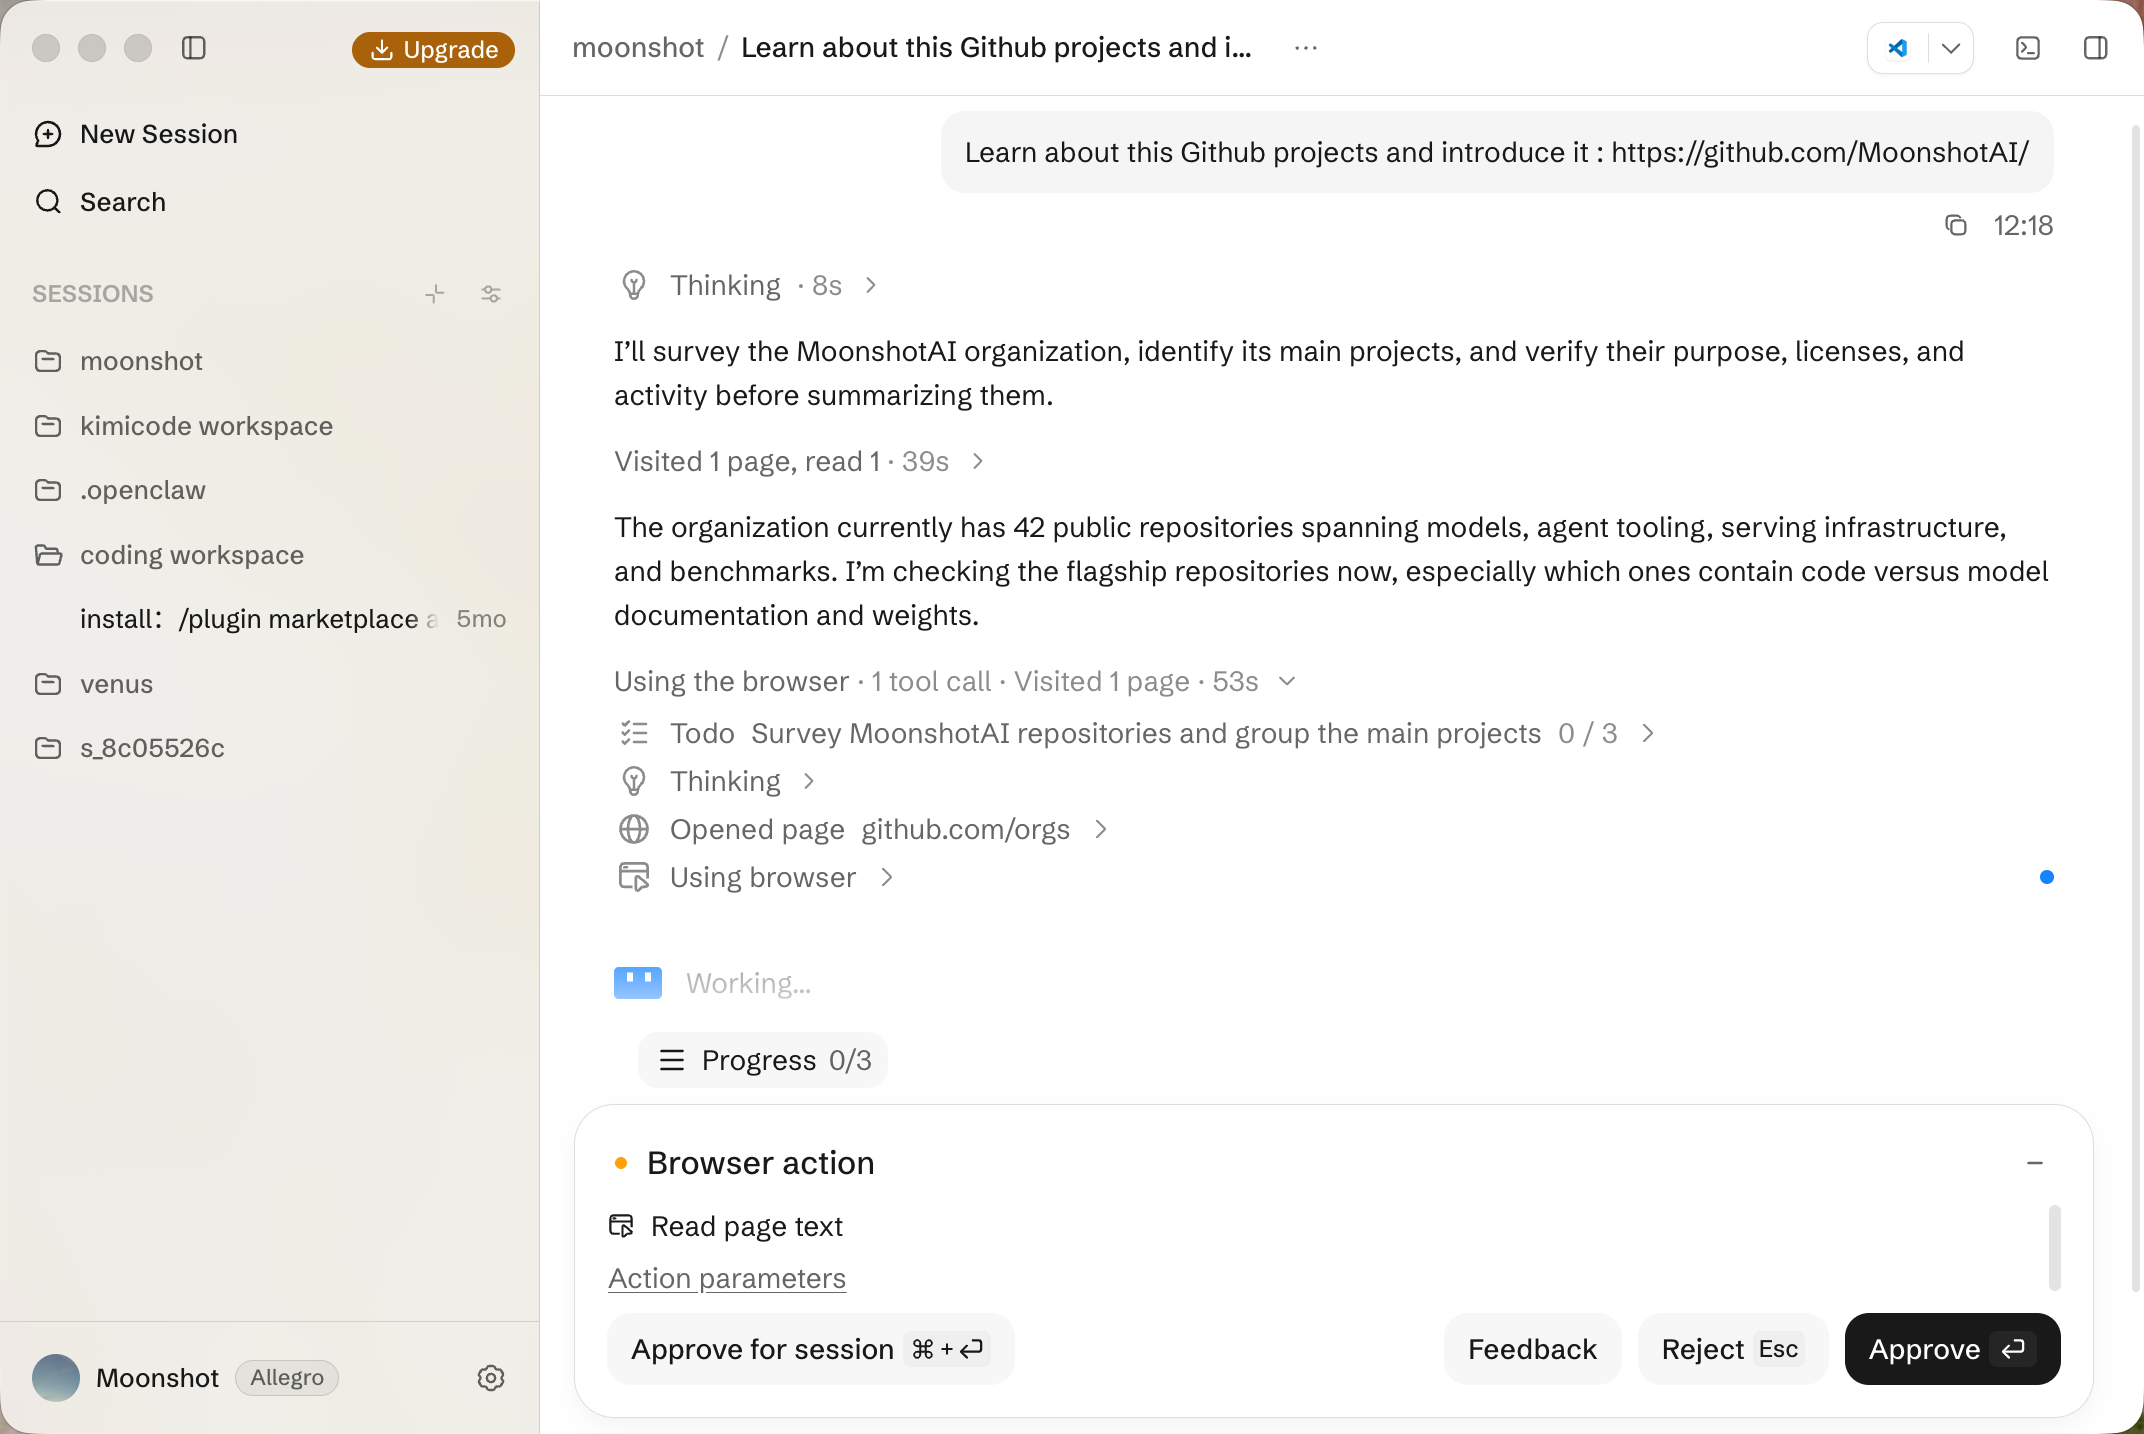
The main window puts projects and sessions on the left, the conversation in the center, supporting panels on the right, and the terminal below. You can follow tool activity while keeping the relevant files or page nearby.
That arrangement supports a practical review loop: inspect the edits, check command output, open the page, and send precise feedback. For a UI change, the conversation explains the implementation, the diff reveals its scope, and the browser shows the behavior you need to assess.
How to use Kimi Code Desktop
Using Kimi Code Desktop follows a simple loop: open a project, describe the change, and verify the result. The steps below walk through one small change from the first request to a result you can verify, showing where the agent does the work and where the developer reviews it. The same process applies to larger tasks once the workflow is familiar.
Step 1: Choose the installer for your computer
Download Kimi Code Desktop from the official Kimi Code page and choose the package for your system.
| System | Requirements and package |
|---|---|
| macOS | macOS 12.0 or later; separate Apple Silicon and Intel builds |
| Windows | Windows 10 or later, 64-bit |
| Linux | x86_64; AppImage, DEB, or RPM |
On a Mac, check About This Mac to identify your chip. For Linux, choose DEB for Debian or Ubuntu distributions, RPM for Fedora or RHEL distributions, or AppImage for a portable package.
Step2: Connect a model and open a project
After launching Desktop, sign in with a Kimi account that has eligible Kimi Code membership benefits to use official models.
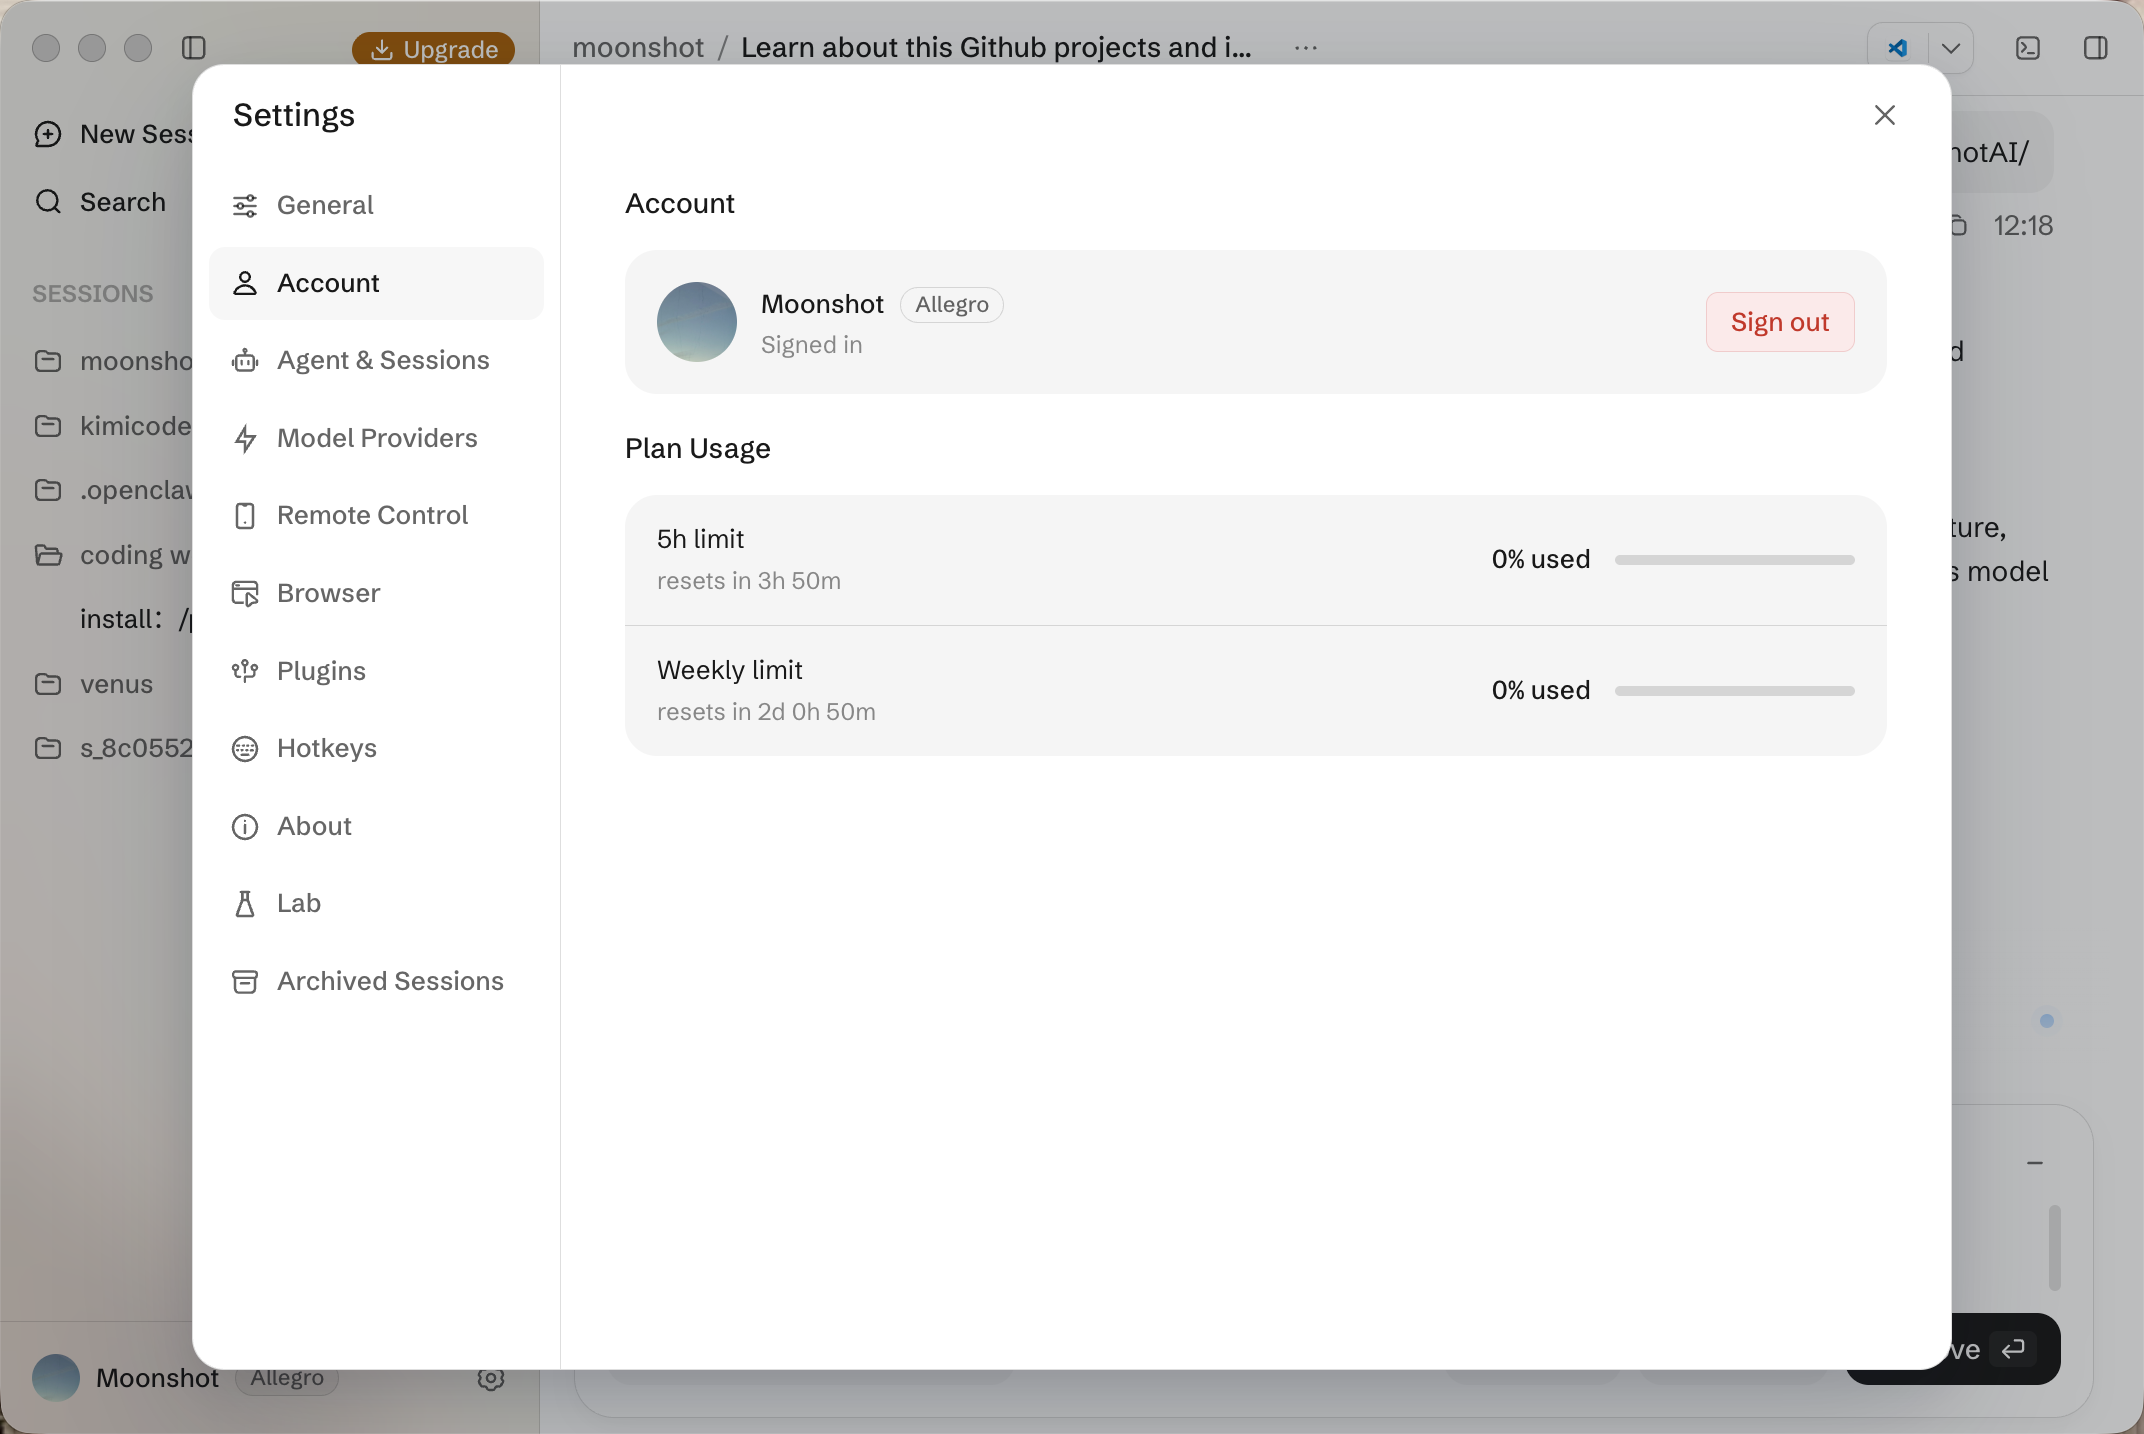
Alternatively, add a third-party provider in Settings using its API key, base URL, and model information. For complete model and provider details, see Model Configuration.
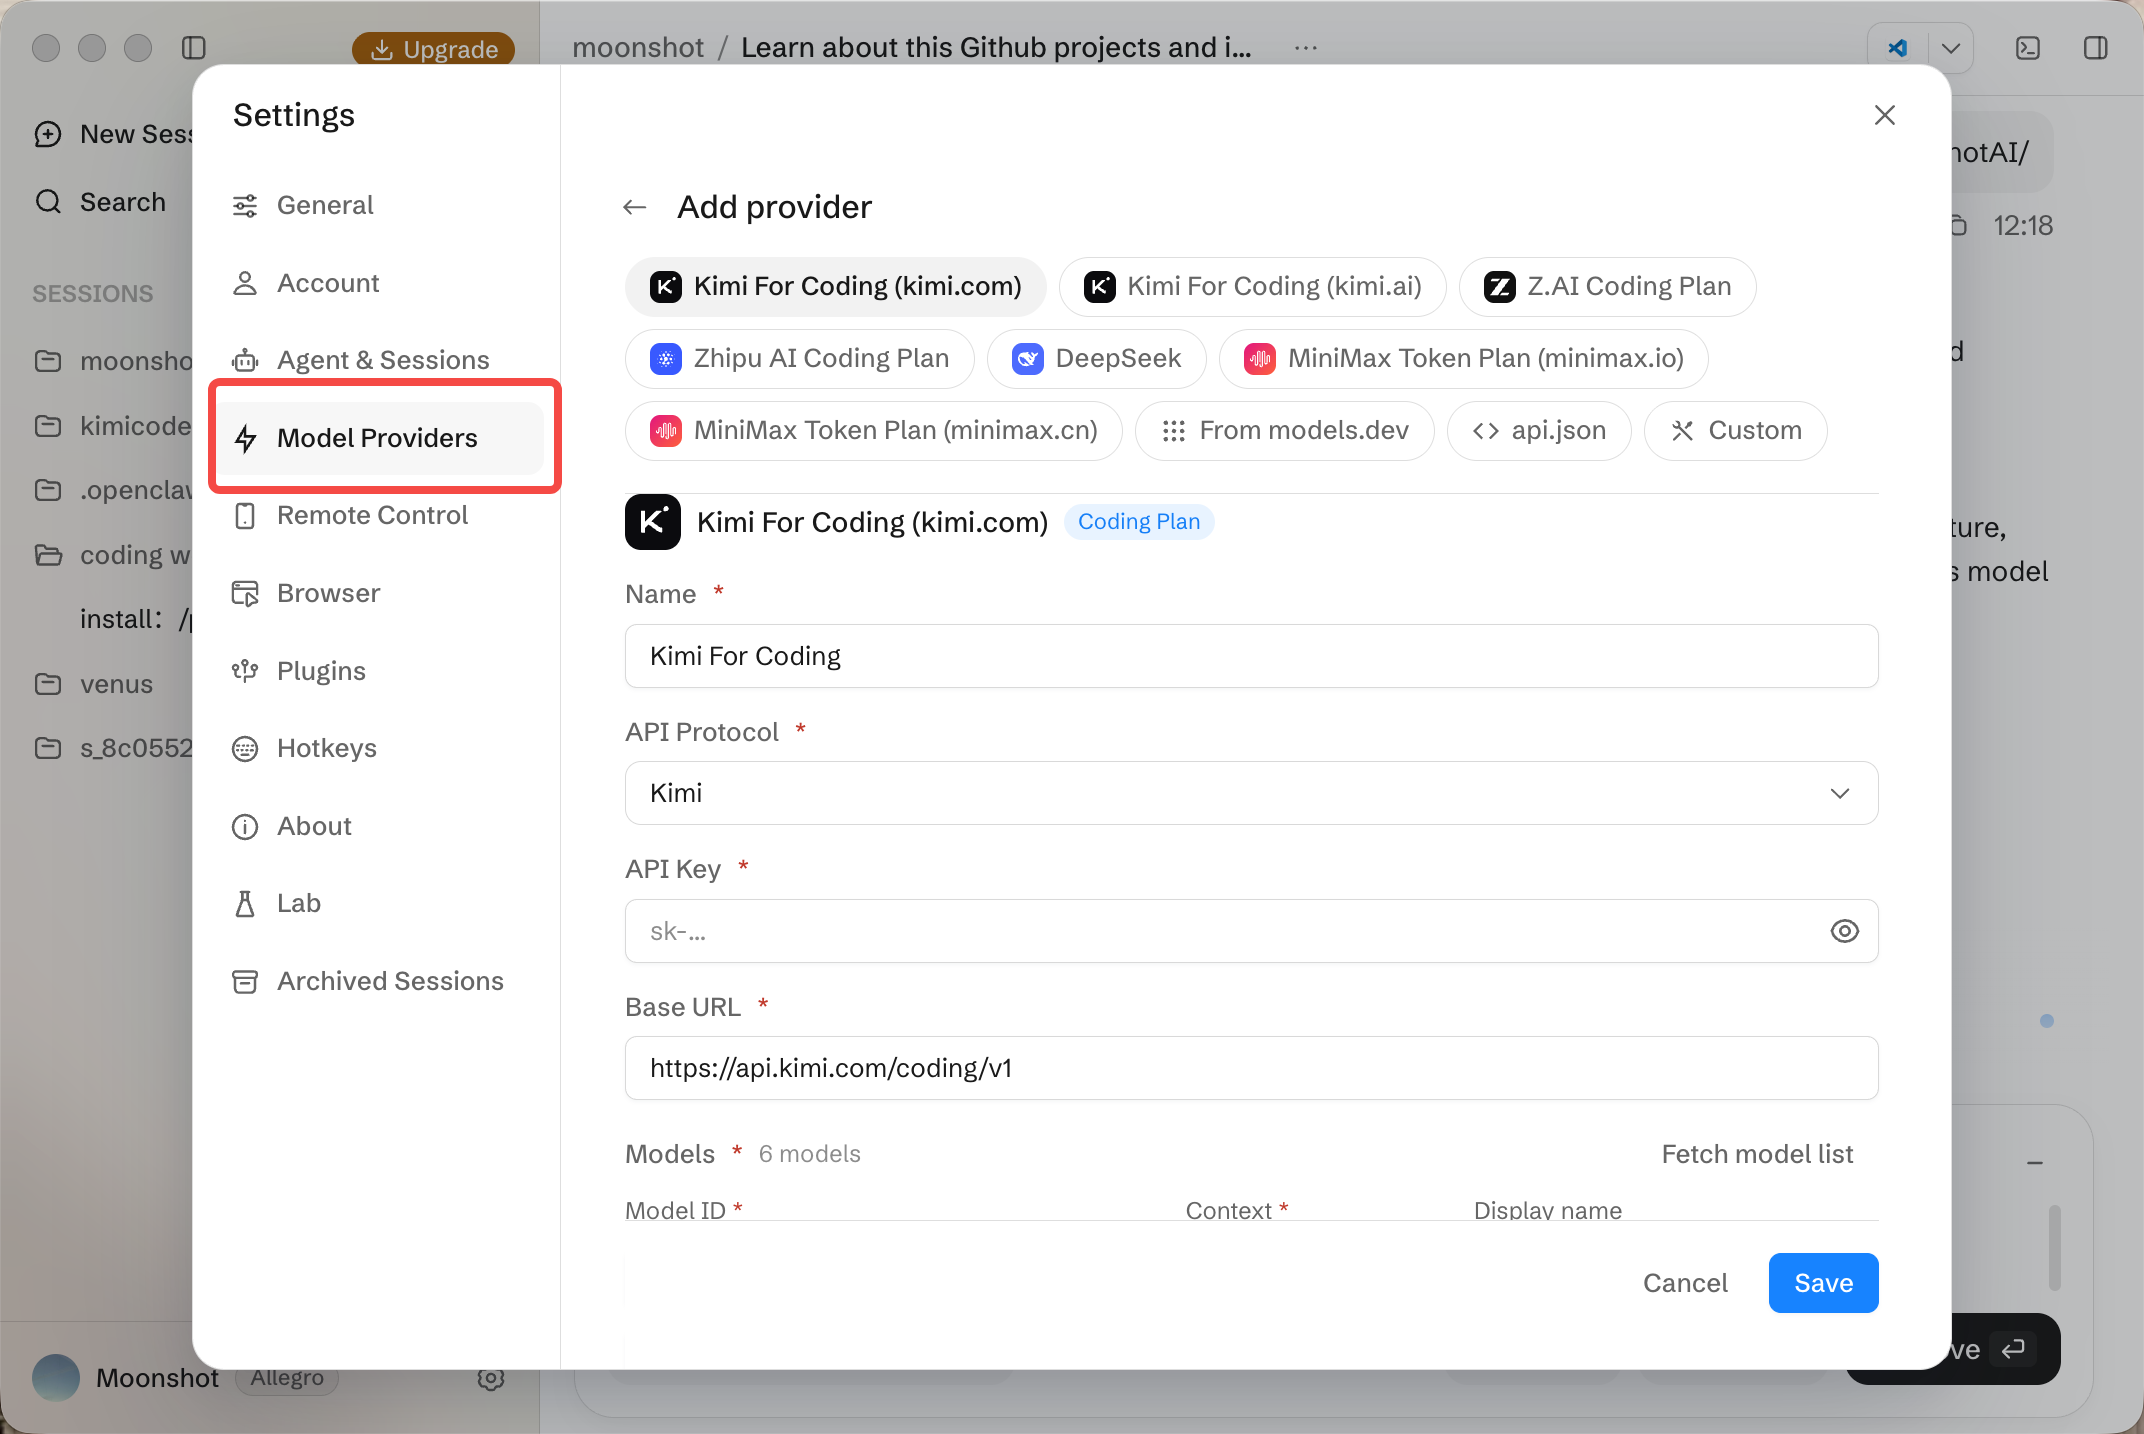
After it is set, create a session, click the folder name above the message composer, and choose your local project. Confirm the selected folder and review any workspace trust prompt. Begin with a request that only reads the project:
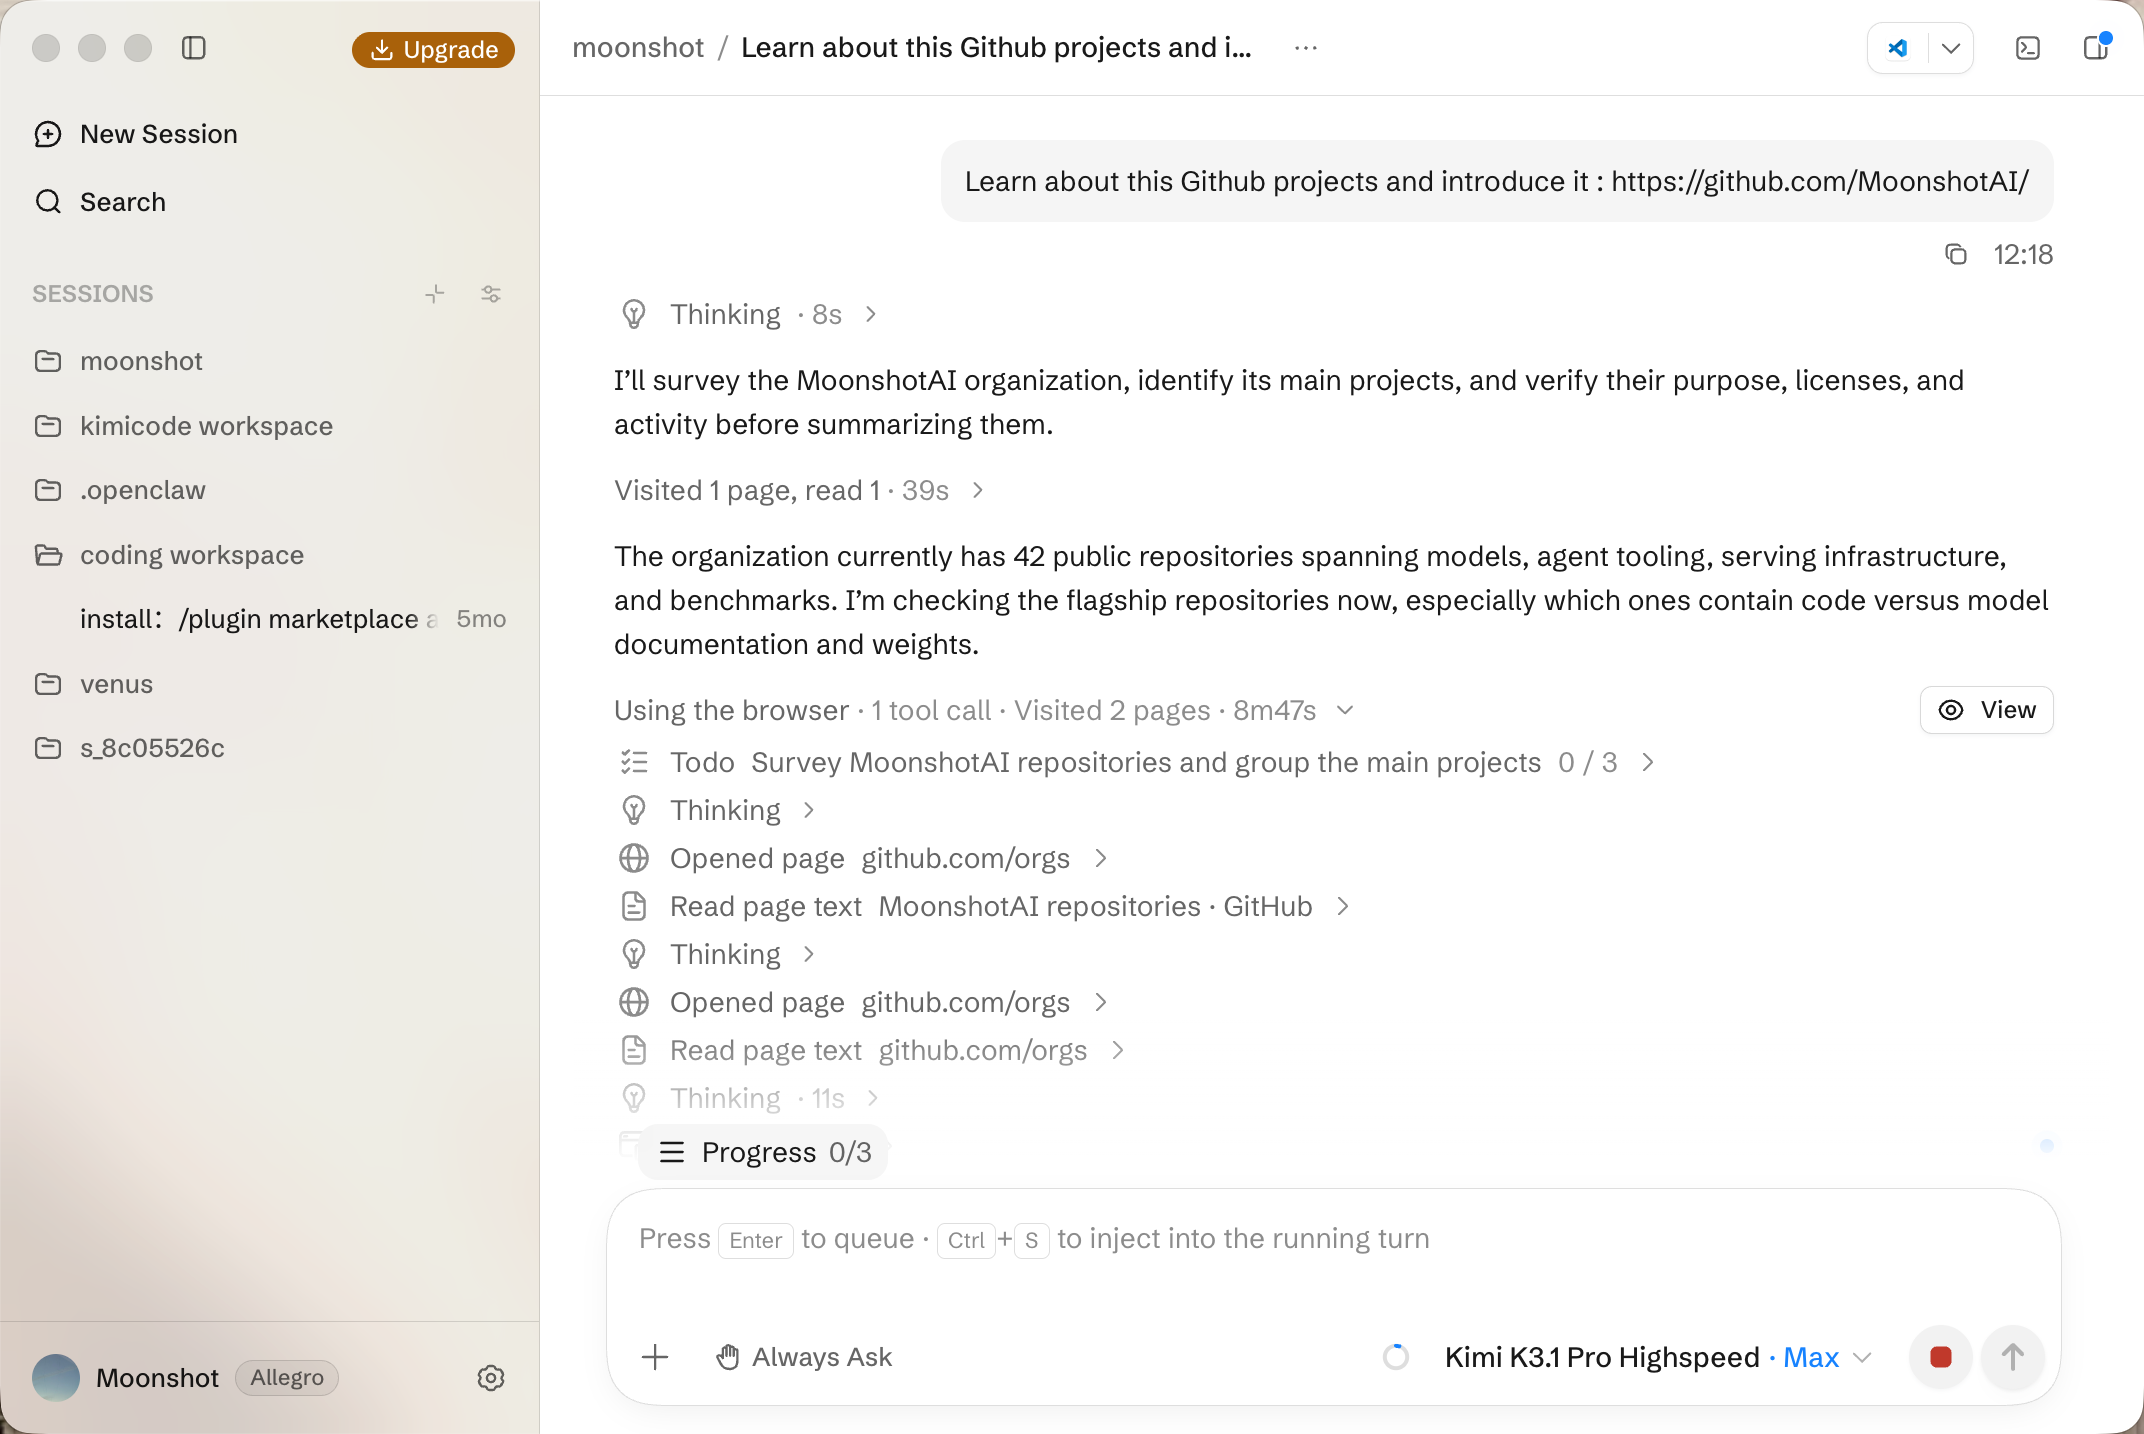
This gives you a starting point for checking the Agent’s understanding before asking it to make a change.
Your first workflow: make a change, review it, and verify it
Suppose an existing contact form should require a name, email address, and message. The following example shows how to structure the task and assess the result in your own project.
Describe the goal and provide context
Give the Agent observable requirements. Reference the form file with an @ mention, attach a screenshot, or include the steps that reproduce the problem. Kimi Code Desktop’s context tools help connect your request to the relevant code and page.
These requirements give both you and the Agent something concrete to check. They also establish boundaries: a validation change should not quietly become a redesign or a replacement of the submission service.
Agree on the approach and follow execution
Choose Plan when you want to review the approach before edits begin. Check whether the proposed work covers the form component, existing validation patterns, and appropriate tests. Ask for adjustments if the plan introduces unnecessary dependencies or changes unrelated behavior.
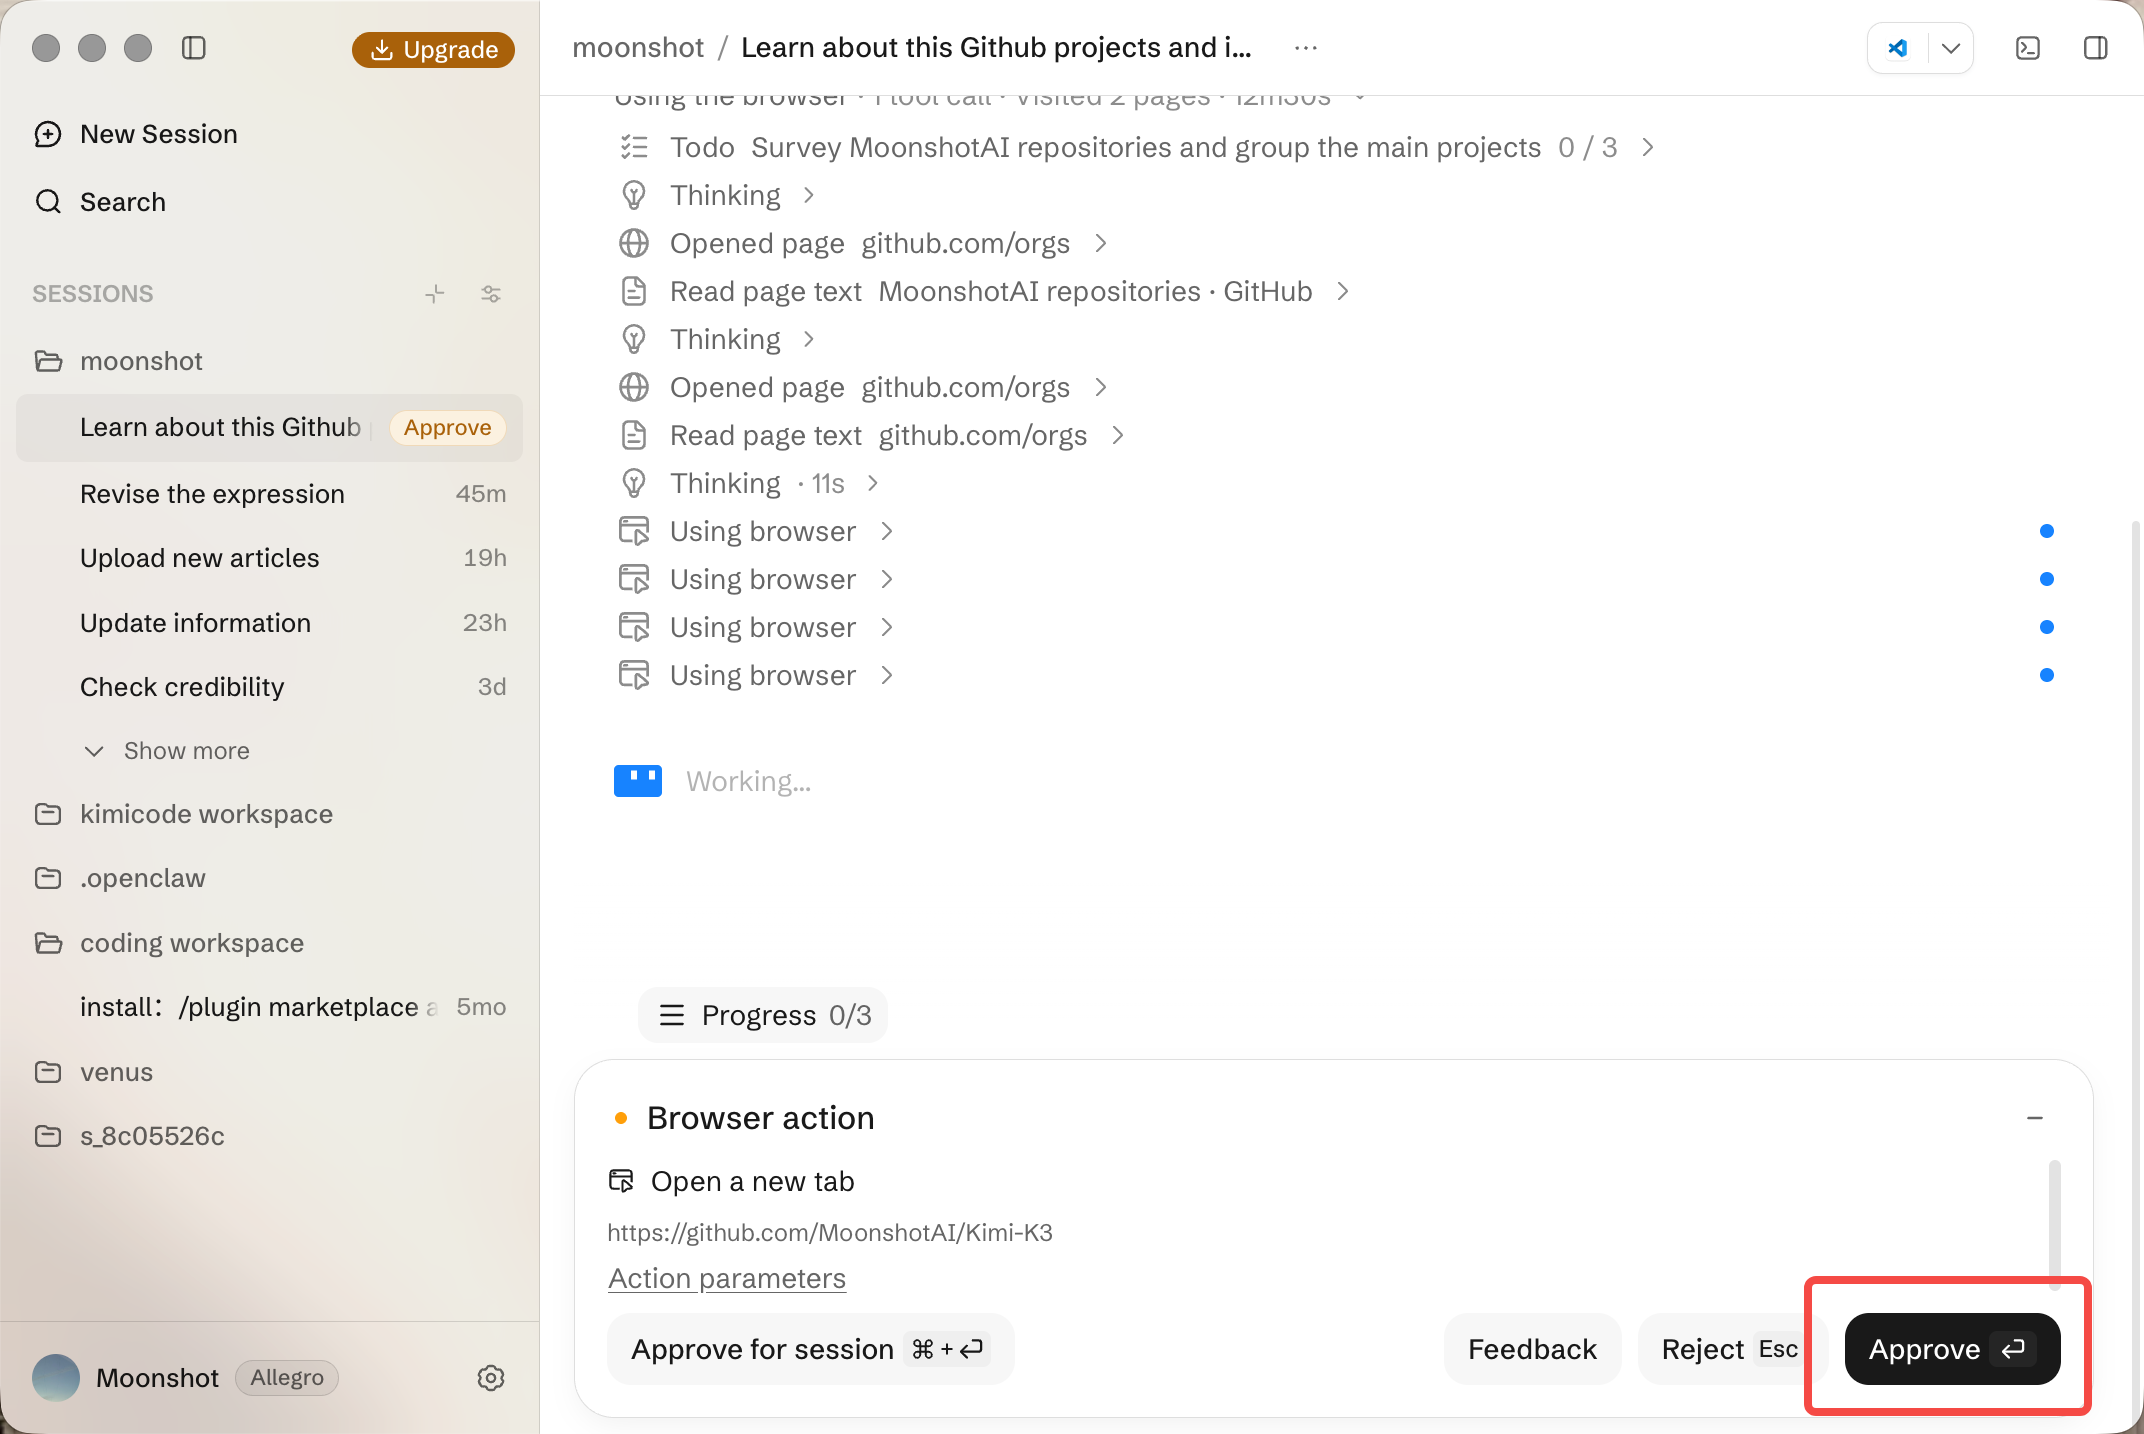
After approving the plan, follow the tool activity in the conversation. Read approval requests and respond to questions about requirements. If you discover another constraint, add it to the session while the task is underway.
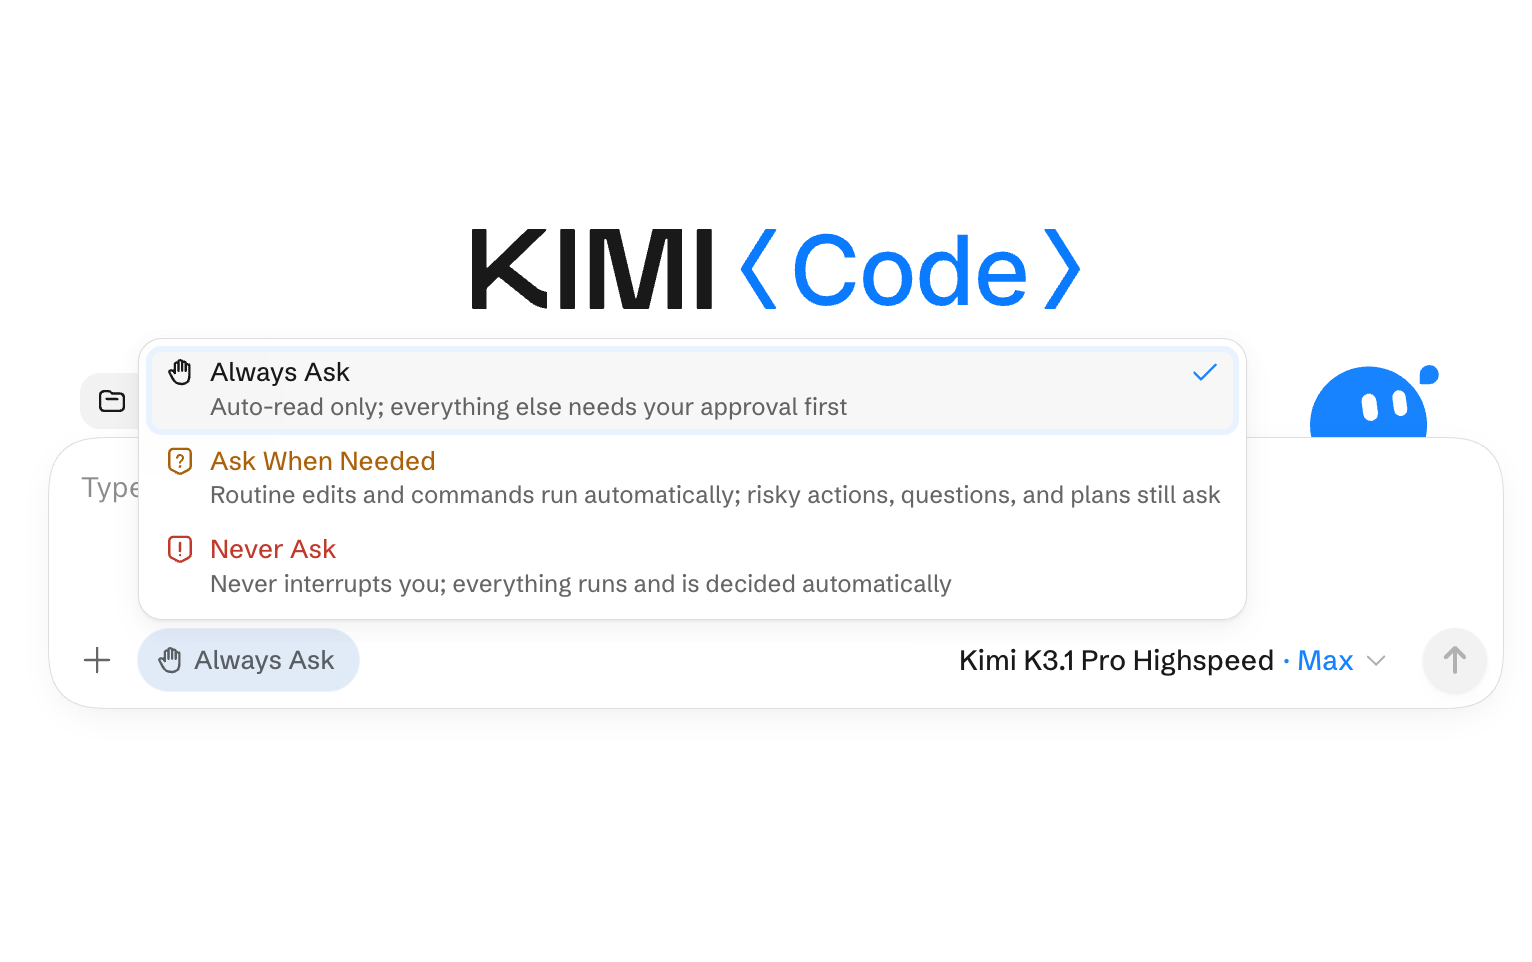
You can also choose how much control to keep. Kimi Code Desktop lets each user decide how much freedom the agent has. Permission settings control when the agent must pause for approval before acting:
Always ask: Read operations run automatically; other operations require approval.
Ask when needed: The agent proceeds on routine steps and pauses only when an action calls for confirmation. This balances speed and control for everyday work.
Never ask: Operations run within the current permission scope without individual approval prompts.
The setting can be adjusted at any time, so a project can begin with tighter control and move to a lighter touch as confidence grows.
Review the changed files
Open the Changes view and read the diff against your original requirements. For this example, ask:
Are all three required fields covered, including whitespace-only input where specified?
Does invalid input stop submission, and can users understand which field needs attention?
Does correcting the input clear or update the errors appropriately?
Does valid input still reach the existing submission handler?
Are the changes limited to the form and relevant tests?
If something is unclear, quote the relevant code and ask why it changed. A focused question such as “Why does this replace the submission handler?” gives the Agent a specific decision to explain or revise.
Run checks, test the page, and iterate
Use the project’s documented checks rather than guessing commands. You can run them in the terminal or ask the Agent to execute them. Request the command, its result, and an explanation for any check that could not run. A completion message alone does not tell you which behavior was verified.
Next, start the local application and open the actual URL shown in its startup output in the built-in browser. Try an empty submission, complete the fields one at a time, enter an invalid email, and finally submit valid test data in an appropriate development environment. Check the error placement at both desktop and narrow viewport widths.
If an error overlaps the submit button, annotate that element and describe the expected spacing. The browser can send element context and an optional screenshot back to the Agent. After the correction, repeat the affected checks. Finish with a clear account of what changed, what passed, and what remains unverified.
Choose a mode for larger tasks
A small, well-defined change can run directly. As the scope grows, choose a mode that matches how you want to organize the work.
| Task | Mode |
|---|---|
| A contained fix with clear checks | Normal task: proceed directly |
| A change whose impact needs investigation | Plan: review and approve the approach before edits |
| An objective requiring several rounds of work | Goal: define completion and stop conditions; pause or resume as needed |
| Several independent investigations or changes | Swarm: divide the work among parallel subagents |
Tower is an experimental option for larger objectives, with agents using isolated worktrees as needed and changes reviewed before merging. The execution guide covers these modes.
Extend the workflow as your needs grow
Once the basic review loop works for you, add capabilities for recurring tasks. Skills can capture a review process or project conventions. Plugins and MCP integrations can provide additional tools and access to services or data sources. The settings and extensions guide explains how to configure them.
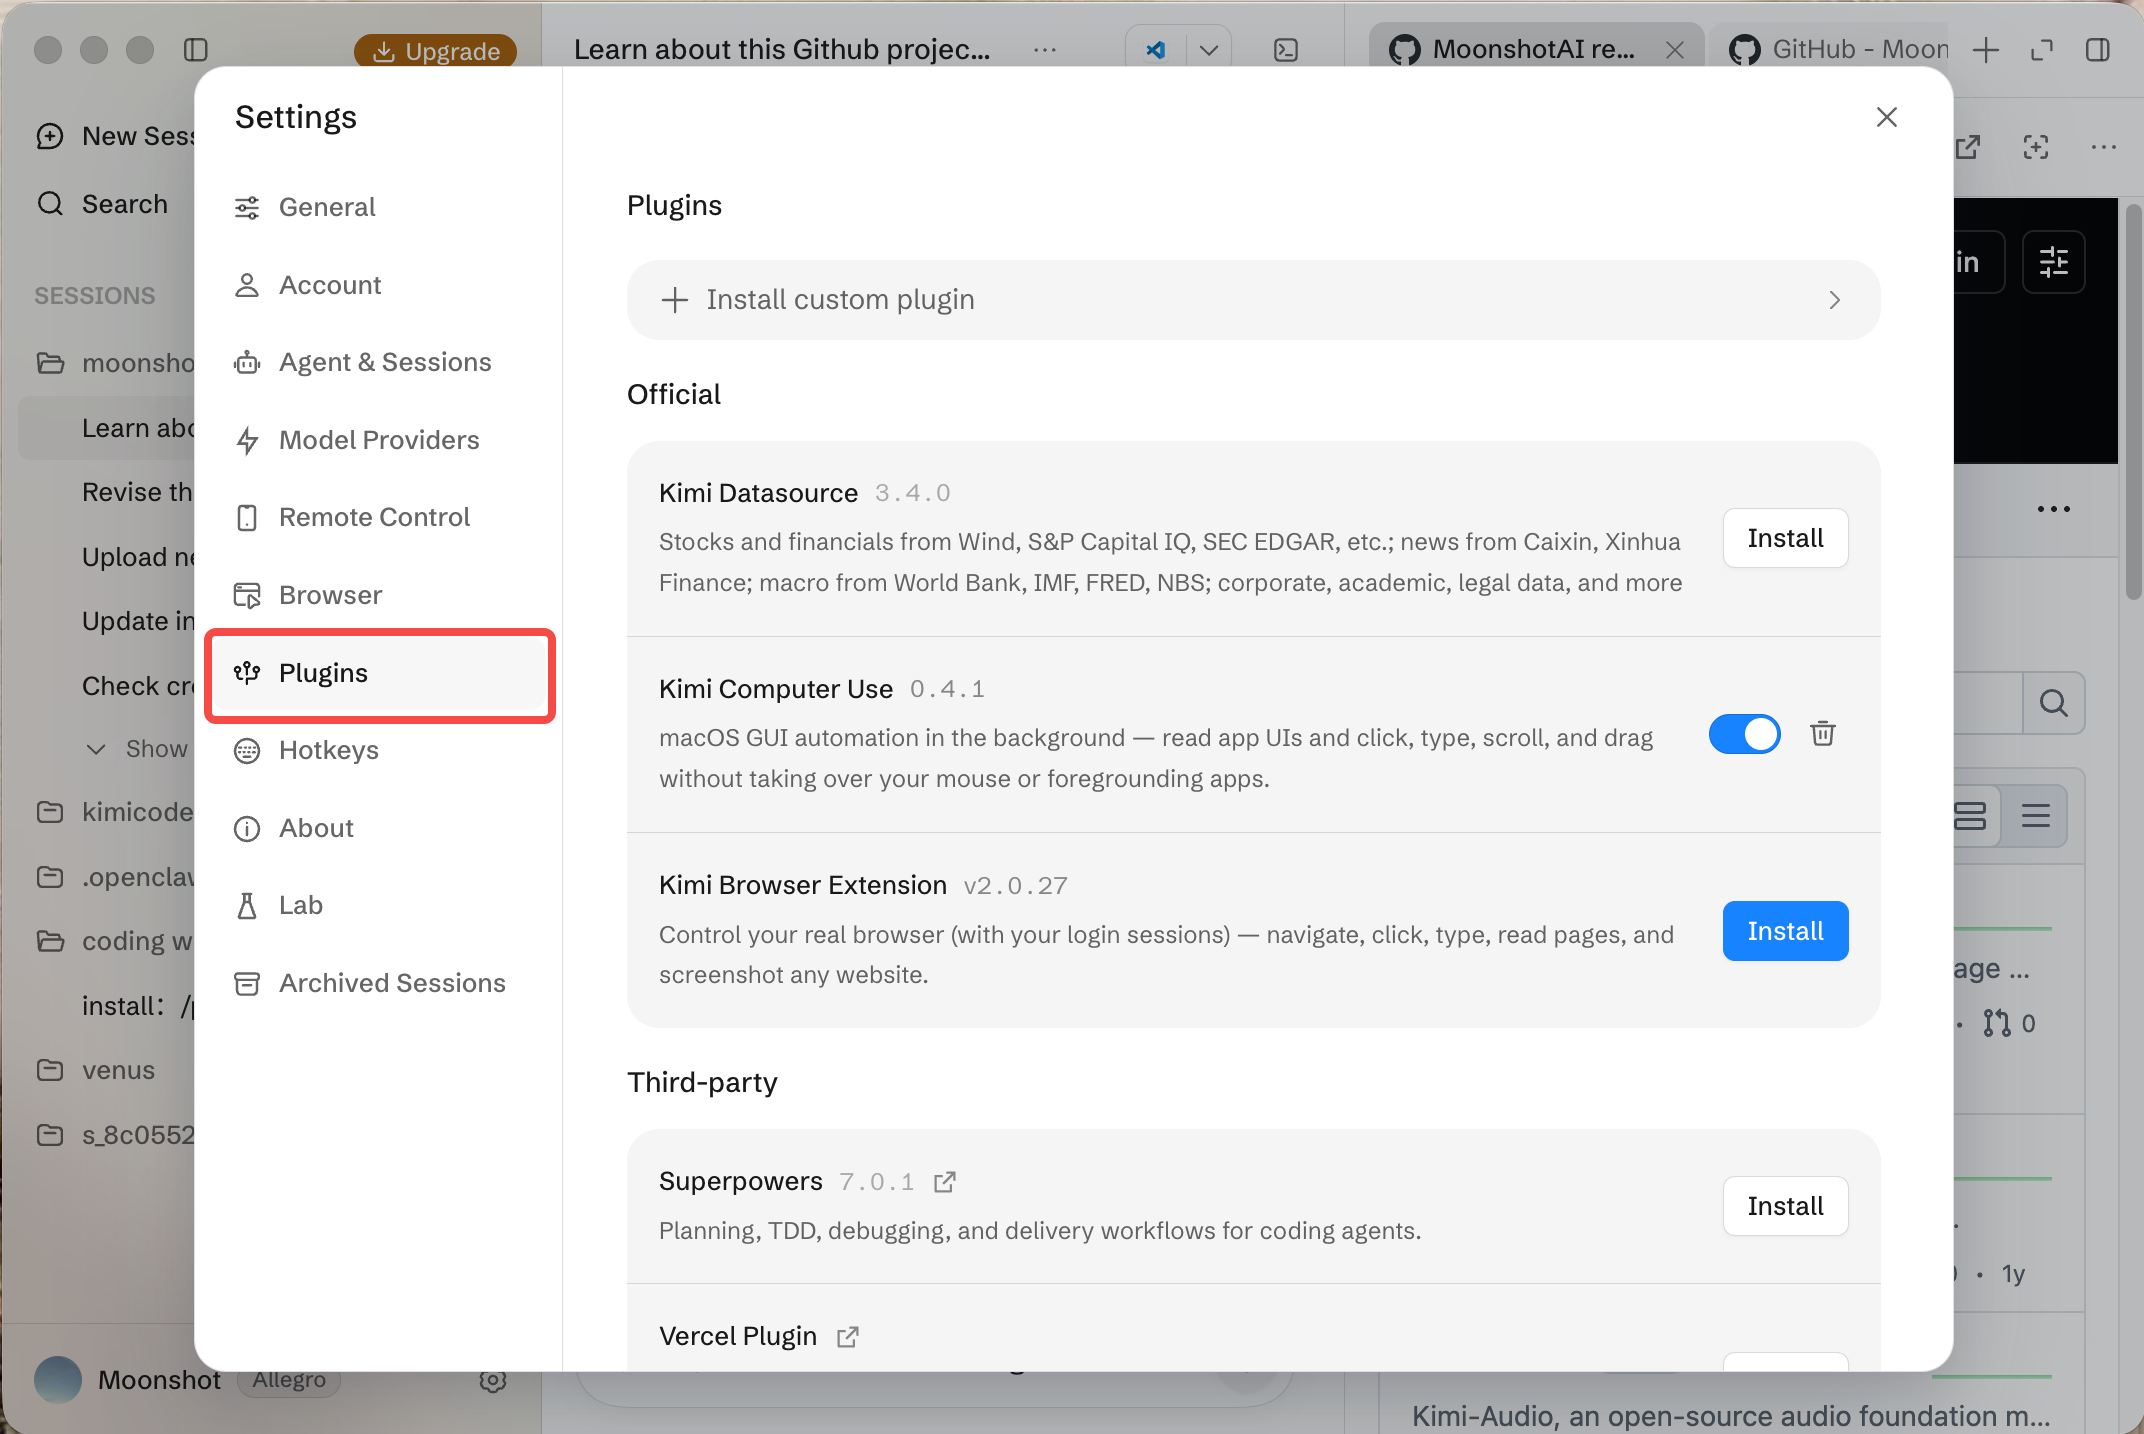
Gather & explore information with the built-in browser
Kimi Code Desktop can gather information or investigate coding-relevant issues, or help you understand unfamiliar open-source projects. For example, share a GitHub URL and ask the Agent to explain what the project does, how its main components fit together, and what you should read first.
The built-in browser keeps the source material beside the conversation. In the example below, the Agent explores a GitHub repository, reads project pages, and checks technical claims and license details while preparing an introduction.
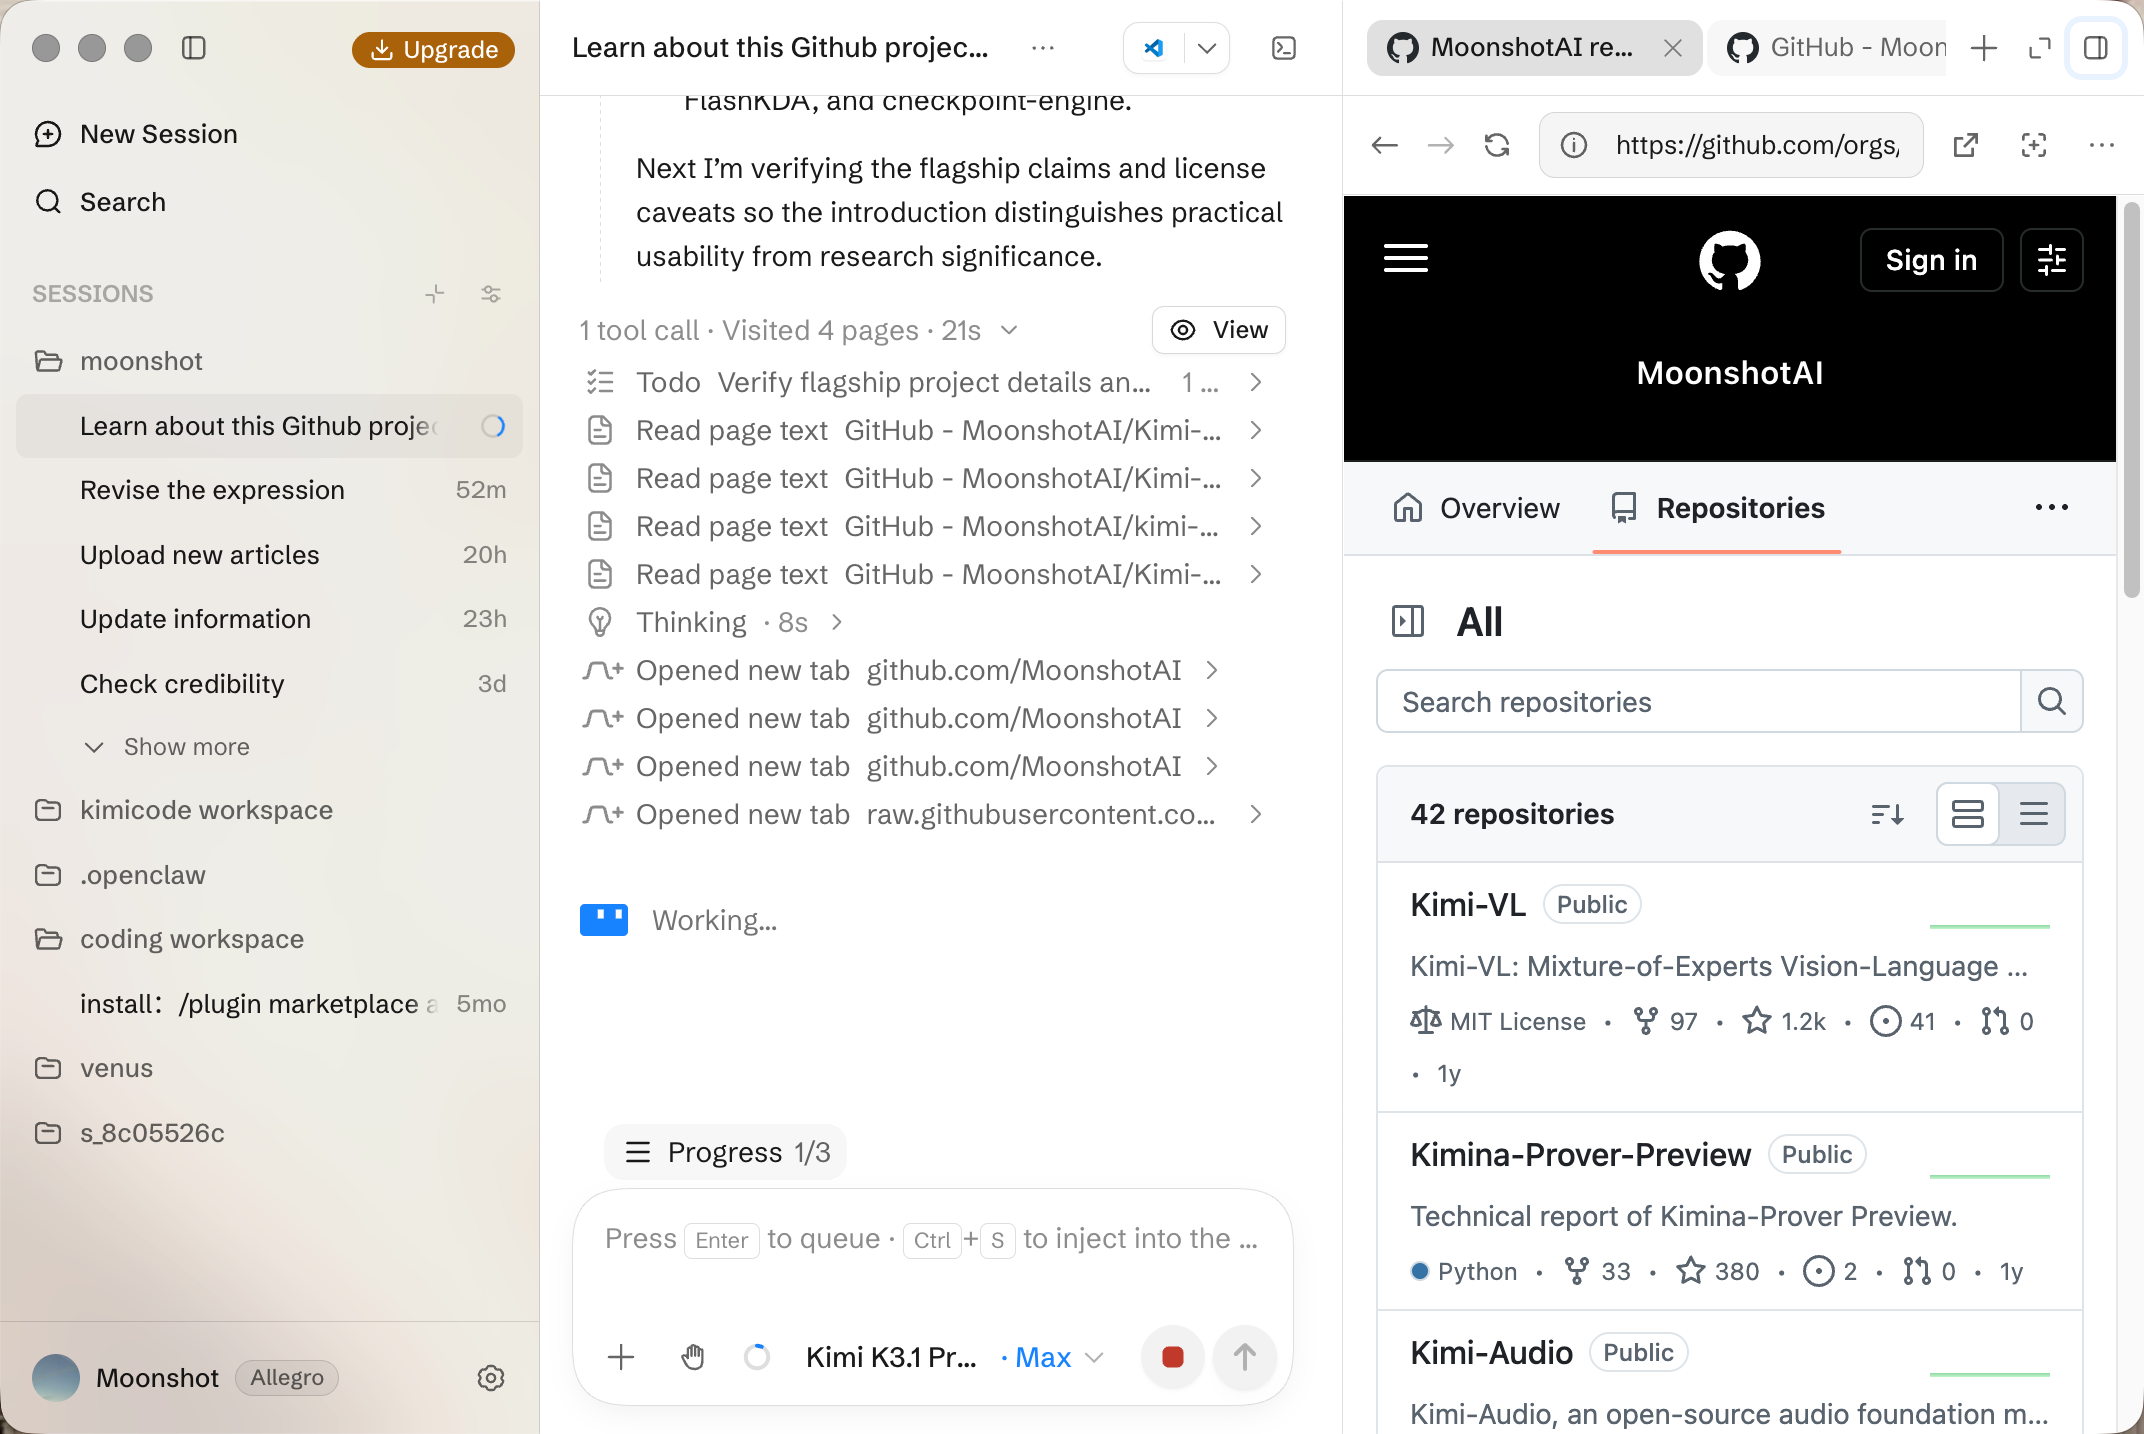
Use follow-up questions to guide your learning: ask which repository is relevant to your goal, what the setup requirements are, or which documentation supports a particular claim. This gives you a starting point for exploring the project and checking the Agent’s conclusions against the original sources.
For browser work, choose the appropriate integration. The built-in browser opens pages inside Desktop. WebBridge connects the Agent to your real browser when a task needs its existing sign-in state.
Keep tasks moving with Remote Control
Stepping away from your desk does not have to interrupt a coding task. Remote Control lets you use a phone, tablet, or another computer to follow execution, inspect tool inputs and outputs, respond to approval requests, and send follow-up instructions. You can also start a new session or stop a running task.
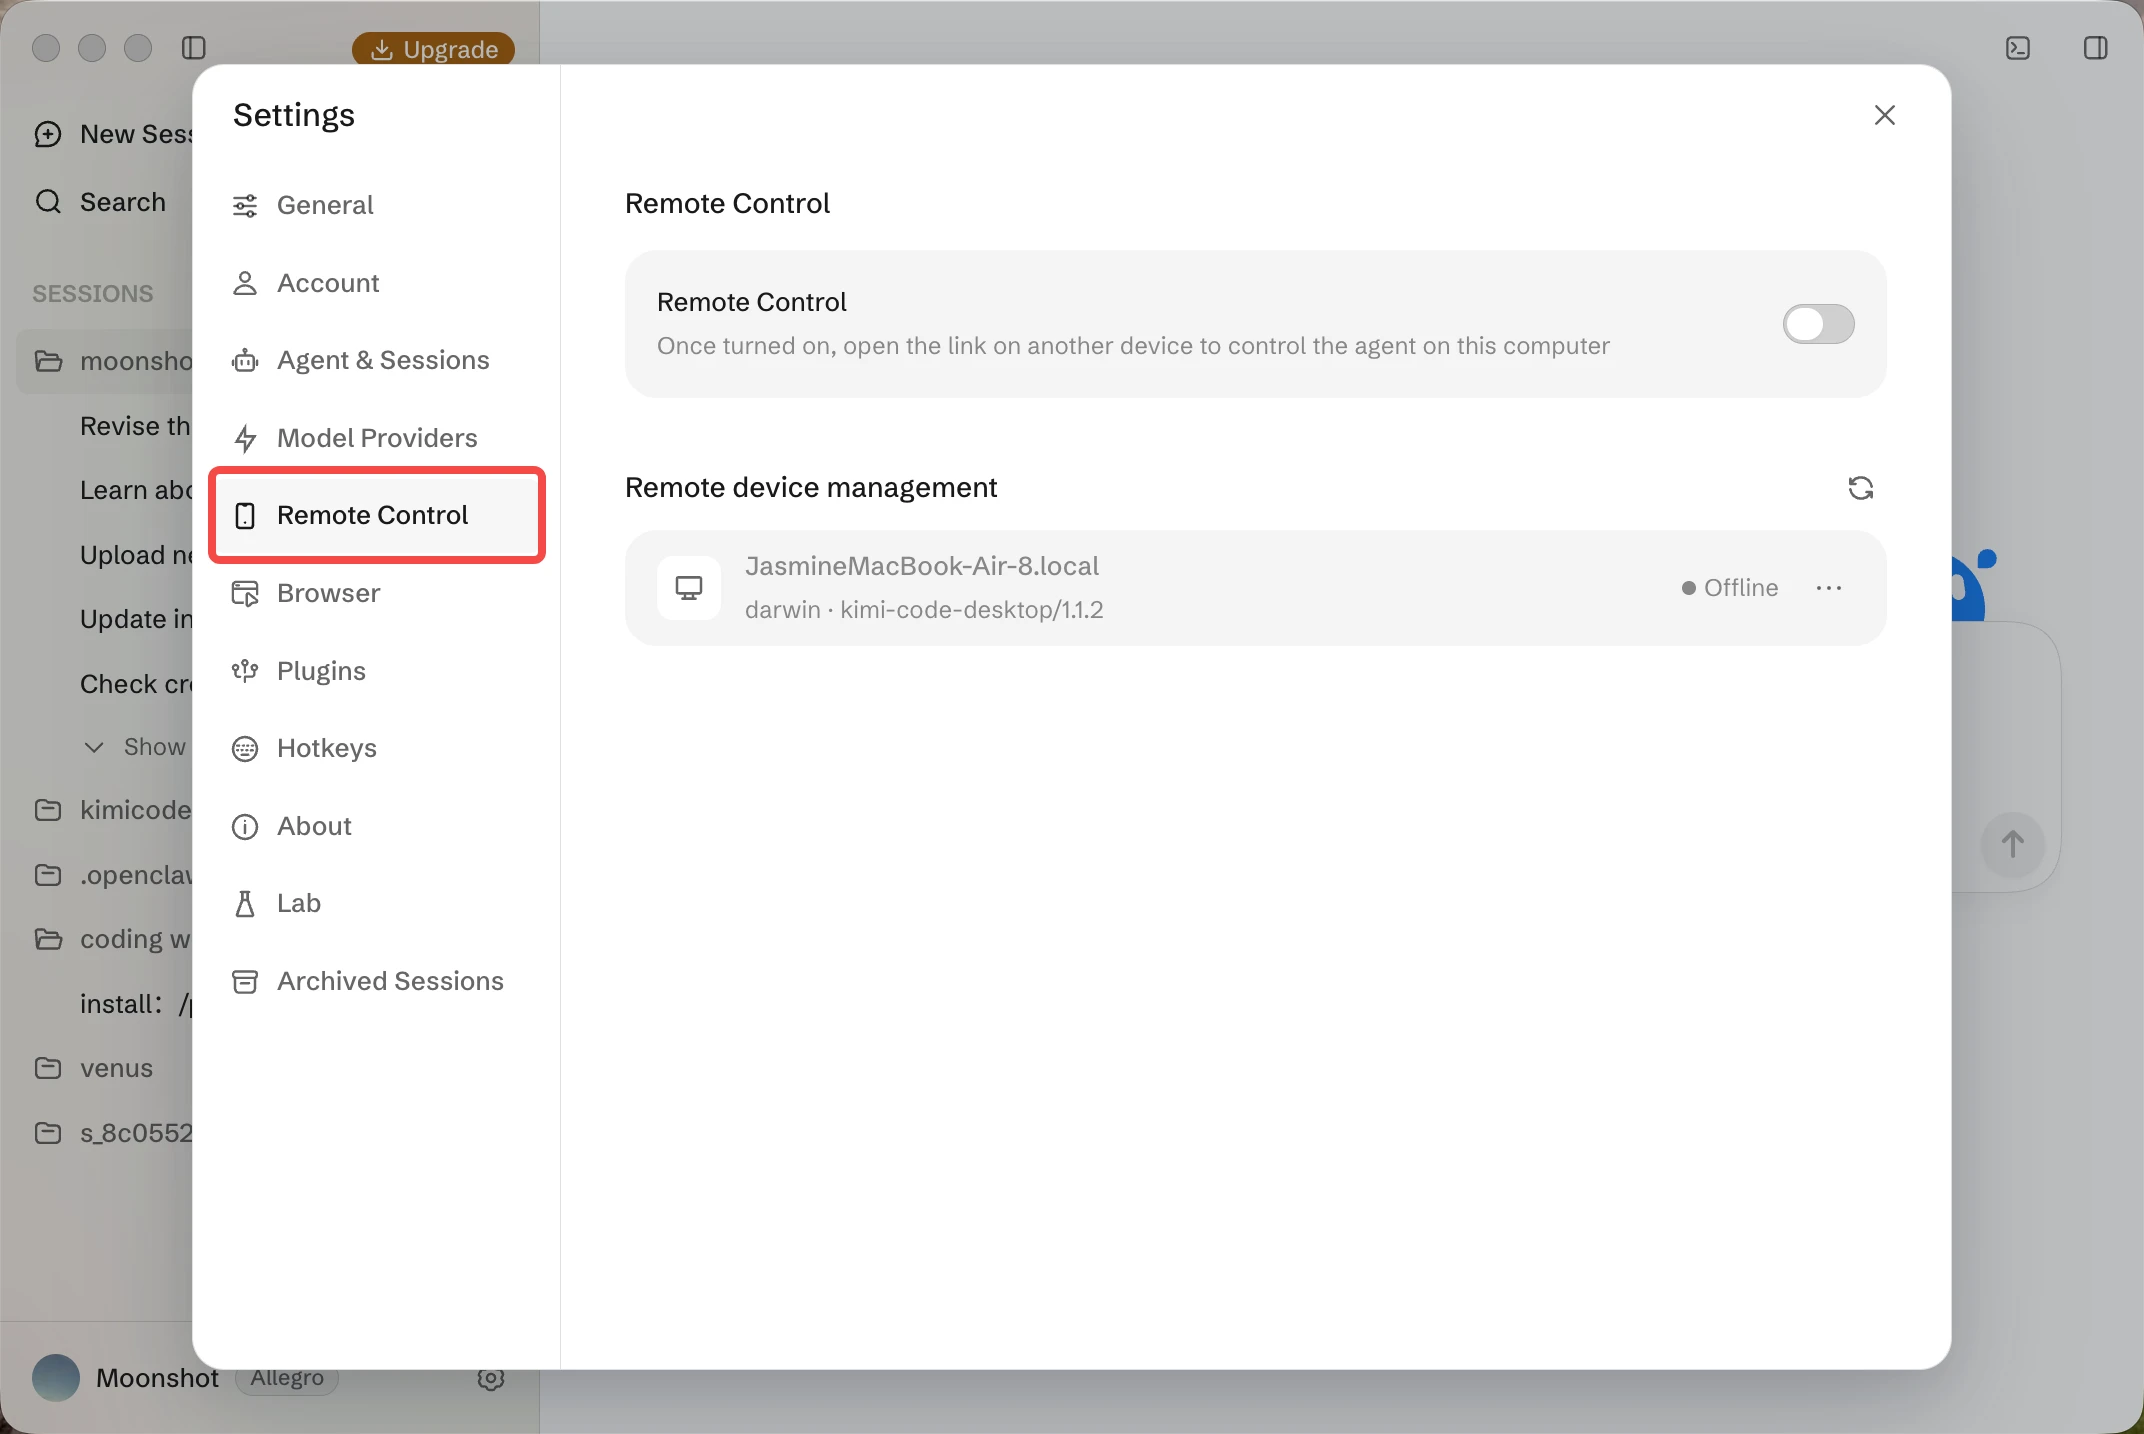
To connect, enable Remote Control under Settings → Remote Control in Desktop. Scan the QR code or open the access link in a browser on your other device, sign in with the same Kimi account, and follow the prompt to enable remote access.
Your original computer remains the execution environment: files, commands, and local tools stay there. Keep it awake, online, and running Desktop. Closing the remote browser page leaves an ongoing task running; to end remote access, disable Remote Control in Desktop settings or quit Desktop.
Models, membership, and usage
Downloading the client and accessing a model are separate steps. Official Kimi models require an eligible membership. Current new plans include Kimi Code from Plus upward. Currently, available models include K3.1 Pro and K3.1 Pro Highspeed, alongside K3, K2.8 Preview, and K2.7 Code Highspeed, and model access and context limits may vary by plan and time. Check the model configuration guide for current details.
Usage is shared across Kimi Code entry points, including Desktop, CLI, and VS Code, within Kimi membership quota rules. New plans retain a rolling five-hour rate window and a monthly total quota, while legacy plans have different rules, including a weekly window. The five-hour window is a rate limit rather than a fixed allowance of five hours of app use.
Review the current plans, consult the membership guide, and check account usage in Desktop’s Settings. If you configure another model provider, its availability, compatibility, and charges apply separately.
Conclusion
Kimi Code Desktop gives you a visual workspace for taking a coding task from a conversation to changes you can inspect and test. Whether you are building a prototype or improving an existing application, you can keep the project, the Agent’s work, and your review in one place, and choose how much approval each task needs. Start with a familiar project and one change with clear acceptance criteria. Describe the goal, review the approach, and check the result in the terminal and browser.