Abrupt slide changes can make an otherwise well-designed PowerPoint presentation feel less polished and break the flow of your ideas. Learning how to add transitions in PowerPoint can help you create smoother slide changes and keep your presentation visually engaging. This guide covers everything you need to know about adding, customizing, and applying transitions effectively.
Overview of 2 methods for adding transitions to PowerPoint
You can add transitions to PowerPoint slides in two simple ways, depending on how much control you want over the process. The table below compares using an AI tool like Kimi Slides with adding transitions manually in PowerPoint.
| Method | How it works | Suitable for |
|---|---|---|
| Using an AI tool | Generate and refine slides with suitable transitions using AI | Faster presentation creation |
| Adding transitions to PowerPoint manually | Select slides and apply transition effects through PowerPoint's built-in tools | More control and customization |
How to add transitions to PowerPoint using an AI tool
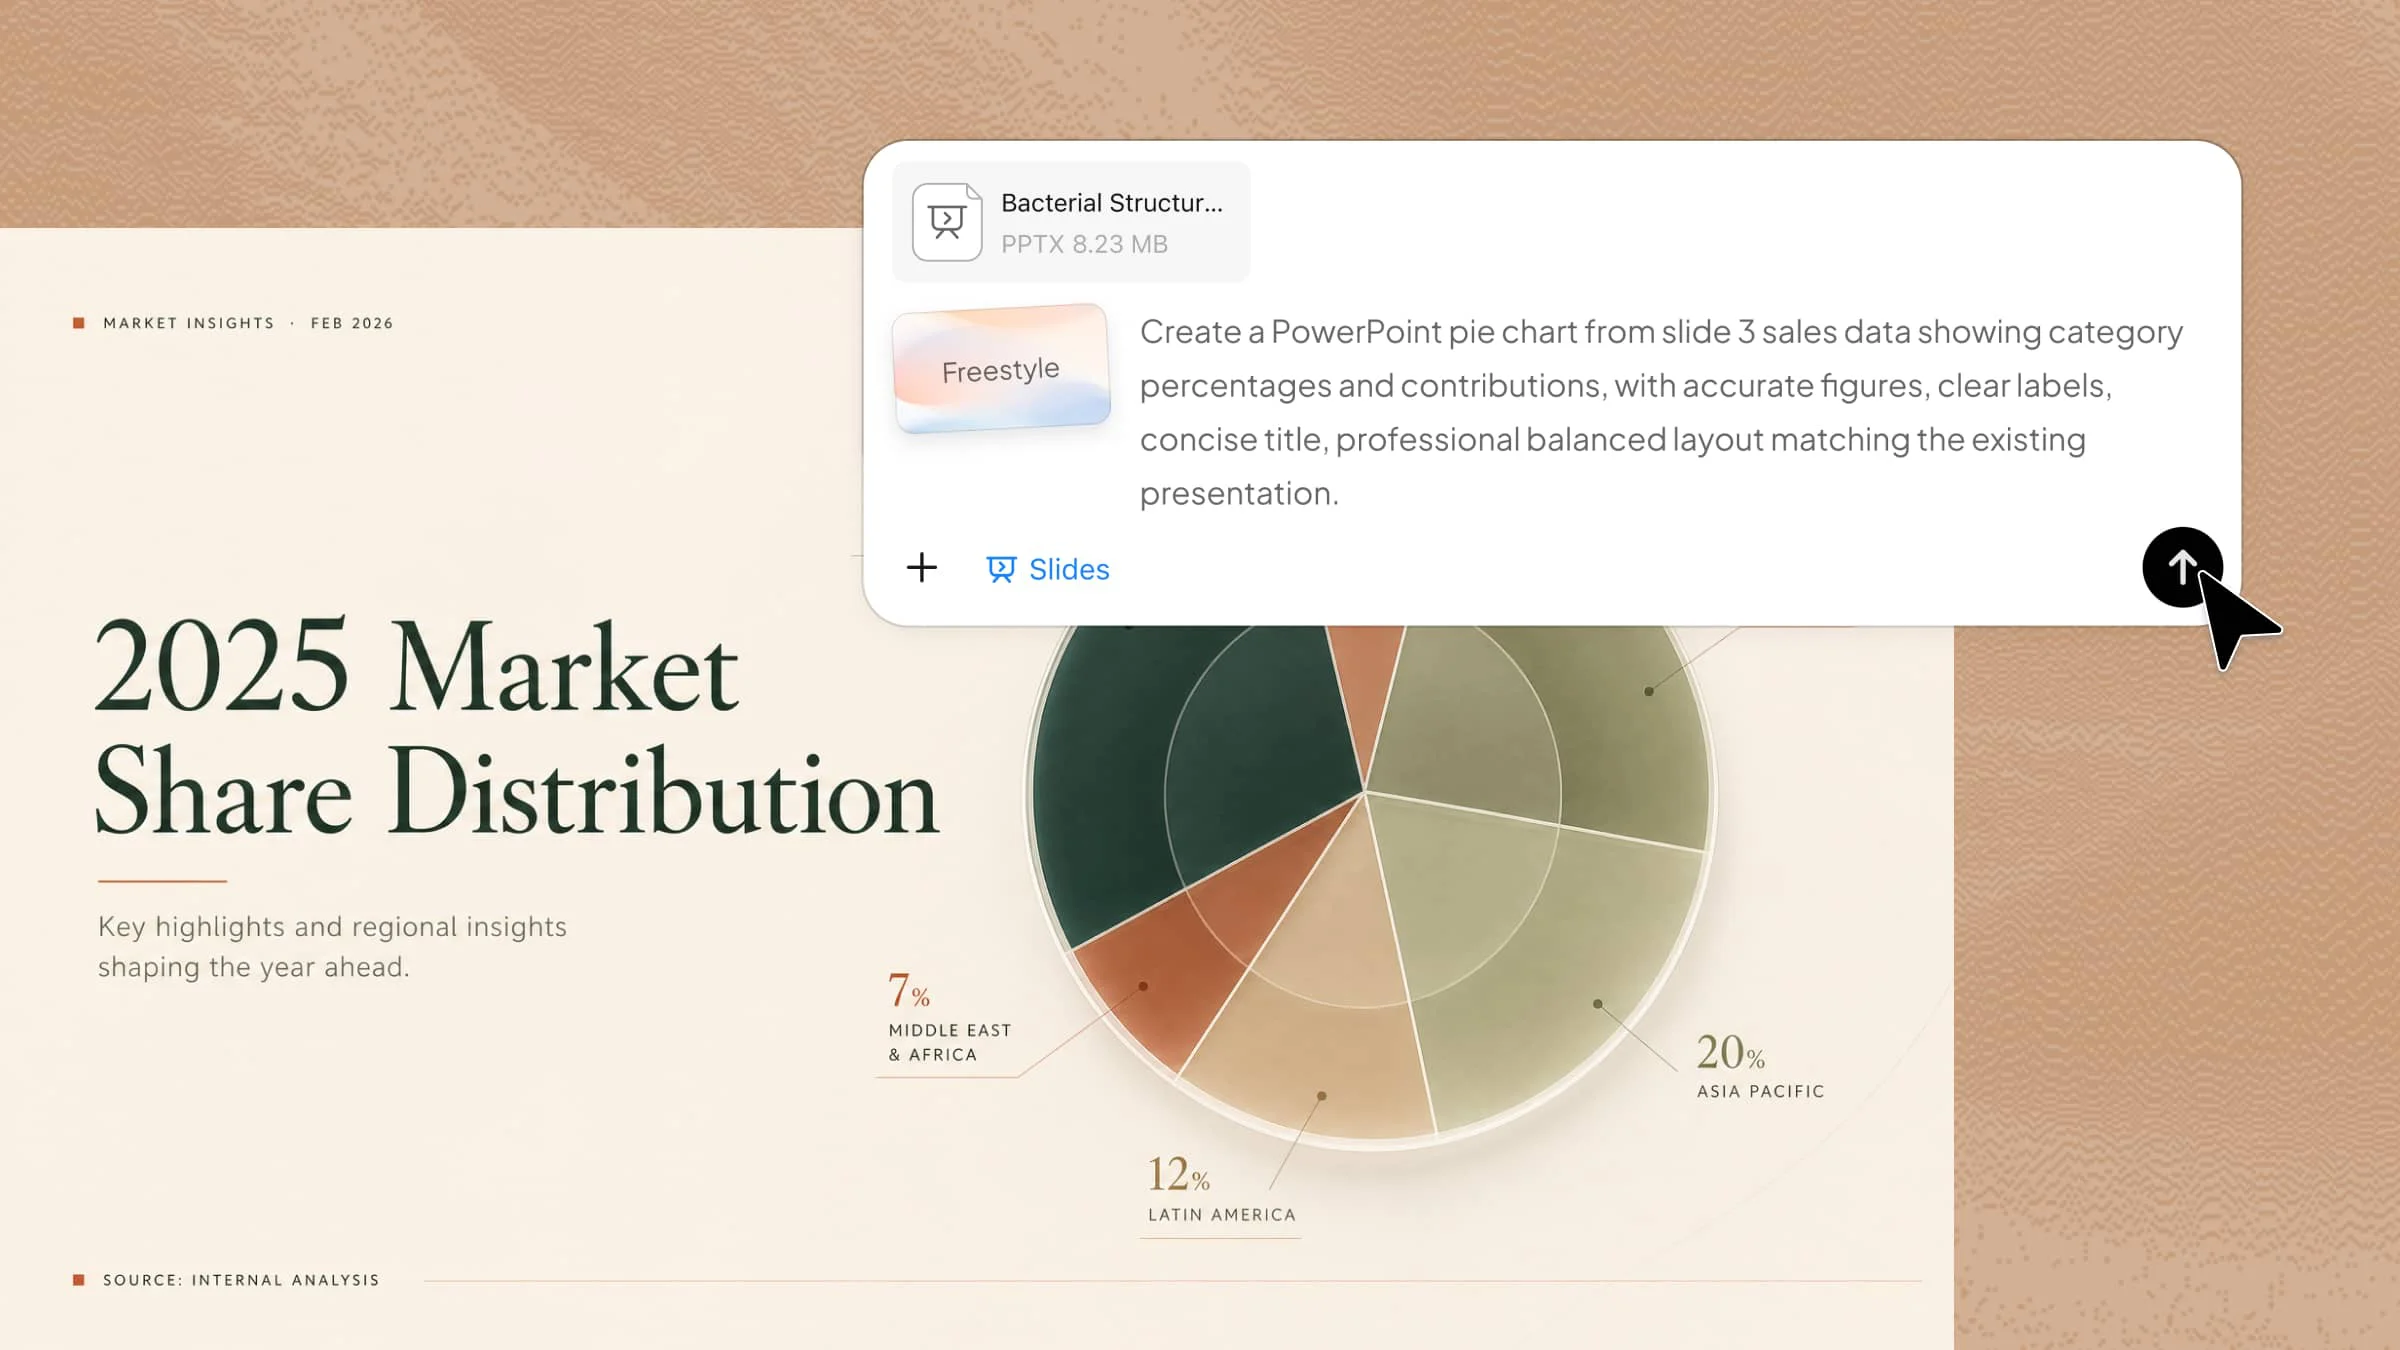
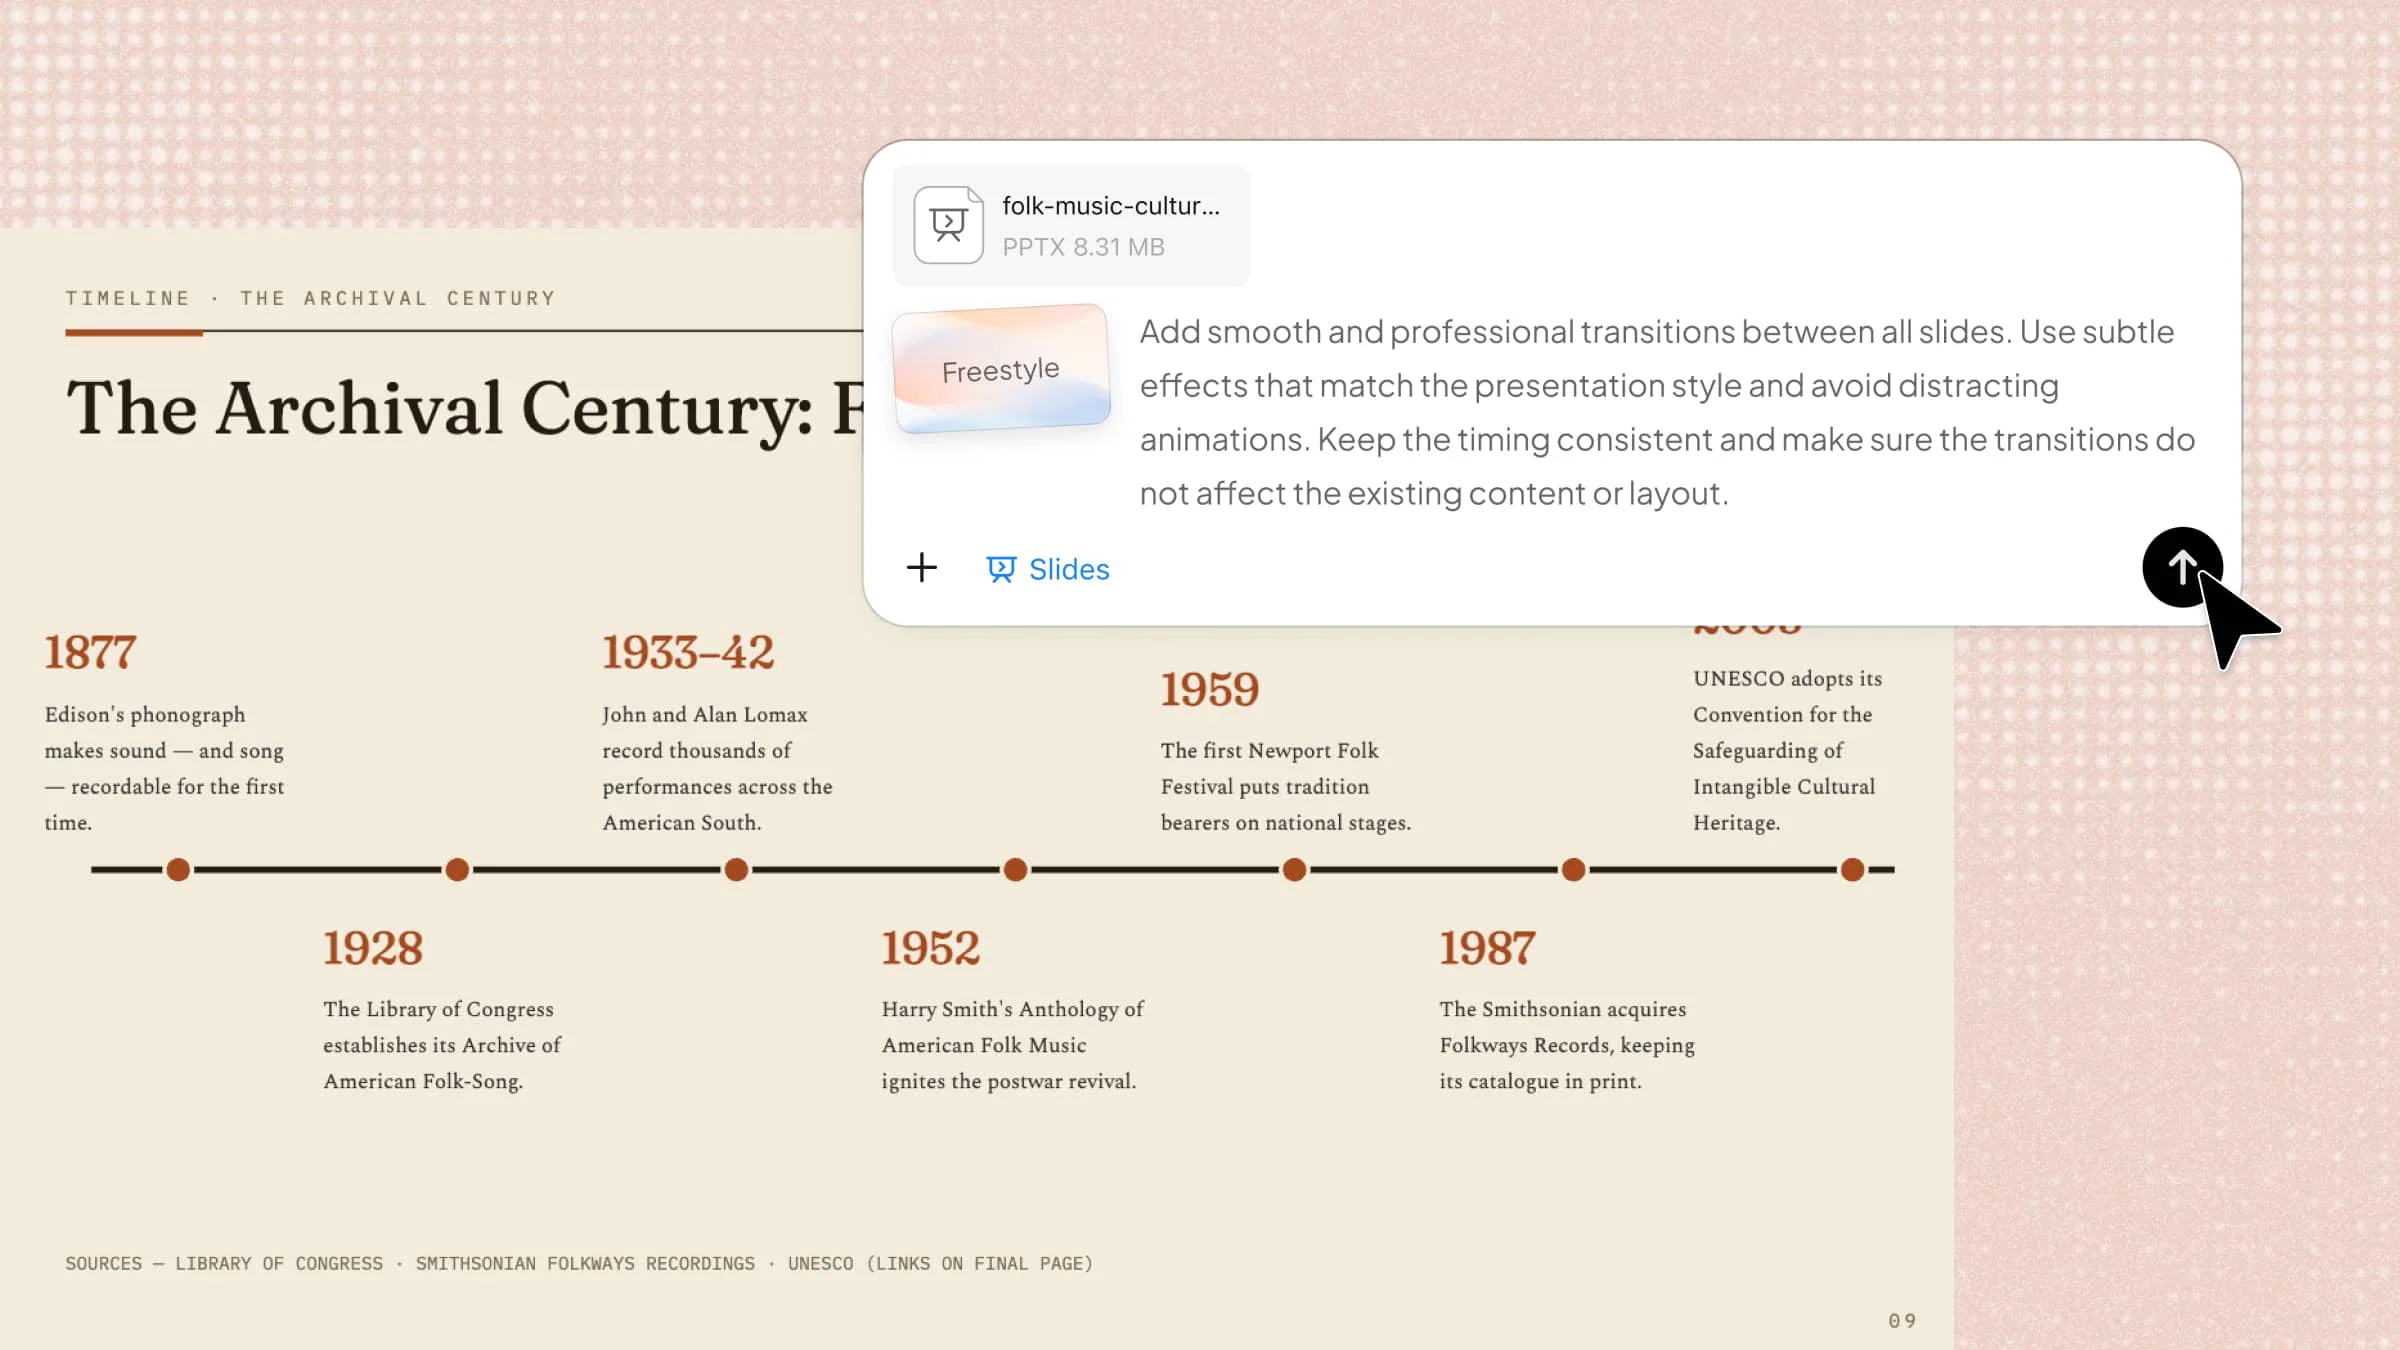
Using an AI tool can make it easier to apply transitions and refine your presentation without adjusting every slide manually. With Kimi Slides, an AI presentation maker, you can upload your existing PPT, describe the changes you want, and review the results before exporting the updated file.
Step 1: Upload your PPT file and enter the prompt
Upload your PowerPoint file to Kimi Slides and enter a clear prompt explaining how you want the transitions applied. Keep the prompt detailed enough to describe the desired effect, but no longer than five lines.

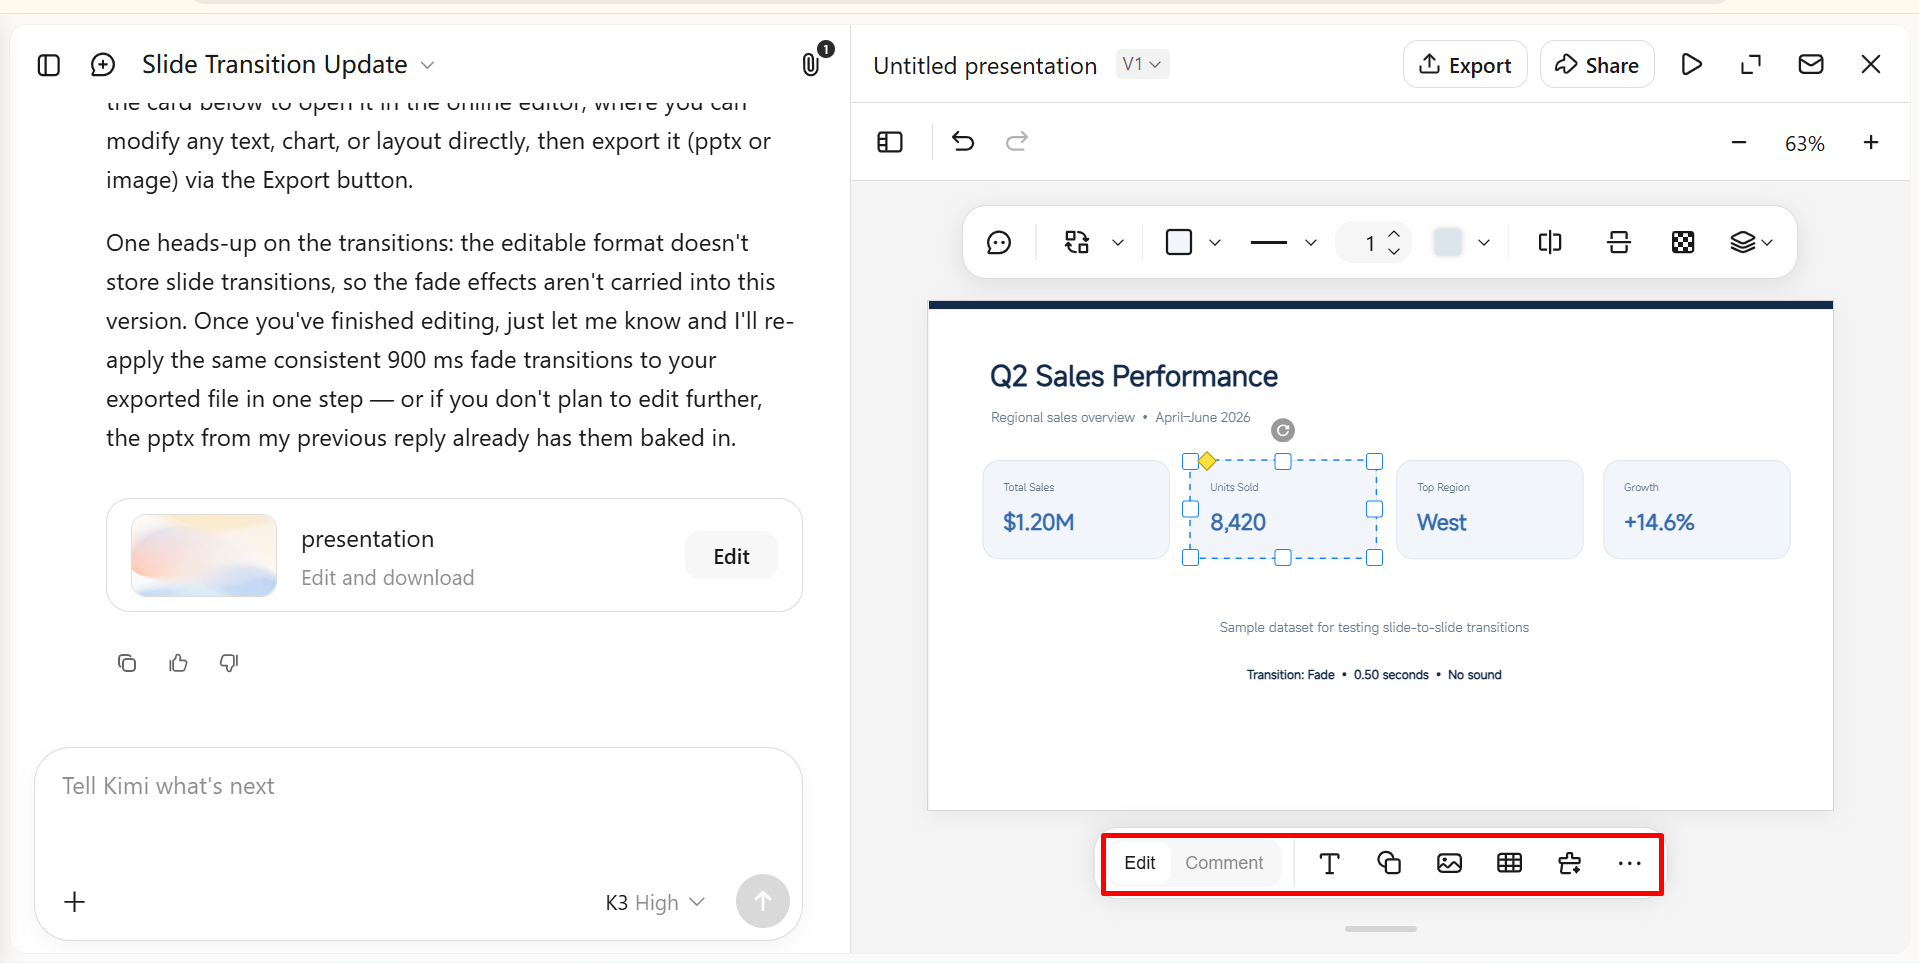
Step 2: Edit your PPT
Review the generated presentation and make changes as needed. You can edit elements manually, enter a prompt to describe the changes you want, or comment on a specific element and ask Kimi Slides to modify it. This makes it easy to refine transitions, timing, chart elements, and slide layouts.
Step 3: Preview and download the PPT file
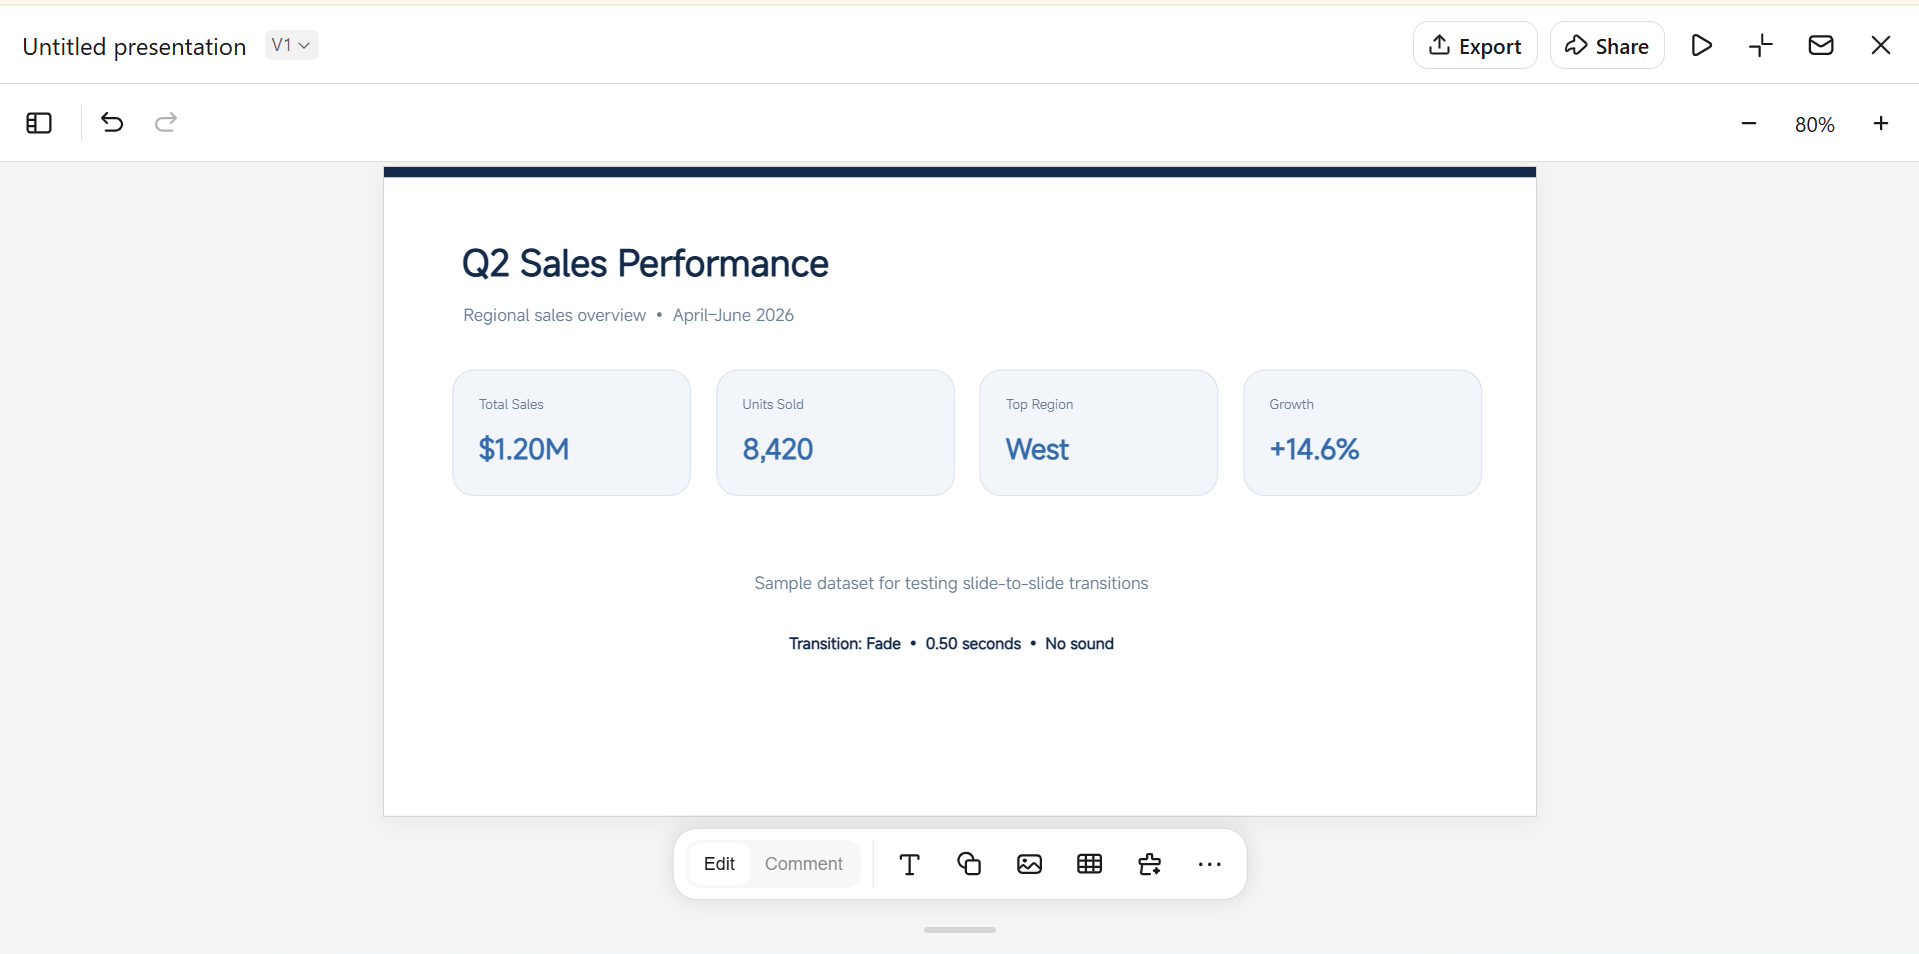
Preview the complete presentation to make sure the transitions look smooth and the content remains unchanged.
Once you're satisfied with the result, download the updated PowerPoint file and use it for your presentation.
Main features of Kimi Slides
Kimi Slides offers several useful features that can help you create, edit, and enhance PowerPoint presentations more efficiently.
Generate smooth transitions and animations: Automatically add fluid transitions and animation effects between slides to create a more engaging presentation. In the Preview interface, choose from different transition effects and adjust the way your slides move from one to the next.
Create visually consistent slides: Keep layouts, typography, colors, and visual elements consistent across the deck, so moving from one slide to the next feels smooth and cohesive.
Build clear connections between slides: Organize related information into a logical progression, making it easier to decide where to use subtle transitions and where a greater visual change is appropriate.
Customize slides with natural-language prompts: Refine layouts, content, visuals, and overall style simply by describing what you want to change, helping you prepare slides before adding transitions in PowerPoint.
Export editable PPTX for further customization: Export your finished deck as an editable PowerPoint file, then add, change, or fine-tune transitions directly in PowerPoint to match your presentation style.
How to add transitions to PowerPoint manually
PowerPoint includes built-in transition effects that you can apply directly to individual slides. You can choose from different effects, adjust their options, and preview the result before presenting. You can also use the same transition across the entire presentation or apply different effects to different slides. Follow the steps below to learn how to add PowerPoint transitions within a slide manually.
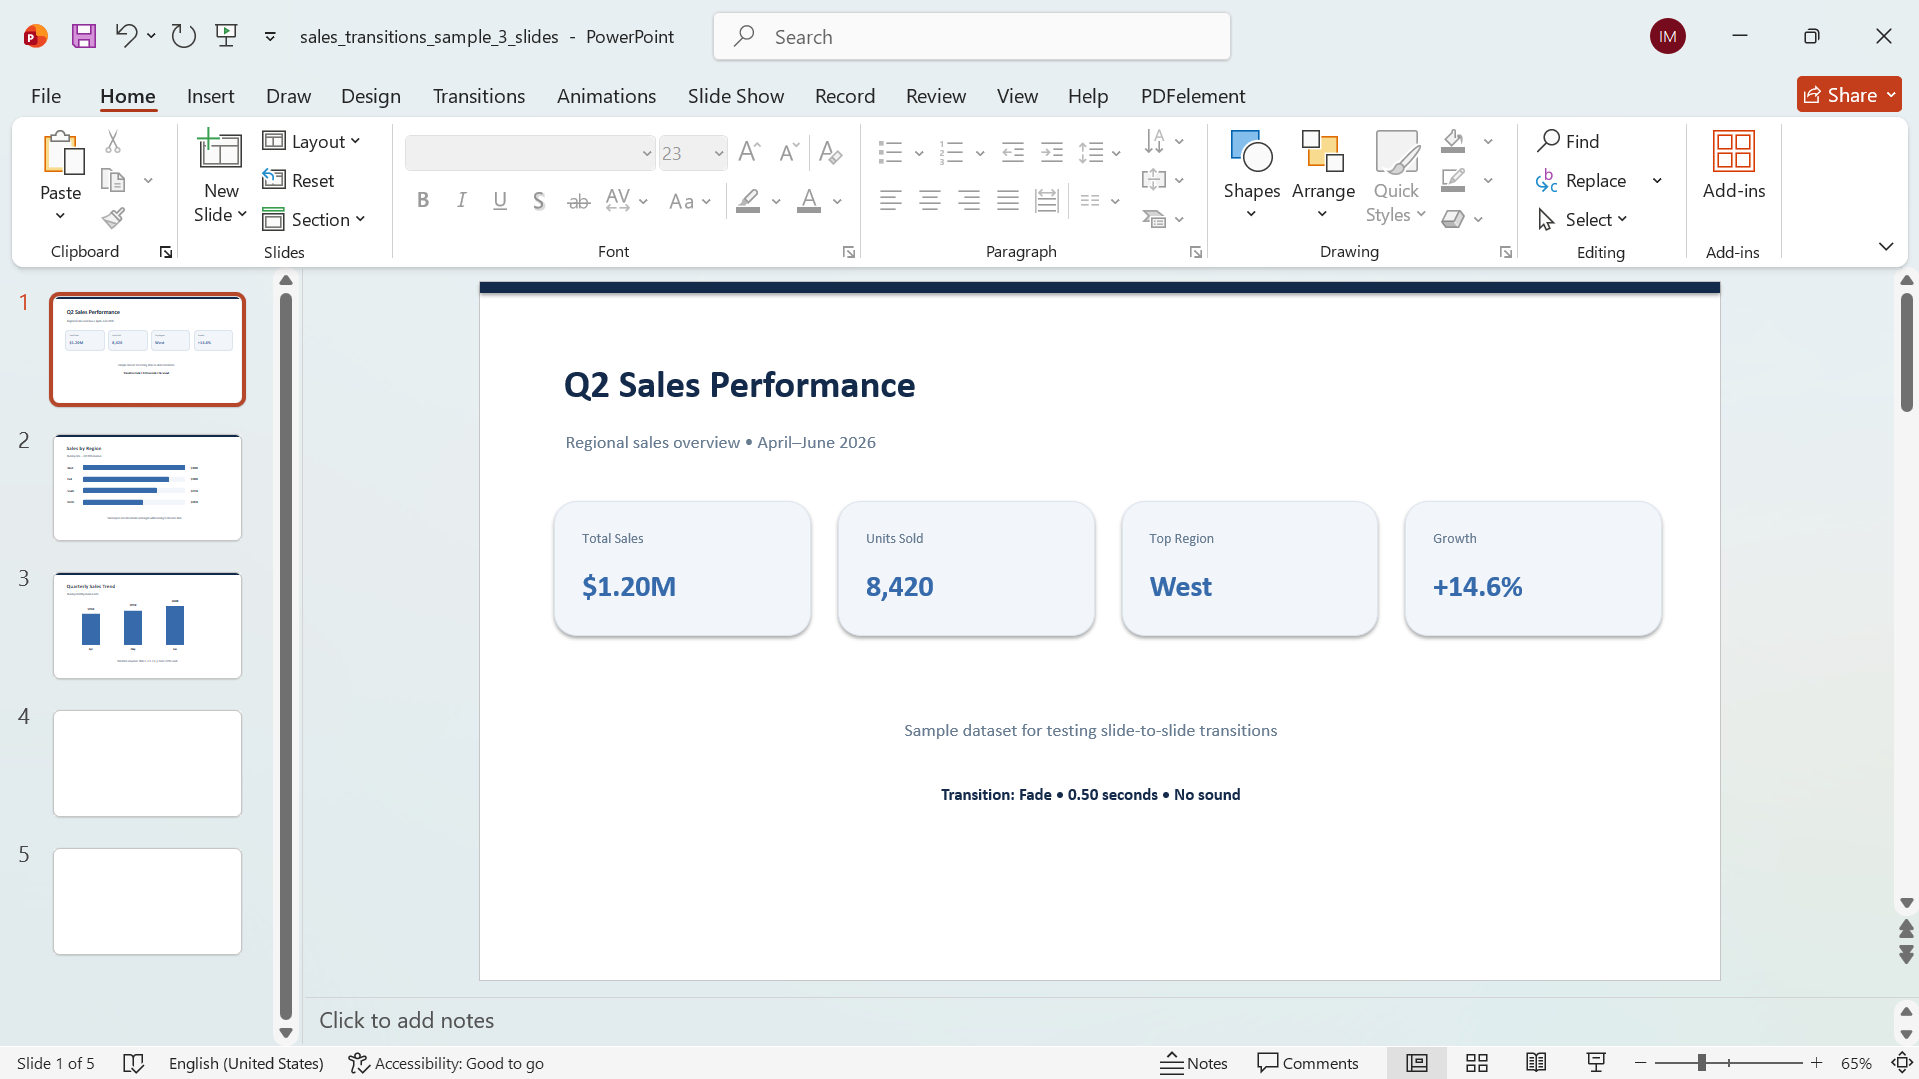
Step 1: Select the slide
Open your presentation in PowerPoint and select the slide where you want to add a transition. The effect will be applied when moving from the previous slide to the selected slide.
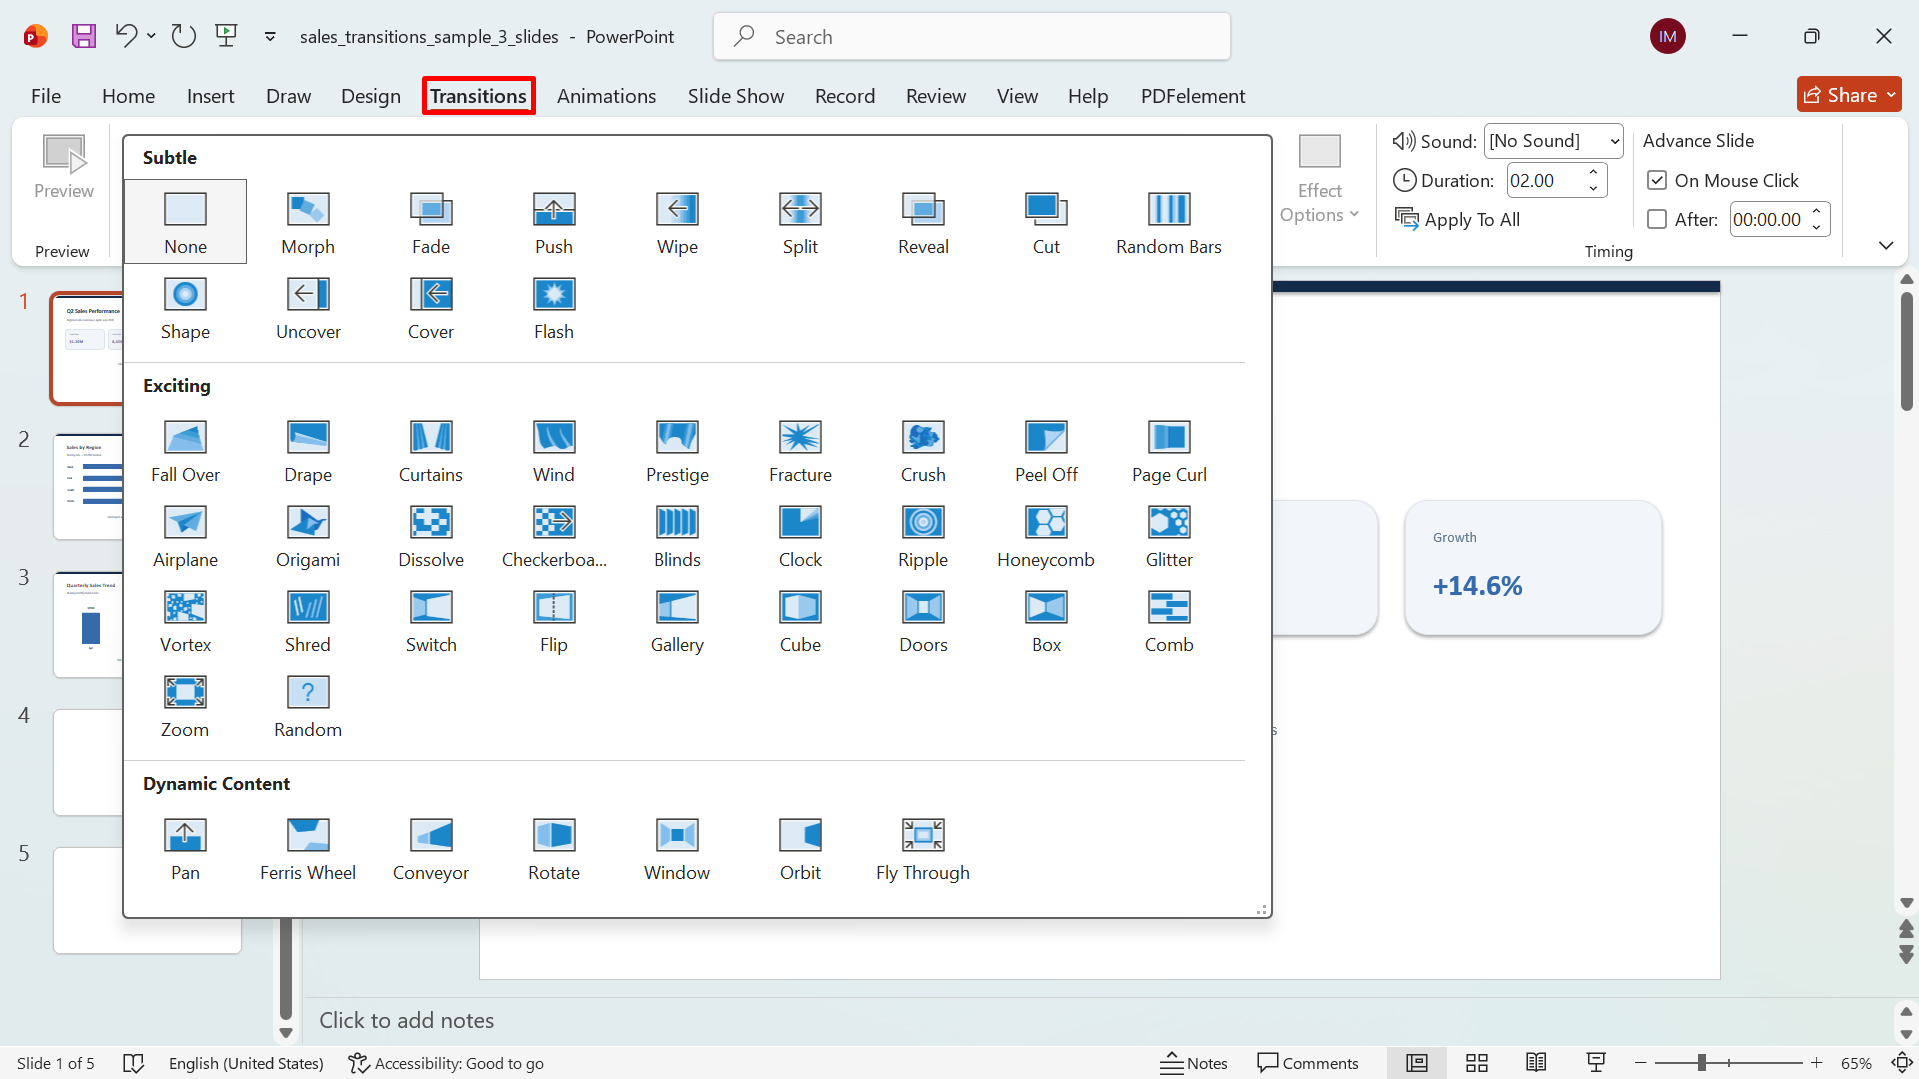
Step 2: Choose a transition effect
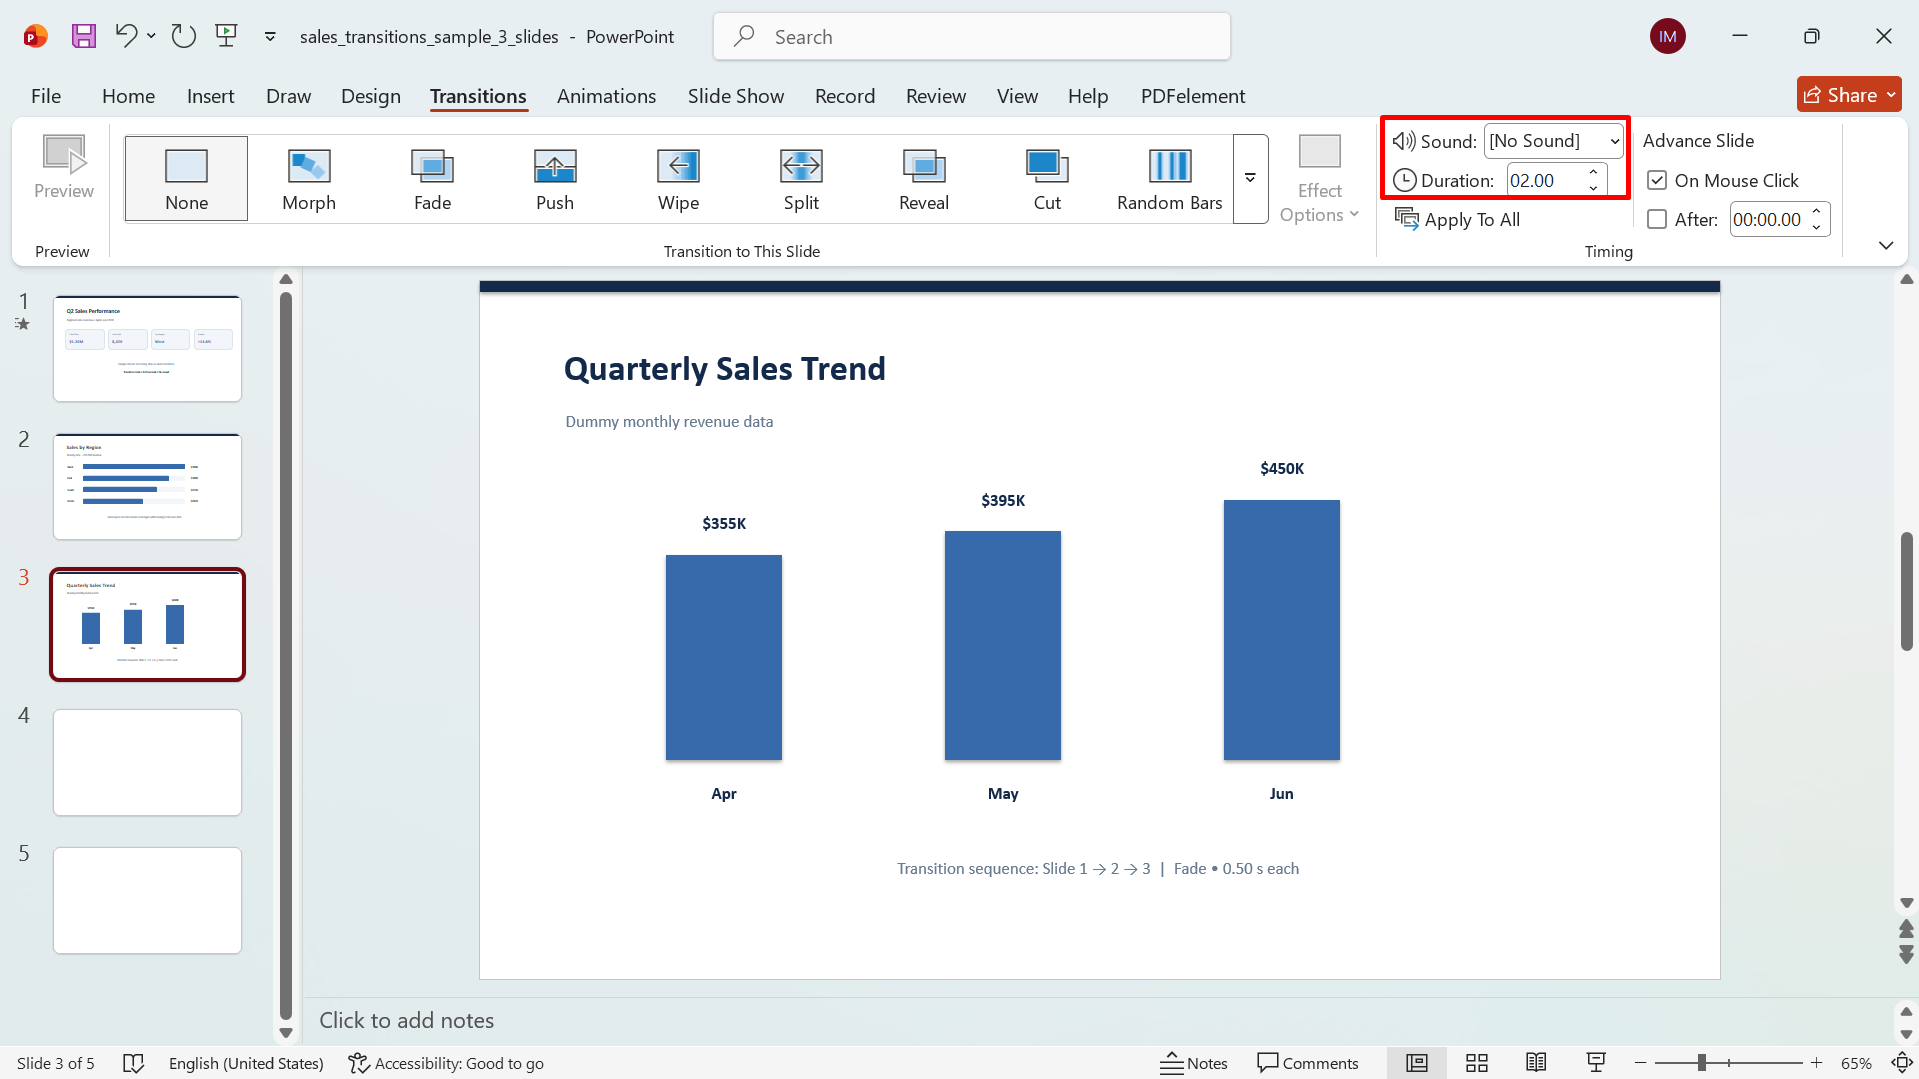
Click the "Transitions" tab in the PowerPoint ribbon to view the available effects. Select a transition you like, and click the arrow to explore more options.
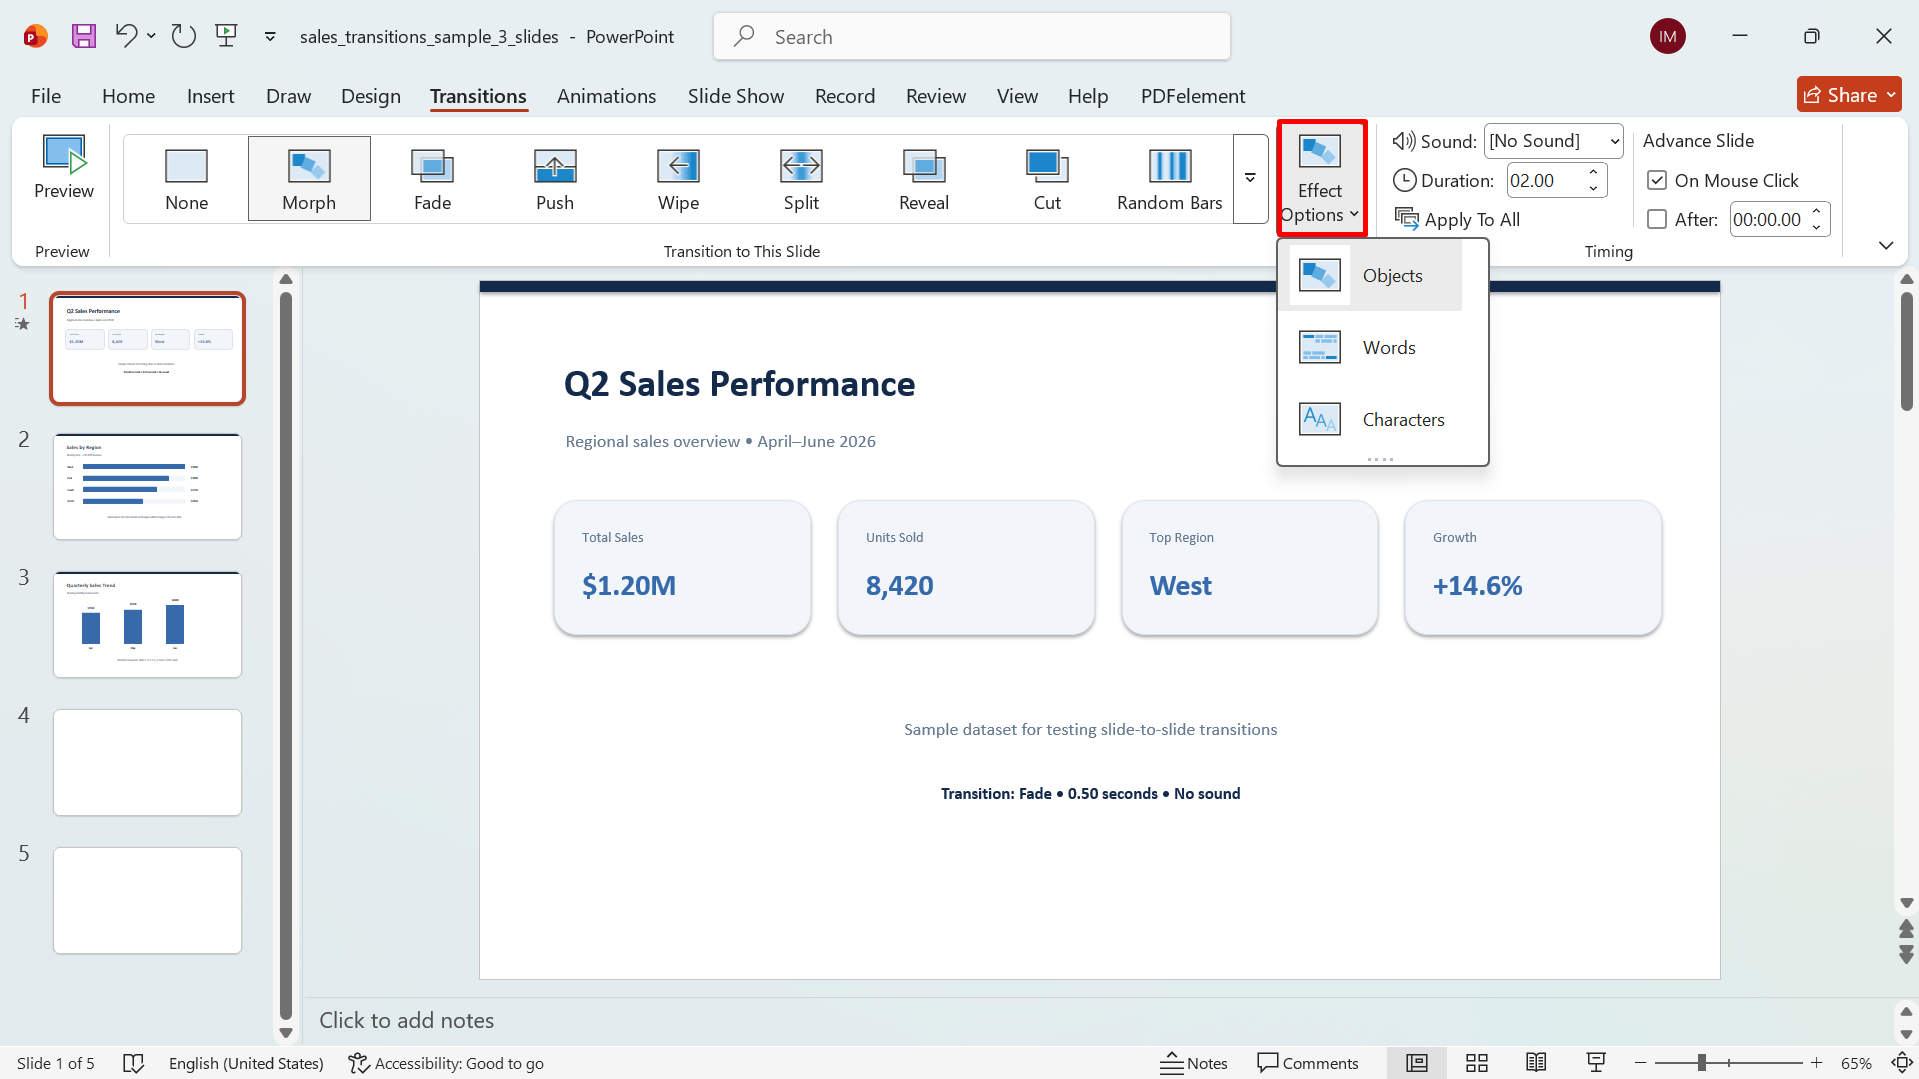
Step 3: Customize and preview the transition
Use "Effect Options" to adjust the transition when available. Click "Preview" to see how the effect looks, then adjust the sound, duration, or other settings until you're satisfied.
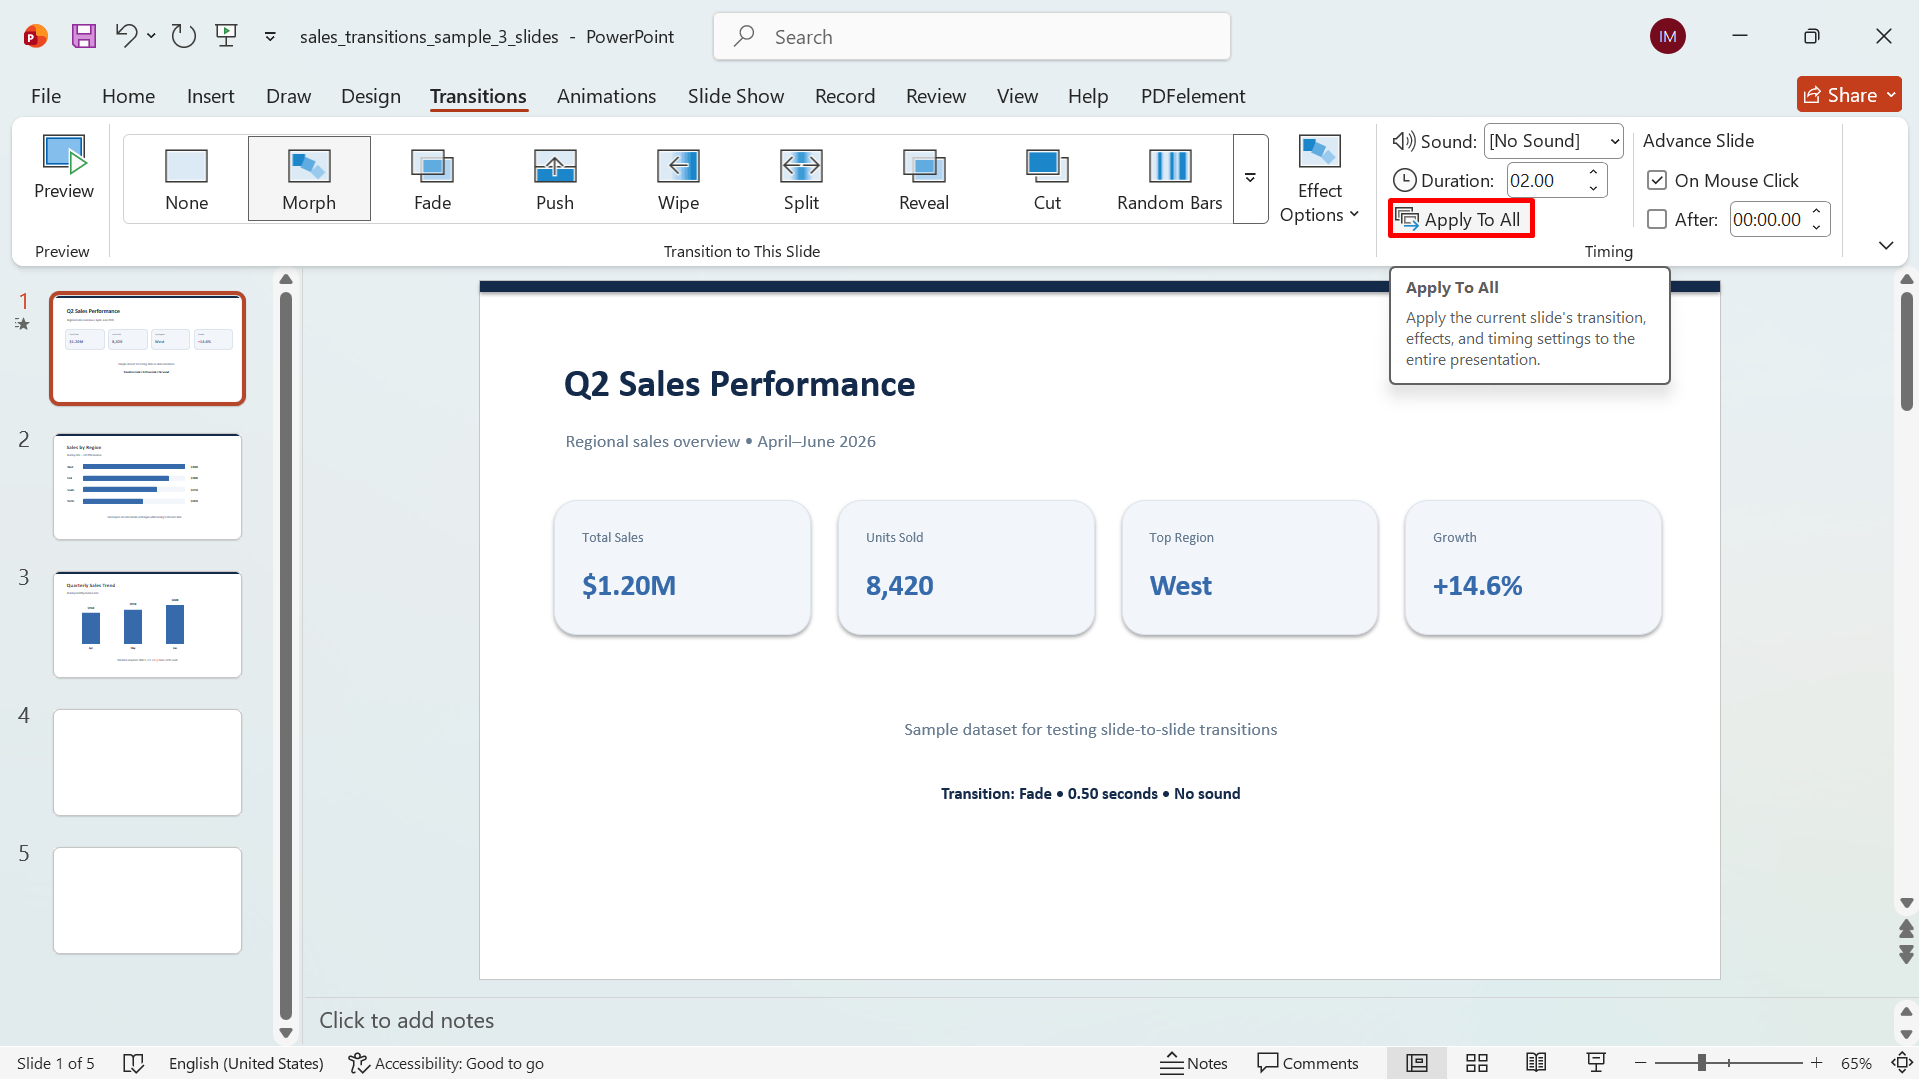
Step 4: Apply the transition to all slides
If you want the same transition throughout your presentation, click "Apply To All." Otherwise, you can select individual slides and use different transitions for each one.
Step 5: Review your presentation
Play through the presentation to make sure the transitions are smooth and do not distract you from your content. Make any final adjustments to the effects or timing before presenting.
Tips for choosing the right PowerPoint transitions
The right transition should improve the flow of your presentation without taking attention away from your message. If you're learning how to apply transitions to all slides in PowerPoint, these tips can help you choose effects that look polished and work well with your content.
Match transitions to your presentation style
Choose effects that fit the overall tone of your presentation. Simple fades can work well for professional presentations, while more dynamic effects may suit creative or informal topics.
Use transitions to signal a change
Transitions can help show when you are moving from one section or idea to another. Use a noticeable effect for major changes and simpler transitions when moving between related slides.
Keep the pace of your presentation in mind
Set the transition speed according to how quickly you present your content. Avoid effects that take too long or make the presentation feel slow.
Choose transitions that support your content
Select effects that complement your message and visuals instead of competing with them. For most presentations, subtle transitions are enough to create a smooth flow.
Keep transitions consistent across related slides
Using the same transition across a group of related slides creates a more unified presentation. Change the effect only when there is a clear reason to signal a new section or topic.
Test transitions in Slide Show mode
Preview your transitions in "Slide Show" mode to see how they feel during an actual presentation. Check the timing, movement, and overall flow, then make adjustments where needed.
Conclusion
Adding transitions can make your PowerPoint presentation smoother, more engaging, and easier to follow when used thoughtfully. If you're learning how to add transitions in PowerPoint, you can apply them manually for more control or use Kimi Slides to speed up the process. Choose effects that match your content, keep them consistent, and preview the final presentation before presenting.