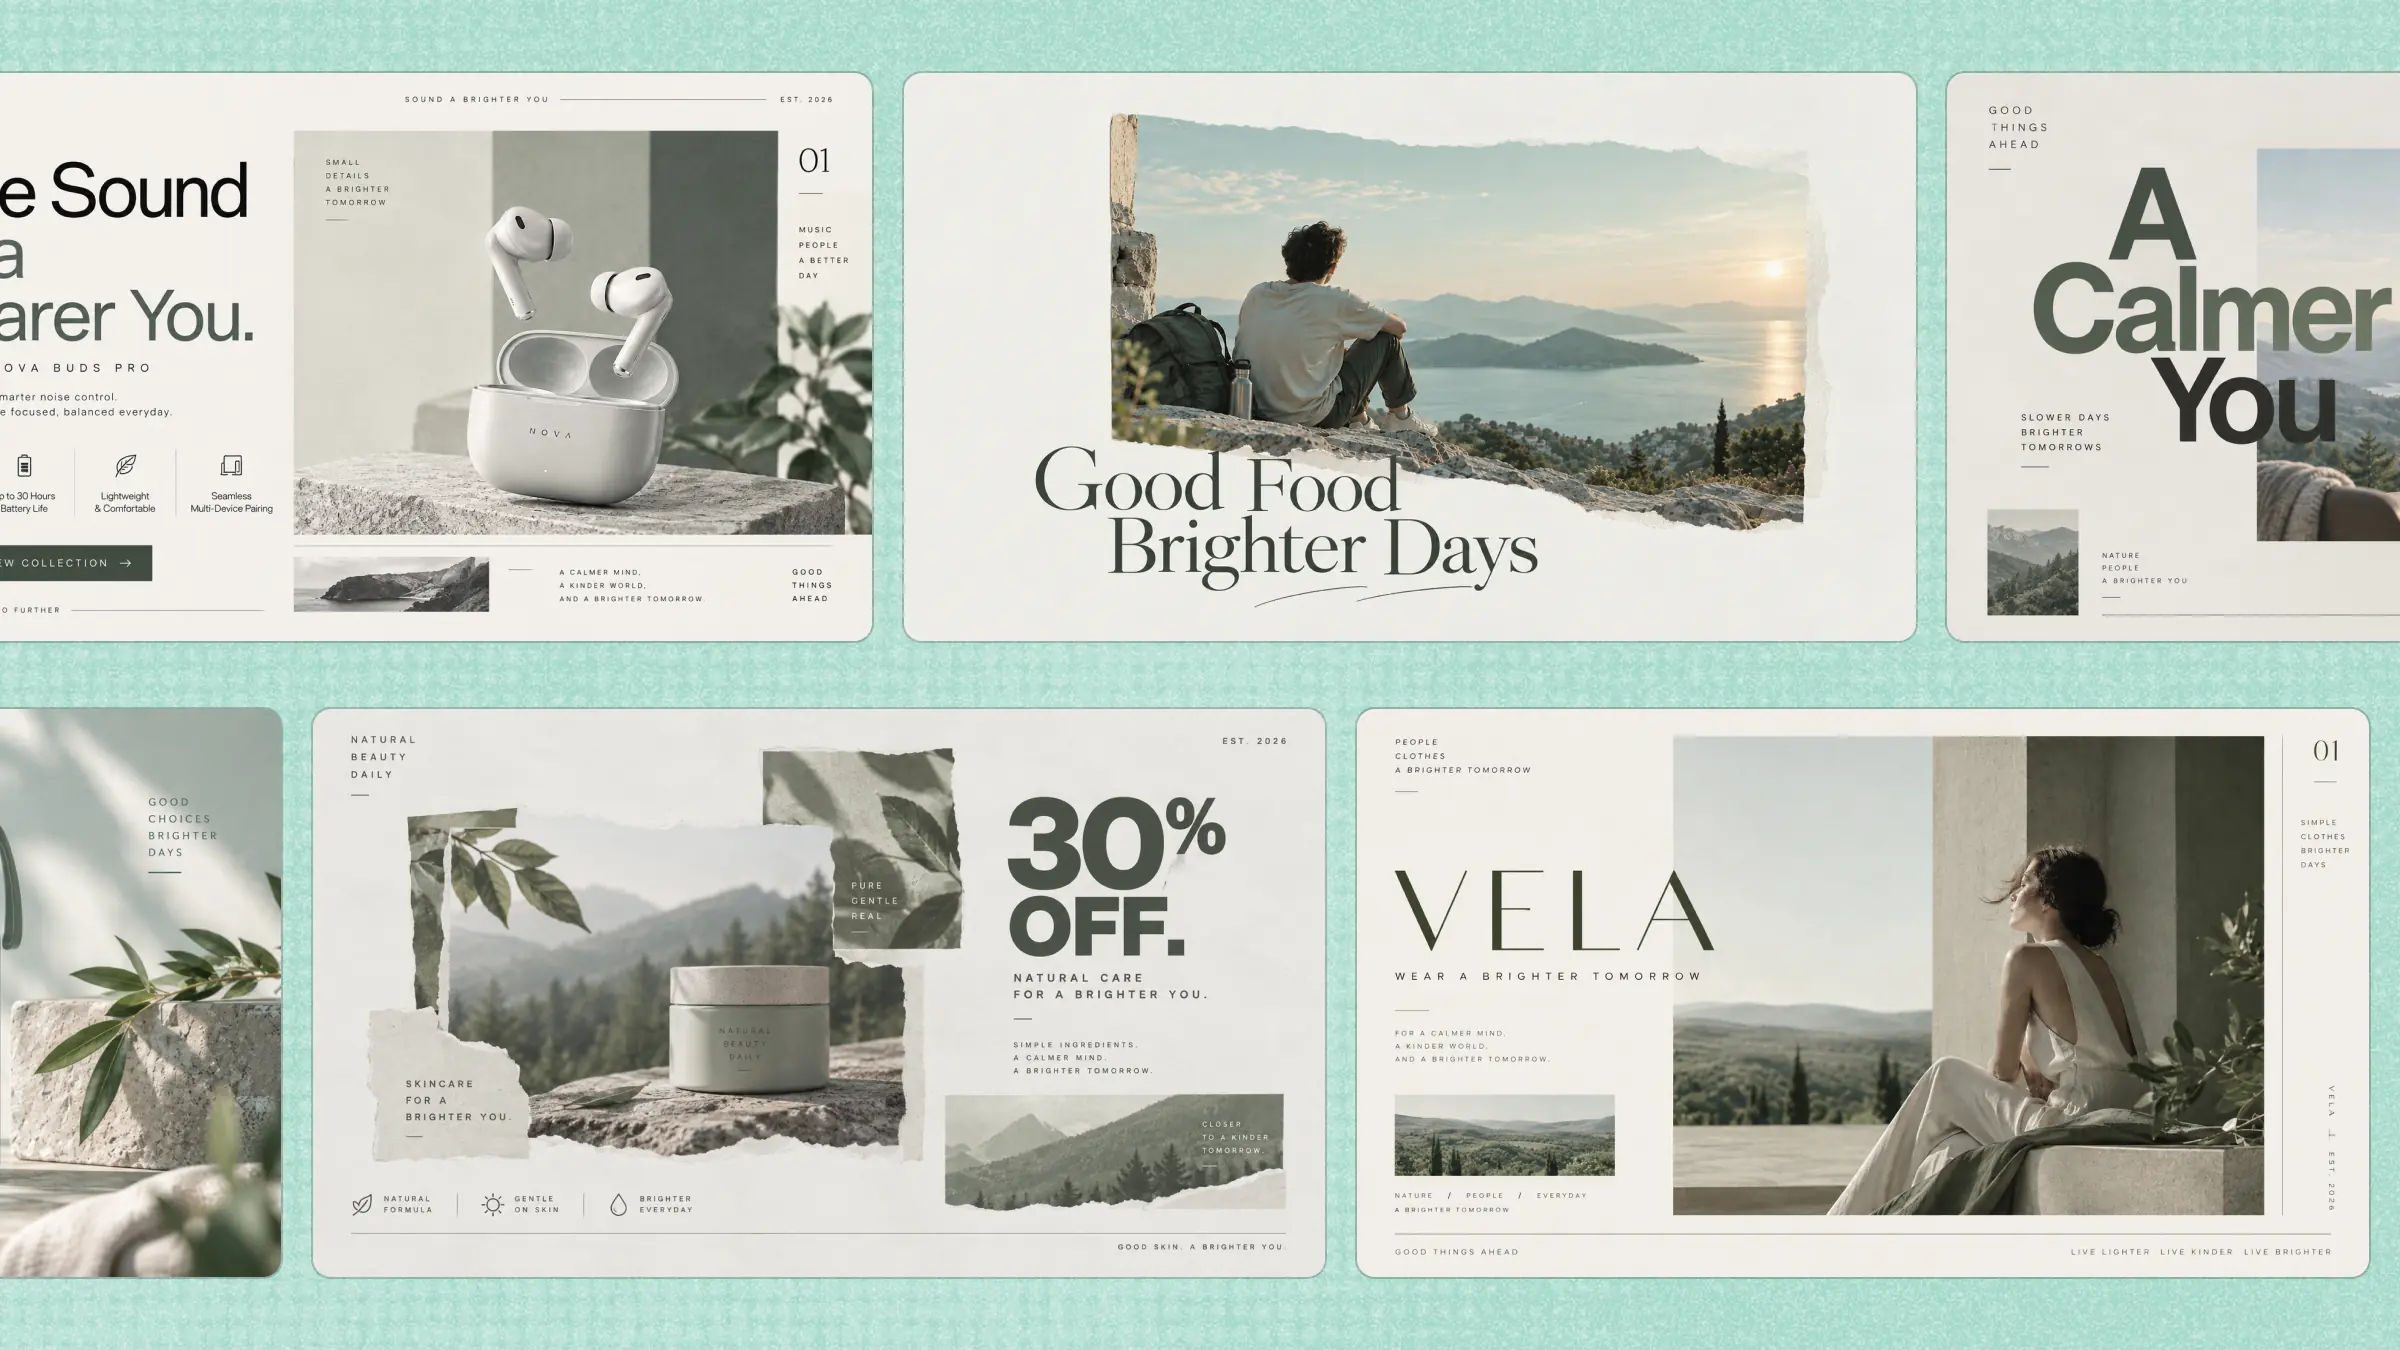
A good flyer needs to catch attention within seconds, but creating a design that looks professional and communicates the right message is not always easy. Poor layouts, crowded text, and unsuitable colors can make an otherwise useful flyer easy to overlook. The right flyer design ideas can help you create a more appealing layout while keeping your message clear and memorable. In this guide, you'll explore creative ideas and practical ways to turn them into flyers that capture attention and communicate effectively.
15 flyer design ideas to make your flyers stand out
A strong flyer starts with a design choice that catches the eye before the reader even notices the details. The following flyer design ideas can help you create eye-catching flyers that communicate your message effectively.
Make a statement with bold colors
Bold colors can make your flyer stand out at first glance. Pick two or three contrasting shades and use them throughout the design for a consistent look. You can use the brightest color for attention-grabbing elements such as the headline, special offer, or CTA. Keep the rest of the design simple so the colors add energy without making the flyer feel too busy.
How to create a flyer from your design idea
Step 1: Enter your prompt
Open the Kimi website and enter a detailed prompt describing your flyer idea. The clearer your prompt is, the better Kimi can understand your requirements.
Here is an example prompt:
Prompt:
Step 2: Let AI generate your flyer
Once you enter the prompt, let Kimi process your design instructions and generate the flyer.
Step 3: Review and export
Take a quick look at the generated flyer and make changes if needed. Once the flyer is finalized, export it in a suitable format.
Let one image take center stage
A single striking image can often say more than several design elements. Choose a high-quality photo that captures the main idea of your flyer at a glance, then make it the focal point of the layout. Keep the supporting text short and place it where it is easy to read without distracting from the image. This approach keeps your flyer clean, visually appealing, and easy to understand.
How to create a flyer from your design idea
Step 1: Enter your prompt
Visit the Kimi website and enter a prompt in detail.
Here is an example prompt:
Prompt:
Step 2: Let AI generate your flyer
Submit the prompt and let Kimi turn your idea into a flyer. The AI will arrange the main image, text, and other elements while keeping the photo as the dominant visual.
Step 3: Review and export
Review the generated flyer to make sure the main image stands out. Once everything looks right, export the finished design in a suitable format.
Keep it clean with a minimalist design
Minimalist layouts are among the most effective simple flyer design ideas when you want readers to focus on one message, product, service, or announcement. Use a limited color palette, concise copy, restrained visuals, and plenty of white space to create a professional design without unnecessary distractions.
How to create a flyer from your design idea
Step 1: Enter your prompt
Go to the Kimi website and describe your minimalist flyer idea in a clear prompt.
Here is an example prompt:
Prompt:
Step 2: Let AI generate your flyer
Submit your prompt and let Kimi turn your instructions into a clean flyer design. The AI will arrange the text, visuals, colors, and spacing while keeping the minimalist style in focus.
Step 3: Review and export
Review the generated flyer. Check the text, spacing, colors, and visual elements, then export the finalized design for your intended use.
Create contrast with a dark background
A dark background can instantly give a flyer a premium and dramatic feel. Try black, deep navy, or another dark shade with bright typography, photography, or graphic accents. Strong contrast also helps important information stand out without adding too many decorative elements.
How to create a flyer from your design idea
Step 1: Enter your prompt
Start with a detailed prompt that tells Kimi to use a dark background as the foundation of the design.
Here is an example prompt:
Prompt:
Step 2: Let AI generate your flyer
Let Kimi interpret the prompt and create the visual composition. It will bring the dark color scheme, high-contrast elements, imagery, and event details together
Step 3: Review and export
Check whether the text remains readable against the dark background and the important details are easy to find. Then export the final flyer.
Turn typography into the main visual
A powerful headline can become the star of your flyer without relying heavily on images. Experiment with oversized text, different font weights, line breaks, or stacked words to give a simple message a more visual impact. Keep supporting details smaller, so the headline remains the first thing readers notice.
How to create a flyer from your design idea
Step 1: Enter your prompt
Enter a prompt in which you tell the AI that typography should be the primary visual element of your flyer.
Here is an example prompt:
Prompt:
Step 2: Let AI generate your flyer
Submit the prompt to Kimi. The AI will arrange the headline and supporting details to create a strong visual hierarchy.
Step 3: Review and export
Review the generated flyer. Once the typography feels balanced, export your completed flyer.
Add energy with an asymmetrical layout
Move beyond traditional columns by placing text and images at different scales or angles. An asymmetrical layout can make a flyer feel more dynamic and create a stronger sense of movement. Just make sure the unconventional arrangement still guides readers toward the most important information.
How to create a flyer from your design idea
Step 1: Enter your prompt
Describe the unconventional layout you want Kimi to create, including the placement of images, text blocks, shapes, and other elements.
Here is an example prompt:
Prompt:
Step 2: Let AI generate your flyer
Kimi will use your instructions to arrange the different elements in an asymmetrical composition.
Step 3: Review and export
See if your eyes naturally move from the headline to the supporting details and CTA. Make adjustments where needed, then export the final version.
Tell a story with a photo collage
A photo collage gives you room to showcase several related images in one design. Combine related images in a structured grid or dynamic arrangement, then add short captions or headings to connect them. It can be especially useful for food flyer design ideas, allowing restaurants, cafés, and food businesses to feature multiple dishes, ingredients, or moments while keeping the overall composition cohesive.
How to create a flyer from your design idea
Step 1: Enter your prompt
Open Kimi and enter the prompt.
Here is an example prompt:
Prompt:
Step 2: Let AI generate your flyer
Send your prompt and let Kimi arrange the photos into a unified composition.
Step 3: Review and export
Look at the collage as a whole and check that no single image overwhelms the others. Then export the finished design to a suitable format.
Give your flyer a retro feel
Retro-inspired design can bring a nostalgic personality to your flyer. Use vintage colors, typography, textures, borders, or graphic details that match the subject. The goal is to make the style feel intentional while keeping the important information clear and easy to read.
How to create a flyer from your design idea
Step 1: Enter your prompt
Give Kimi a clear description of the era or retro style you want to recreate. Include details about the colors, typography, textures, illustrations, and information that should appear on the flyer.
Prompt:
Step 2: Let AI generate your flyer
Once you submit the prompt, Kimi will translate the retro references into a complete flyer design. It will combine the vintage colors, textures, typography, and graphics into one composition.
Step 3: Review and export
Check whether the retro effects enhance the flyer without making the text difficult to read. Fine-tune the design if needed, then export your final version.
Make it personal with hand-drawn elements
Hand-drawn elements can give a flyer a friendly and distinctive personality. Add doodles, handwritten lettering, sketches, or illustrated icons to create a more approachable look. This style works particularly well for creative services, workshops, community events, and personal brands.
How to create a flyer from your design idea
Step 1: Enter your prompt
Explain the handmade look you want and mention specific elements such as doodles, sketches, handwritten text, or illustrated icons. Also include the information your flyer needs to display.
Prompt:
Step 2: Let AI generate your flyer
Send the prompt to Kimi and let it create the handmade-style composition. The AI will combine the illustrations, typography, colors, and event information into the requested design.
Step 3: Review and export
Make sure the hand-drawn details add personality without distracting from the main information. Check the readability and layout, then export the finished flyer.
Use shapes to build a playful composition
Simple shapes can add movement and visual rhythm to a flyer without relying on complex graphics. Try circles, waves, blobs, stickers, lines, or geometric forms to break up large areas of text. Keep them connected to the overall theme so they support the design instead of becoming unnecessary decoration.
How to create a flyer from your design idea
Step 1: Enter your prompt
Tell Kimi which shapes and visual elements you want to include and explain how they should work with the text and imagery. Add the desired mood, color direction, and key information.
Prompt:
Step 2: Let AI generate your flyer
Kimi will arrange the shapes, illustrations, typography, and content into a playful composition. Let the AI establish the overall rhythm while keeping the information organized.
Step 3: Review and export
Check that the decorative shapes do not hide or compete with important details. Once the layout feels fun but still easy to scan, export your flyer.
Turn information into an infographic
When a flyer needs to communicate several facts, visual organization can make the information easier to digest. Use icons, numbers, diagrams, or short blocks of copy to divide the content into clear sections. This approach works better than filling the flyer with long paragraphs.
How to create a flyer from your design idea
Step 1: Enter your prompt
List the information you need to include and tell Kimi how you want it organized. Mention the number of sections, preferred visual elements, headline, and CTA.
Prompt:
Step 2: Let AI generate your flyer
Submit the instructions and allow Kimi to organize the information into a visual layout. It will use sections, icons, numbers, and typography to make the content easier to scan.
Step 3: Review and export
Read through each section and make sure the information flows logically from one point to the next. Fix any crowded areas or unclear text before exporting the final flyer.
Put the product in the spotlight
Product flyer design ideas work best when the featured item is the first thing viewers notice. Give the product enough space to stand out, then use concise supporting text to highlight its key benefit or features. Keep decorative elements subtle so the main product stays in focus and viewers can quickly understand what you're promoting.
How to create a flyer from your design idea
Step 1: Enter your prompt
Tell Kimi which product should dominate the composition and provide the key features you want to highlight. Include details about the background, imagery, headline, and CTA.
Prompt:
Step 2: Let AI generate your flyer
Kimi will build the flyer around the featured product and arrange the supporting information around it. The result should keep the product visually dominant while maintaining a clean layout.
Step 3: Review and export
Check that the product is clearly visible and the key benefits are easy to find. Review the CTA and other details, then export the finished promotional design
Design around a seasonal moment
Seasonal design can instantly connect a flyer with a particular time of year or occasion. Use relevant colors, imagery, patterns, and typography to create the right atmosphere. A summer promotion, Halloween event, or holiday sale can each have a distinct visual style while keeping the core message clear.
How to create a flyer from your design idea
Step 1: Enter your prompt
Describe the season or occasion you want your flyer to represent. Include relevant imagery, colors, atmosphere, event details, and the CTA you want Kimi to feature.
Prompt:
Step 2: Let AI generate your flyer
Let Kimi translate your seasonal concept into a complete visual design. It will combine the requested imagery, colors, typography, and event information to create the desired atmosphere.
Step 3: Review and export
Check that the seasonal elements support the message rather than overwhelming it. Once the event details are clear and the design feels balanced, export the final flyer.
Build around a question
A question can make a flyer more engaging by addressing a need or concern that matters to the audience. Follow the question with a concise answer, benefit, or solution, so the headline naturally leads readers to the rest of the content. This approach can work particularly well for flyer design ideas for business, especially when promoting a service.
How to create a flyer from your design idea
Step 1: Enter your prompt
Give Kimi the exact question you want to use as the headline and explain what information should follow it. Add details about the imagery, benefits, layout, and CTA.
Prompt:
Step 2: Let AI generate your flyer
Submit the prompt and let Kimi build the design around the question. The AI will arrange the headline, supporting visuals, benefits, and CTA to create a clear visual flow.
Step 3: Review and export
See if the question immediately catches your attention and leads naturally into the solution. Check the supporting details and CTA, then export the completed flyer.
Make the offer impossible to miss
A strong promotional offer deserves a prominent place in the flyer. Use size, contrast, spacing, and clear typography to make a discount, giveaway, or special incentive immediately noticeable. The layout should tell readers what they get and what action they should take next. This approach works particularly well for fashion flyer design ideas, retail promotions, and limited-time sales.
How to create a flyer from your design idea
Step 1: Enter your prompt
Start by telling Kimi which offer should receive the most visual attention. Include the discount, supporting imagery, sale details, and CTA so the AI can build a clear promotional hierarchy.
Prompt:
Step 2: Let AI generate your flyer
Kimi will turn your offer and design instructions into a promotional flyer with the discount as the main visual focus.
Step 3: Review and export
Make sure the offer is impossible to miss, and the sale details are easy to understand. Once the design looks polished and the CTA is clear, export the final flyer.
Why choose Kimi Design to design your flyer
Kimi Design is an AI-powered design tool that helps turn your ideas, references, and instructions into professional visual content. For flyer creation, it gives you flexible ways to generate, customize, and refine designs. Here are some reasons to choose Kimi Design for your flyer.
Turn your ideas and references into a complete flyer design
Describe your promotion, audience, message, and preferred style in a prompt, then upload images or visual references to show the look you have in mind. Kimi Design can combine your instructions and references to create a complete flyer with a cohesive layout and visual direction.
Create a flyer tailored to your campaign
Shape the visual direction through your prompt based on your promotion, product, audience, or message. Describe the look you want, from minimalist and retro to editorial, playful, or bold, and refine the design through conversation. You can also use MusePool to bring in distinctive visual references and create a more distinctive design, rather than relying on a one-size-fits-all template.
Refine your flyer your way
Make changes through conversation to have AI revise the design, leave comments on specific elements for targeted AI-assisted revisions, or adjust the design manually when you want more control. Whether you're reworking the overall layout or fine-tuning individual details, you can choose the editing approach that fits the change you want to make.
Export your flyer and revisit past versions
Export your finished flyer in PNG, JPG, and PDF formats for different uses, while keeping access to previous versions along the way. Easily return to an earlier version when you want to compare changes, recover a previous design, or continue refining from where you left off.
Tips to make your flyer clearer and more eye-catching
A well-designed flyer should not only grab attention but also make the message easy to understand at a glance. Here are some tips to make your flyer more attractive and effective.
Design for your audience
Think about who will see your flyer and where they are likely to encounter it. For event flyer design ideas, for example, the visuals and wording should match the audience and atmosphere of the event while making essential details easy to find.
Plan your content
Decide which details your audience actually needs before arranging the layout. If you are working on school flyer design ideas, for instance, focus on essential information such as the activity, age group, date, schedule, and registration details rather than filling the design with unnecessary copy.
Build a natural reading flow
Guide readers naturally from the main message to the supporting details and, finally, to the CTA. Give the most important elements greater visual emphasis instead of making everything compete for attention.
Keep branding consistent
Use your brand's colors, fonts, logo, imagery, and other visual elements to give the flyer a familiar look. Consistent branding also helps the design fit naturally with your website, social media posts, and other marketing materials.
Review it from a reader's perspective
Take a final look at your flyer as if you are seeing it for the first time. Make sure the message is easy to understand, remove anything unnecessary, and check that the key information and next step stand out clearly.
Conclusion
Choosing the right flyer concept depends on your campaign, audience, and the type of information you need to present. The 15 flyer design ideas above give you different creative directions to explore, from bold promotional designs to product-focused and seasonal layouts. Kimi Design can turn your chosen concept into a professional flyer based on your instructions and references