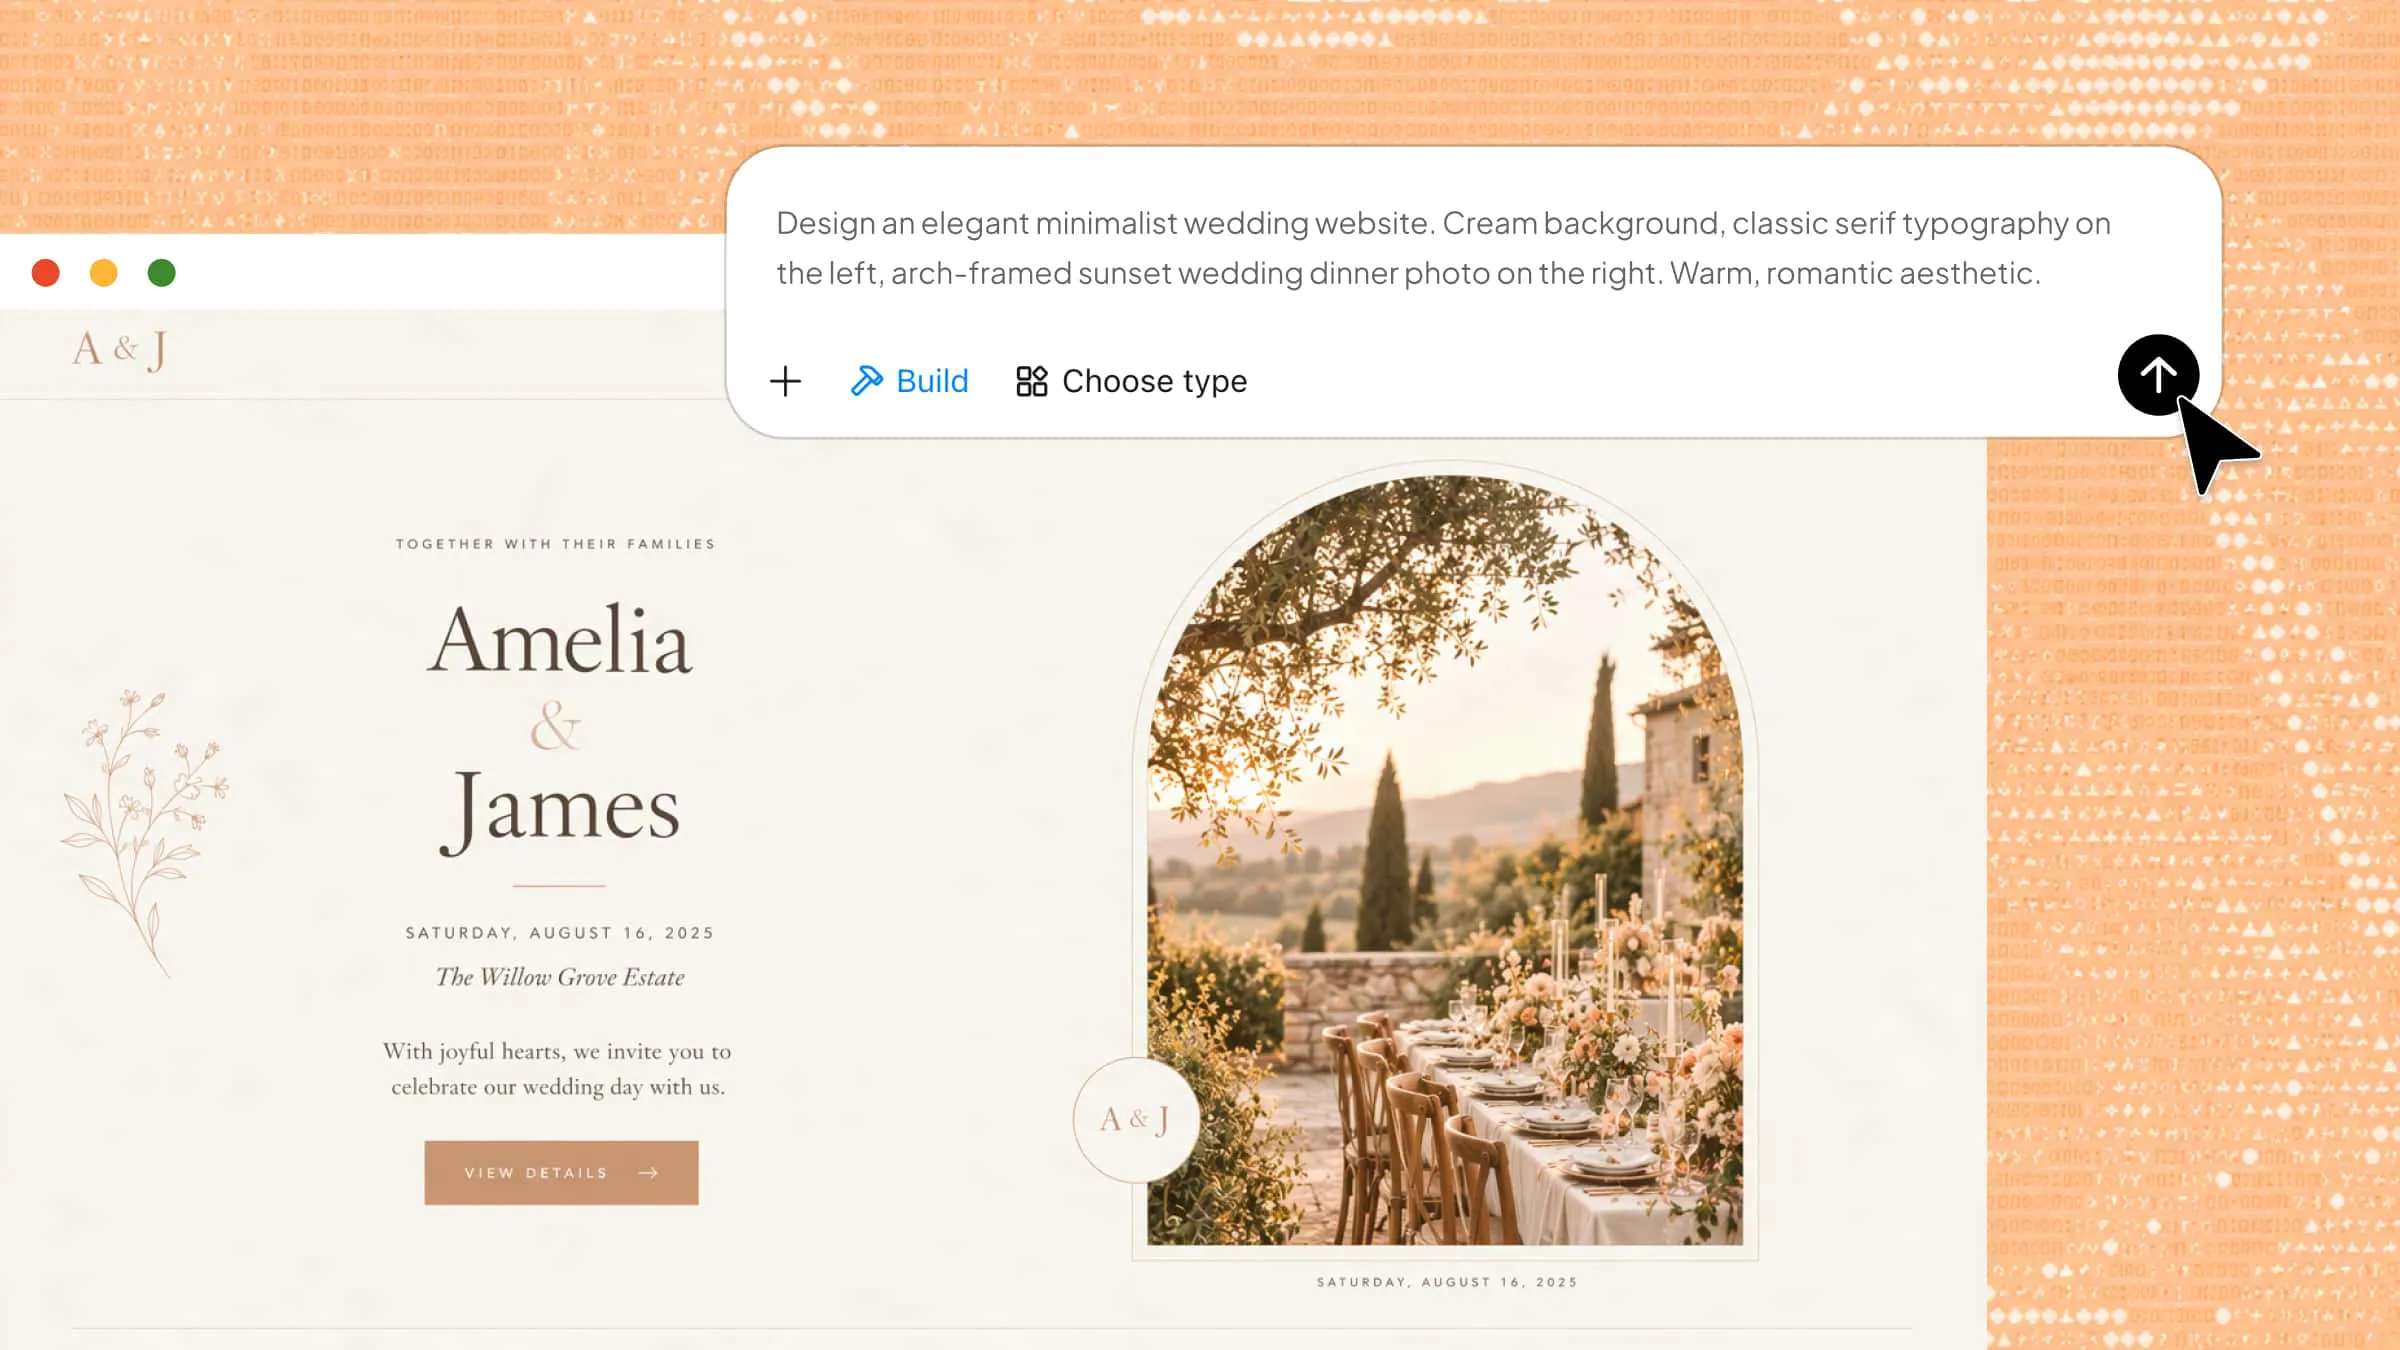
Planning a wedding involves keeping guests informed about important details, from the venue and schedule to accommodation and RSVP updates. Sharing all this information through separate messages can quickly become confusing and time-consuming. Creating a wedding website offers a simple way to organize everything in one place and give guests easy access to the details they need. In this guide, we'll walk you through how to create a wedding website, explore essential features, and share tips for designing a beautiful and informative site.
Essential pages to include on a wedding website
When you build a wedding website, organizing information into dedicated pages helps guests find important details easily. Here are the essential pages to include to make your site informative, personal, and easy to navigate.
Home page
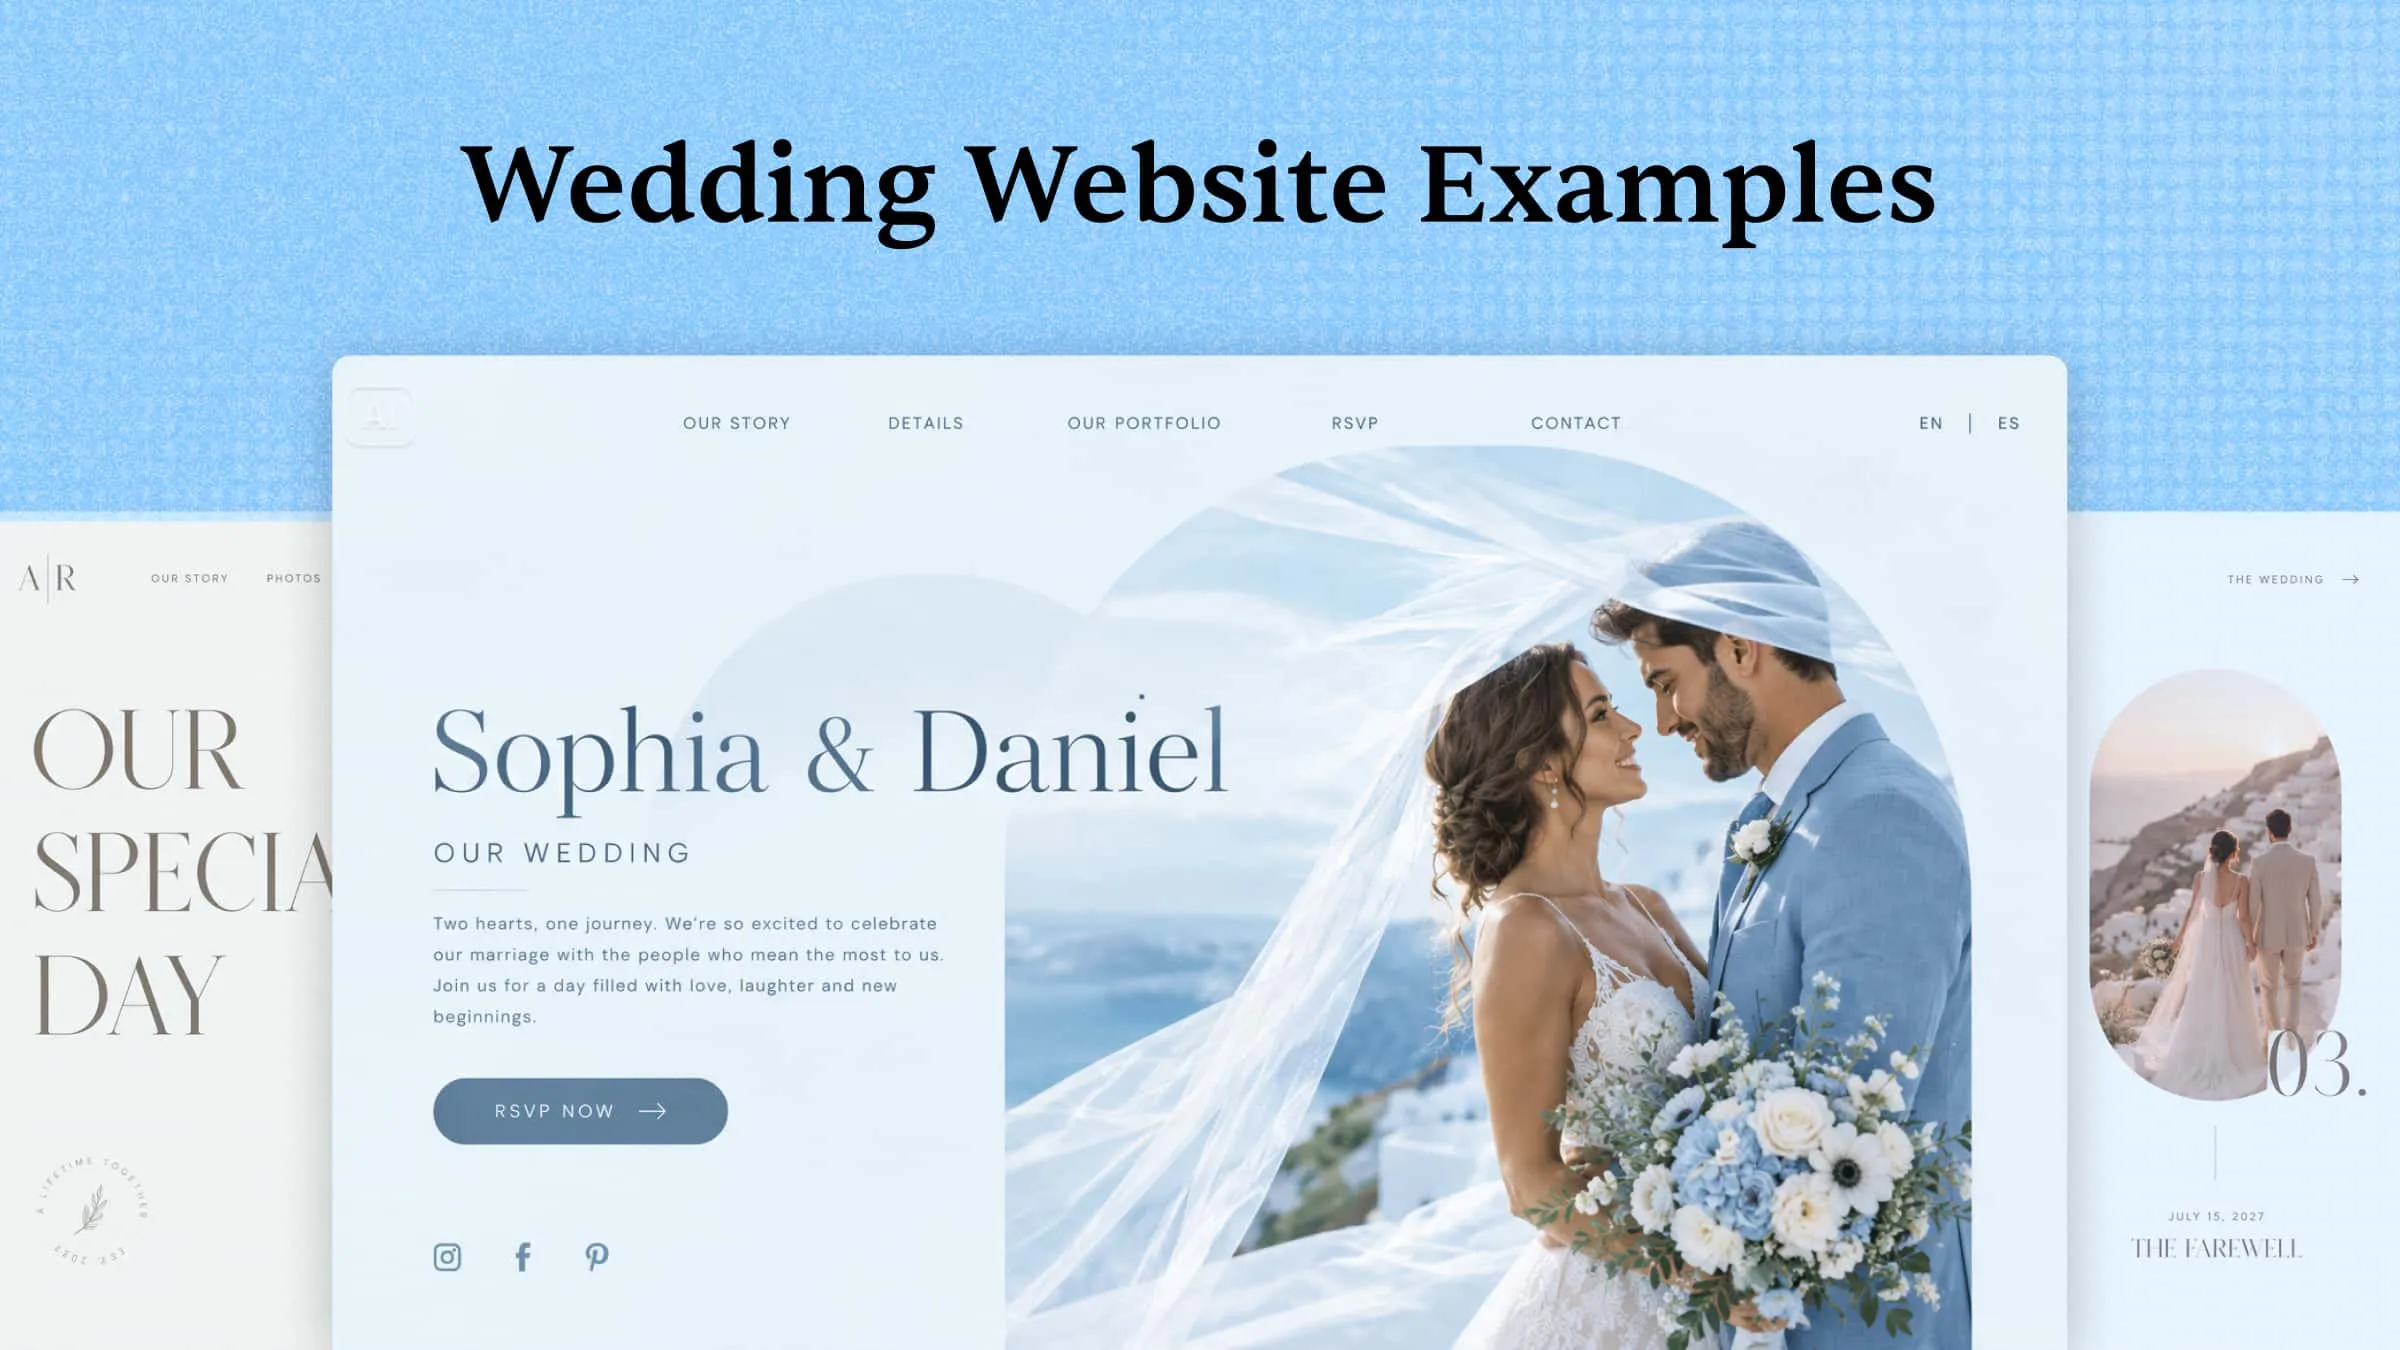
The home page welcomes visitors and introduces your wedding with a beautiful photo, names, and wedding date. Include a short welcome message and links to important sections so guests can easily navigate your site.
Our story page
Share how you met, your relationship journey, and the story behind your engagement. Adding personal photos and memorable moments makes your wedding website more meaningful and gives guests a glimpse into your relationship.
Wedding details page
Provide essential information such as the wedding date, ceremony time, venue address, and event schedule. When you create a website for your wedding, make sure these details are clear and easy for guests to find.
RSVP page
Add an RSVP form where guests can confirm their attendance, specify the number of attendees, and share dietary requirements. This makes it easier to track responses and organize your guest list before the wedding.
Travel and accommodation page
Help guests plan their journey by sharing directions, nearby hotels, transportation options, and parking information. Include useful links and recommendations, especially for guests traveling from other cities.
Gift registry page
Share links to your preferred gift registries or provide details about other ways guests can celebrate your new beginning. Keep the information simple and optional so guests can easily explore your preferences.
How to make a website for a wedding with AI
With Kimi Build, an AI website builder, you can create a personalized wedding website simply by describing your ideas, without needing coding skills or web design experience. From showcasing your love story and wedding details to sharing venue information and RSVP options, Kimi Build helps turn your vision into an interactive website. Follow these steps to build and customize a wedding website that reflects your style and gives guests the information they need.
Step 1: Define your wedding website requirements
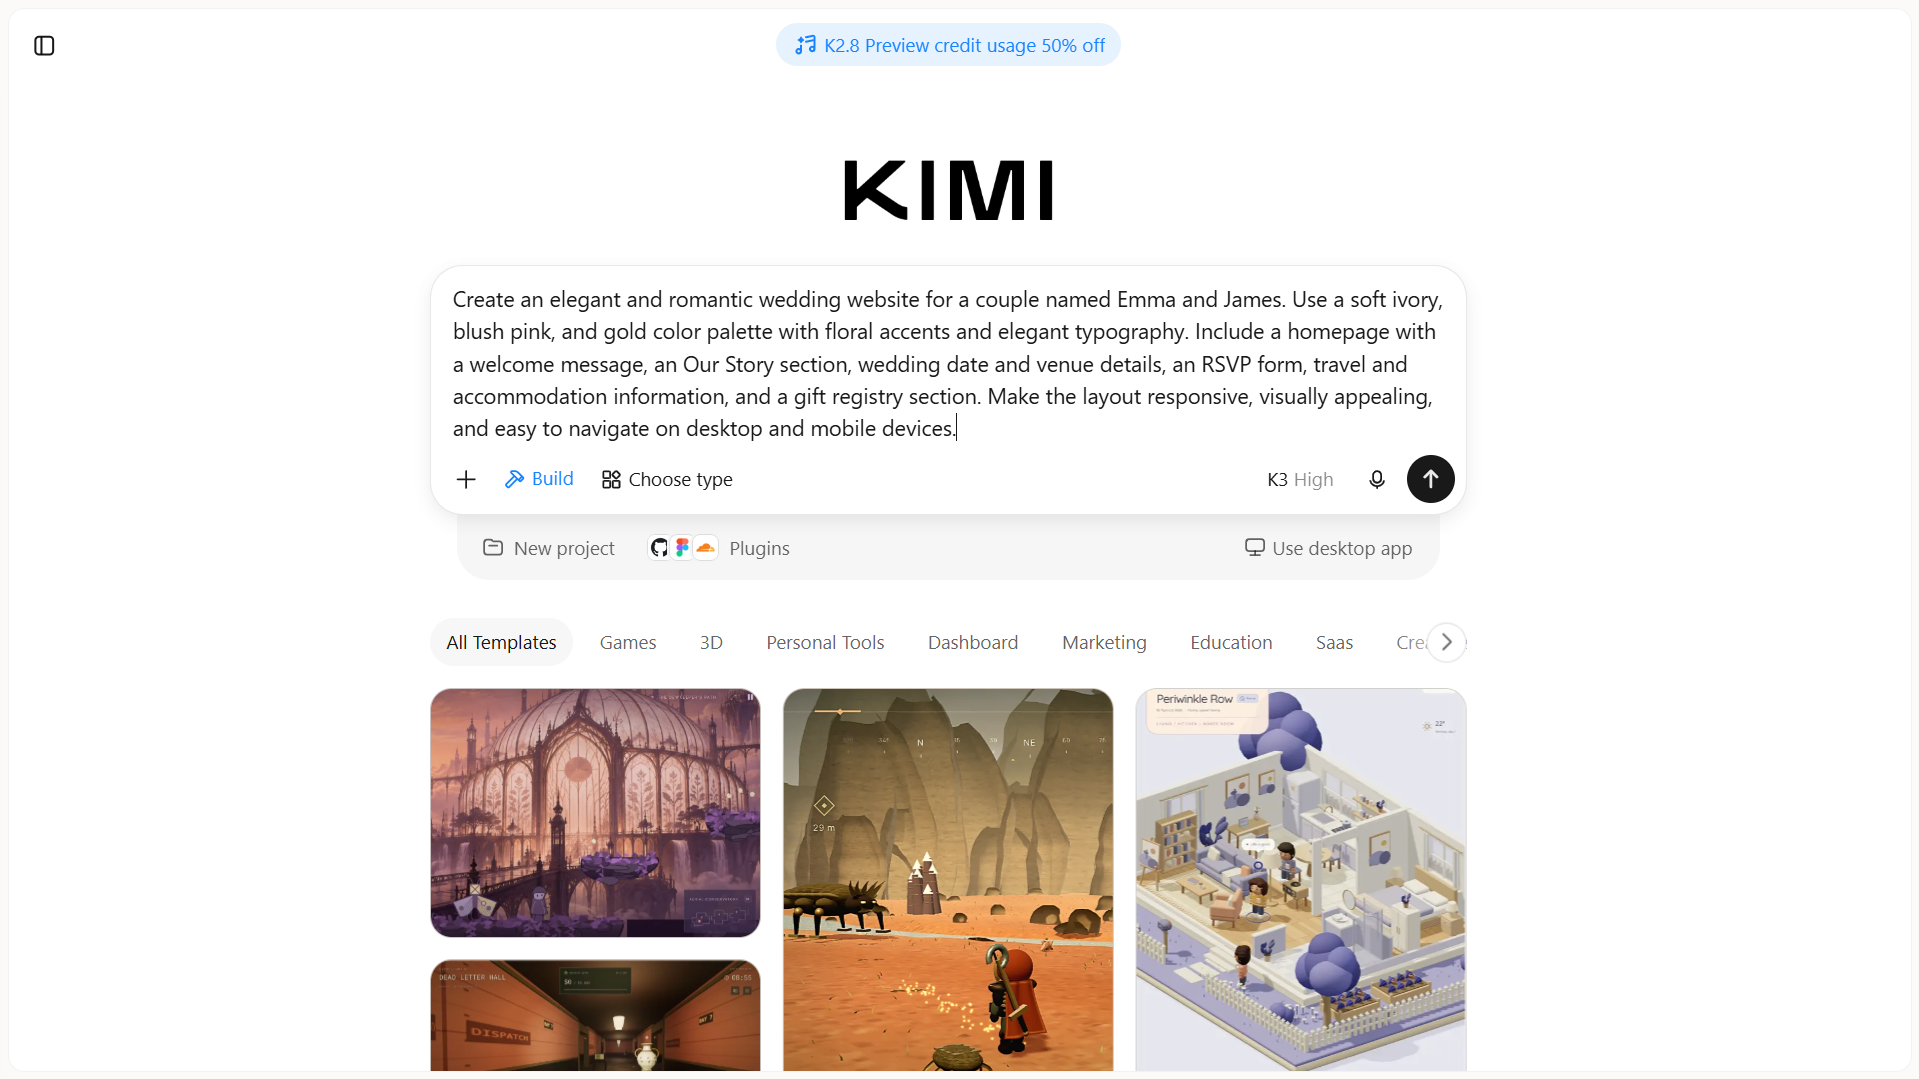
Start by outlining the purpose and design of your website. Consider the pages you need, preferred color palette, visual style, wedding details, and essential features such as RSVP forms and gift registry links.
Step 2: Generate your website with Kimi Build
Open Kimi Build and enter your prepared prompt to generate the initial website design. AI will create the layout, sections, and visual elements based on your instructions.
Step 3: Preview and refine the website design
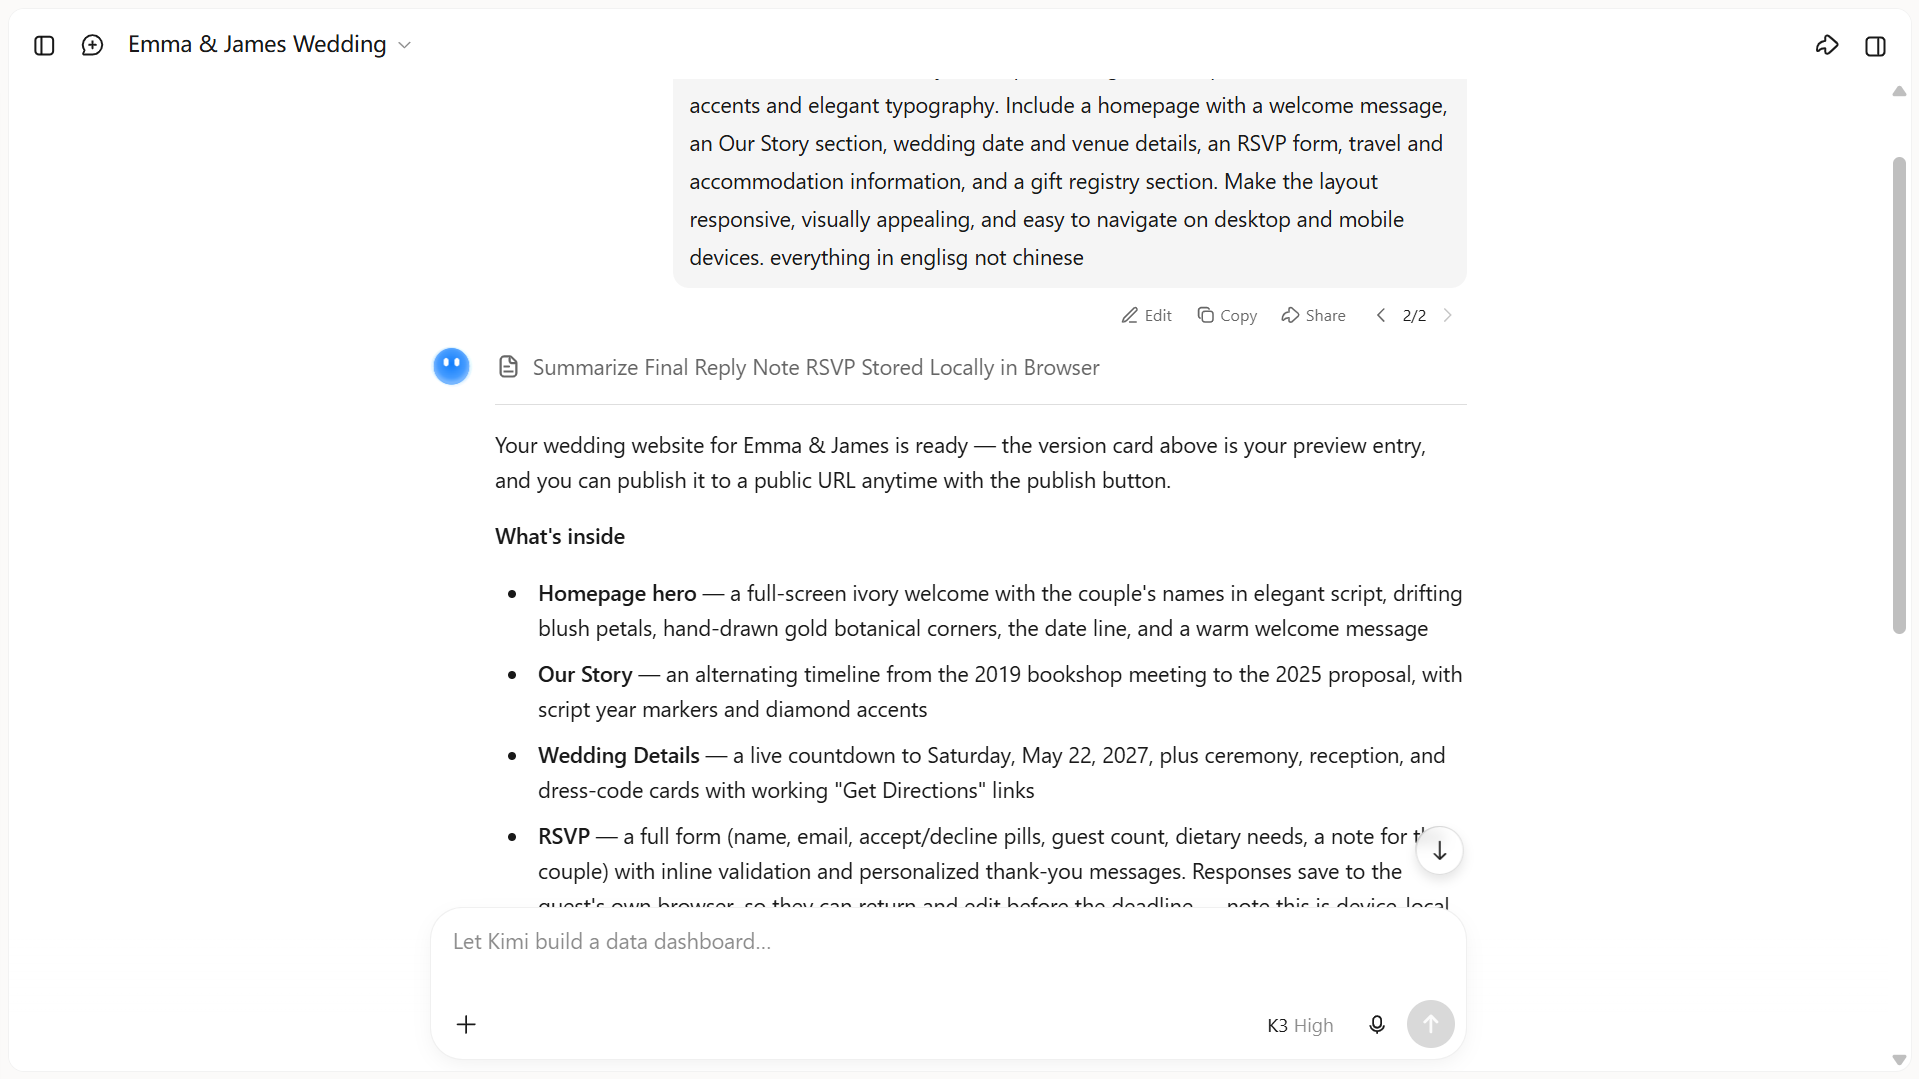
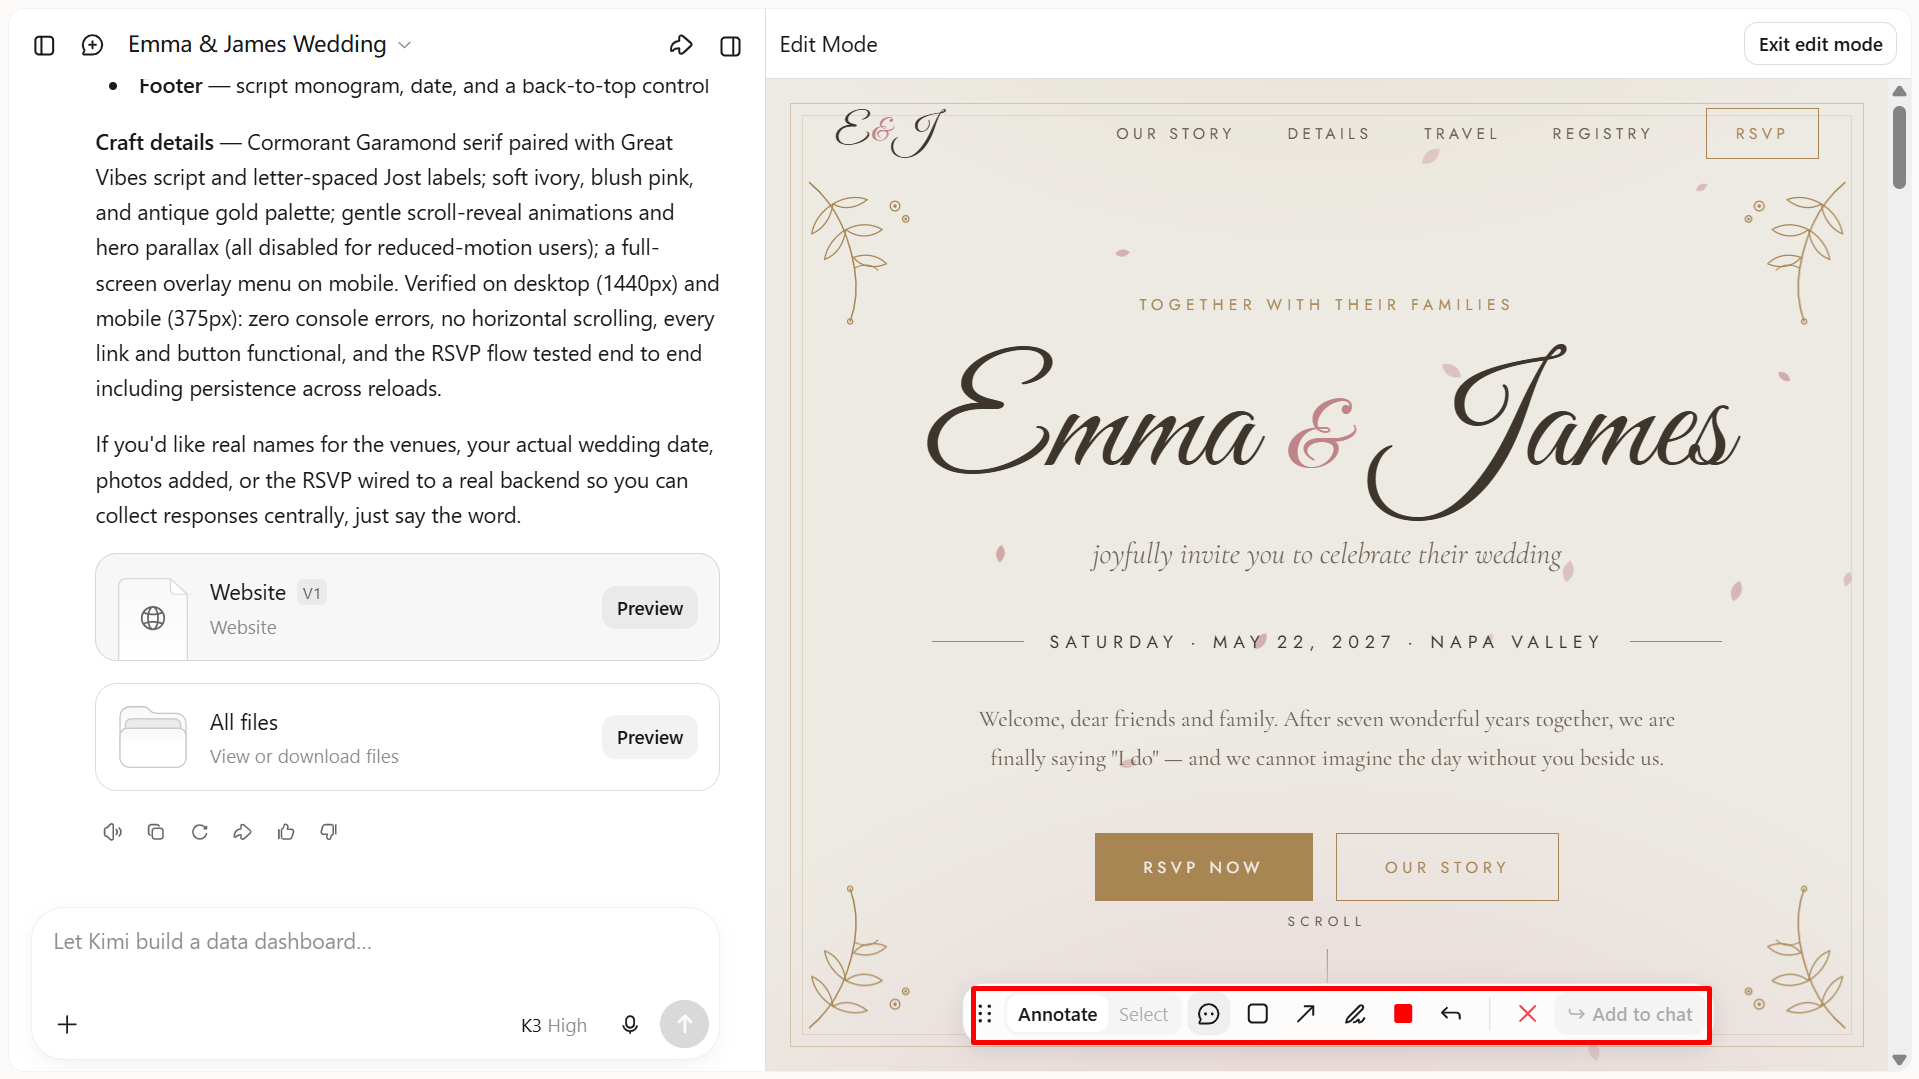
Preview your website to check its layout, navigation, colors, typography, and overall appearance. Use follow-up prompts to adjust design elements, update text, add images, or refine individual sections until the website matches your vision.
Step 4: Publish your website
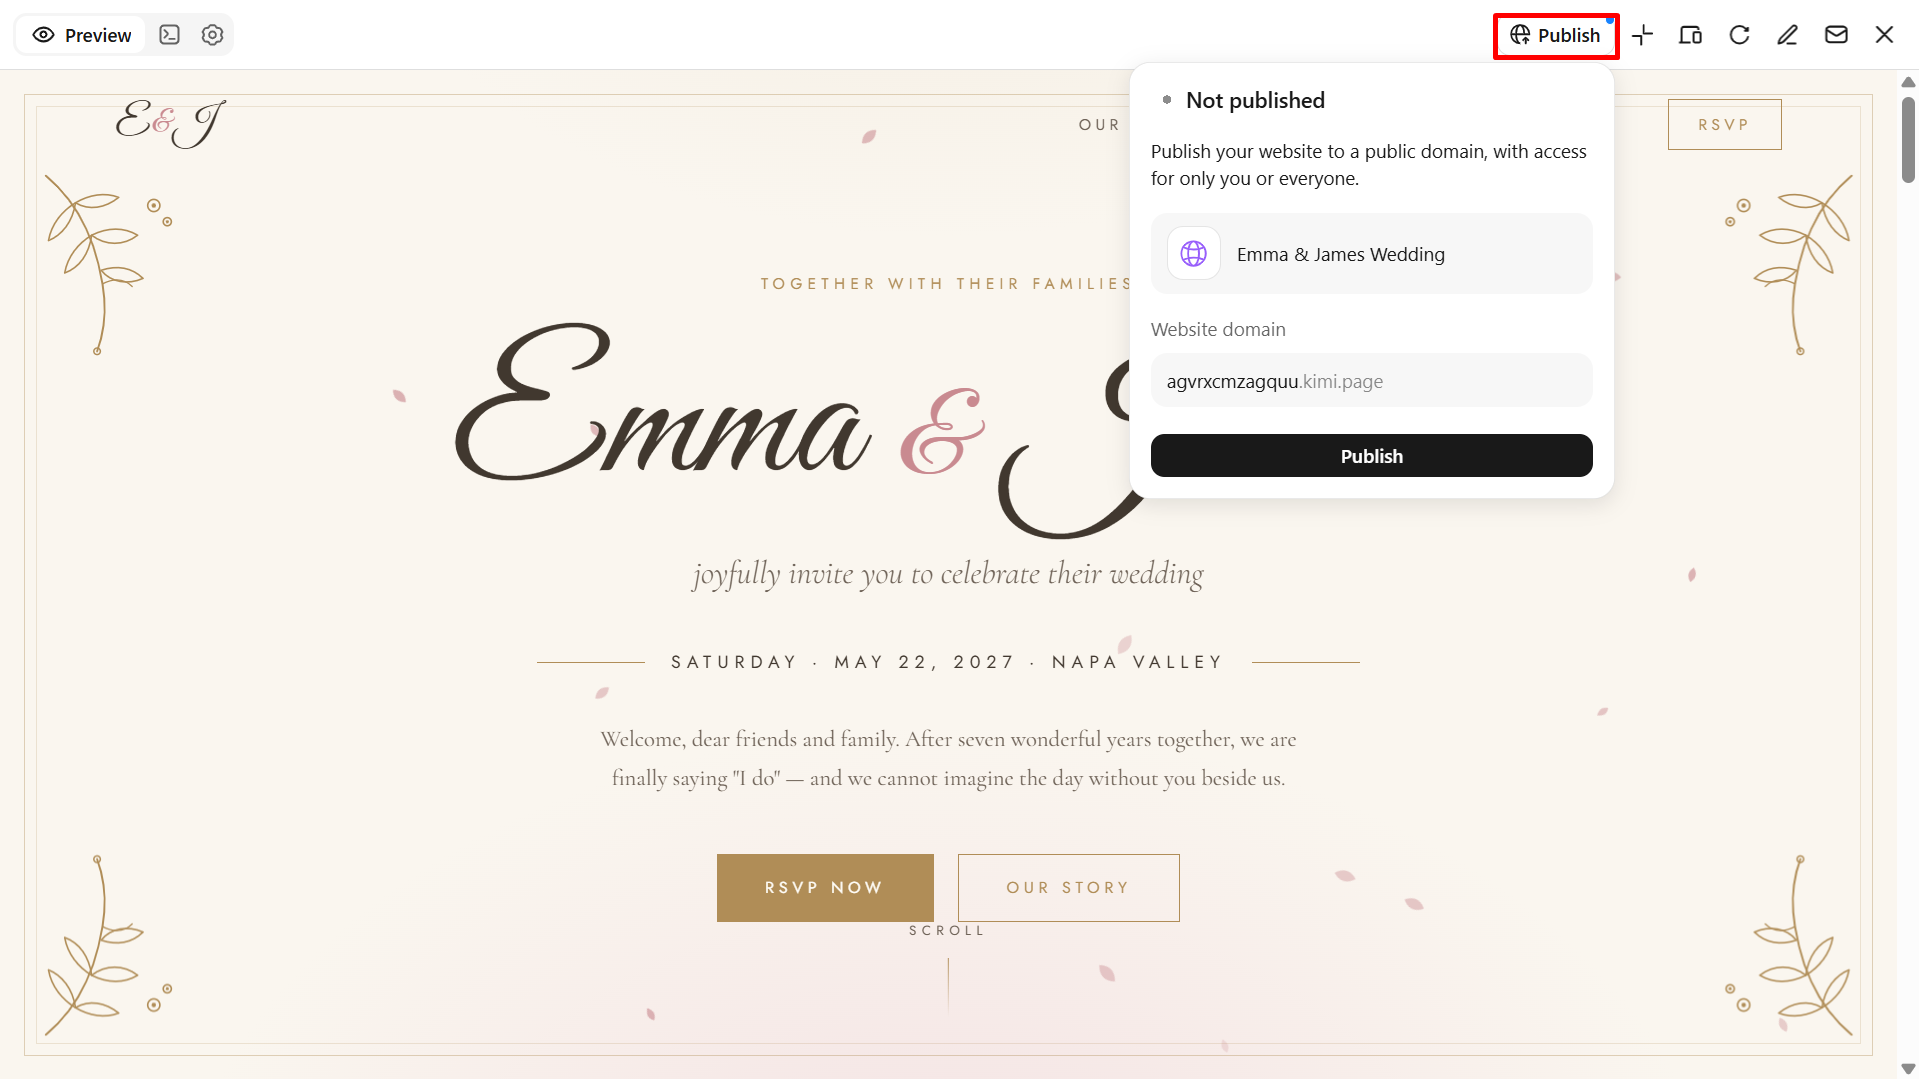
Once your design is ready, prepare the final version for publishing. Check that all links, RSVP forms, wedding details, and navigation elements work correctly. Use a suitable hosting or publishing platform to make your wedding website accessible to guests through a shareable link.
Why use Kimi Build to create a wedding website
Kimi Build makes it easy to create a personalized wedding website without coding or design experience. The following are its key features for building your wedding website.
Create a personalized wedding website from prompts and visual references
Describe your wedding theme, color palette, preferred layout, and website requirements in natural-language prompts, or upload reference images to guide the design. Kimi Build turns your input into a tailored website that reflects your wedding style, with sections for your story, couple photos, event details, and other meaningful content.
Organize wedding information with a multi-page website
Bring important wedding details together in one place. Kimi Build supports multi-page website structures, allowing you to create dedicated pages for your love story, ceremony and reception schedules, venue information, travel arrangements, accommodation suggestions, gift registries, and guest FAQs. You can also expand the website as your plans develop.
Customize website content and design with natural-language editing
Wedding plans and preferences may change as the big day approaches. With Kimi Build, you can describe the updates you want in plain language, whether you need to revise event information, add new photos, adjust page layouts, or change colors, typography, and other visual elements. This makes it easier to keep your wedding website up to date without rebuilding it from scratch.
Create a consistent experience across desktop and mobile
Guests may visit your wedding website from different devices, so important information should remain easy to access. Kimi Build supports responsive layouts that adapt to different screen sizes, helping visitors browse your wedding schedule, check venue details, view photos, and find other useful information on desktop and mobile devices.
Publish and share your wedding website with guests
Once your website is ready, preview the pages, make any final adjustments, and publish the site through a shareable link. You can send the link to family and friends so they can conveniently access wedding details. Kimi Build also provides access to generated code, with the output depending on whether the project uses a static website or a full-stack application.
Tips for building a wedding website
A well-designed wedding website keeps guests informed while reflecting your personality as a couple. Keep these practical tips in mind when creating a wedding website to make it attractive, useful, and easy to navigate.
Choose a design that reflects your wedding theme
Select colors, fonts, and visual elements that match your wedding style, whether romantic, minimalist, rustic, or modern. A consistent design gives your website a cohesive and personalized look.
Share your love story and couple photos
Include a short introduction about how you met, your relationship journey, and your engagement. Add favorite couple photos to make your website more personal and memorable for guests.
Include essential wedding details
Clearly display the wedding date, venue, ceremony time, event schedule, and other important information. When you make your own wedding website, keep these details organized so guests can find them easily.
Make RSVP and guest information easy to access
Add a clearly visible RSVP form so guests can confirm attendance and provide any necessary details. Keep the process simple to make guest responses easier to manage.
Add practical travel and accommodation information
Include venue directions, nearby hotels, transportation options, and parking details. This helps out-of-town guests plan their visits without needing to contact you for basic information.
Optimize the website for mobile devices
Make sure your wedding website looks good and works smoothly on smartphones and tablets. Use readable text, responsive layouts, and accessible navigation so guests can check details wherever they are.
Conclusion
To sum up, creating a wedding website is a simple way to share important details, tell your love story, and keep guests informed throughout your wedding preparations. With the right design and essential pages, you can build a personalized space that reflects your special day. Kimi Build makes it easier to create your wedding website using AI-powered design and natural-language editing, even without coding experience.